
Small denim bag pattern is a practical sewing project that transforms sturdy fabric into a compact accessory for everyday essentials.A handmade denim bag offers room for your phone, keys, and a small wallet without feeling bulky.Its simple shape also gives you space to practice accurate cutting, neat seams, and careful finishing.
This tutorial explains how to make a lined mini tote with two handles and a rectangular base.
You can use suitable fabric from old jeans or choose new denim for a more uniform appearance.
With thoughtful preparation, even a modest piece of fabric can become a useful bag with plenty of personality.
The appeal of a small denim bag comes from the balance between durability and a relaxed, familiar style.
Dark blue denim creates a classic look, while faded fabric adds character and makes each finished piece different.
A cotton lining covers the interior seams and helps small belongings slide into the bag more easily.
An optional pocket keeps frequently used items accessible without complicating the overall construction.
The instructions below include cutting measurements, handle placement, and a clear method for shaping the bottom.Rather than relying on decorative details, this design lets clean construction and the denim texture carry the finished look.
This Small denim bag pattern uses two rectangular exterior panels, matching lining pieces, and separately prepared handles.
The finished bag measures approximately 8 inches across its front, 8 inches high, and 3 inches deep.
Its opening is approximately 11 inches wide when flattened, providing convenient access to the interior.
All cutting measurements include a ½-inch seam allowance unless a step specifies a different distance.
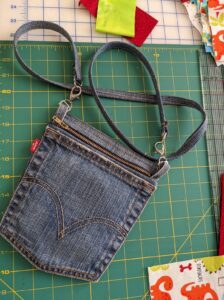
Because no reference photograph accompanies this tutorial, the instructions describe this particular mini tote design.Read through the complete process before cutting, especially the boxed corners and the final lining assembly.
1. Choose Materials and Prepare the Small Denim Bag Pattern
Choose denim with enough body to hold a small bag shape. Medium-weight, nonstretch denim is a sensible starting point because it provides structure without creating extremely thick seams. If you are using old jeans, examine the fabric for thinning, holes, and weakened areas before deciding where to cut. Avoid placing worn knee sections or damaged fabric at the bottom of the bag. Stretch denim can work, but it benefits from suitable interfacing to limit distortion during sewing.
Gather the basic sewing supplies before starting. You will need denim, cotton lining fabric, coordinating polyester thread, fabric scissors or a rotary cutter, a ruler, marking tools, pins or clips, and a sewing machine. A denim needle in size 90/14 or 100/16 is a useful starting choice, depending on the fabric thickness and your machine. Keep an iron nearby for pressing. Optional materials include lightweight woven interfacing, a pocket piece, and a magnetic snap with reinforcement patches.
Cut the main bag pieces accurately. For this Small denim bag pattern, cut two denim rectangles measuring 12 × 10½ inches and two lining rectangles of the same size. Cut two denim handle strips measuring 4 × 16 inches. For an optional inside pocket, cut one cotton rectangle measuring 7 × 6 inches. If the exterior denim needs support, cut two interfacing rectangles to match the exterior panels and apply them according to the manufacturer’s instructions before assembling the bag.
Understand how the pattern measurements create the finished shape. Sewing the two 12-inch-wide panels with ½-inch side seams leaves an 11-inch flattened width. Boxing the bottom to a depth of 3 inches produces a front face approximately 8 inches wide. The bottom shaping also reduces the height, leaving approximately 8 inches after the top seam is sewn. These measurements describe a soft fabric bag, so small variations may appear because of fabric thickness, pressing, and sewing accuracy.
Wash, dry, and press the fabrics before cutting. Prepare both the denim and lining using care methods suitable for their fibers. This helps reduce unexpected shrinkage after the bag is finished. Dark denim may release dye, so check it with a damp white cloth before pairing it with pale lining. Press the fabric flat without stretching it. When cutting reclaimed jeans, open the leg seams if necessary and arrange the pieces so the strongest available fabric supports the bag body.
Mark the construction points clearly. Label the top edge of each exterior and lining panel so the pieces stay oriented correctly. On each exterior panel, mark handle centers 3½ inches from each raw side edge along the top. Each pair of handles will therefore have centers 5 inches apart. Mark the intended pocket position on one lining panel as well. Keeping these reference points consistent helps your denim sewing project look balanced when viewed from the front.
2. Make the Handles and Add the Interior Pocket
Prepare the first handle by folding the strip lengthwise. Place a 4 × 16-inch denim strip wrong side up and fold it in half along its length. Press the fold to establish a center crease, then open the strip. Fold both long raw edges inward until they meet that crease. Press again, then fold the strip closed along the original center line. The resulting handle should measure approximately 1 × 16 inches, with its long raw edges enclosed.
Topstitch the handle to hold the folds in place. Sew approximately ⅛ inch from each long edge, using a stitch length around 3 millimeters as a starting point. Test the settings on folded denim scraps first and adjust if the fabric feeds poorly or the stitches appear uneven. Guide the handle gently instead of pulling it through the machine. Repeat the same folding and stitching process for the second handle, checking that both have equal width and length.
Position the handles on the exterior panels. Place one exterior rectangle right side up with its top edge facing away from you. Arrange one handle in a U shape on the panel, with the loop extending downward across the fabric. Align its short raw ends with the panel’s raw top edge, centering each end over a marked placement point. Check that the handle is untwisted. Repeat on the second panel, then compare the two arrangements before sewing.
Baste the handle ends securely within the seam allowance. Stitch across each end approximately ¼ inch below the raw top edge. This temporary attachment keeps the handles from shifting when you join the exterior to the lining. The final ½-inch top seam will pass below the basting and capture the handles again. Keep the loops away from the side seams during subsequent assembly. Handle placement is a small detail, but consistent spacing makes a noticeable difference in a handmade denim bag.
Prepare the optional lining pocket. On the 7 × 6-inch cotton rectangle, turn one 7-inch edge under by ¼ inch, then turn it under another ¼ inch. Press and stitch this double-fold hem to create the pocket opening. Fold the remaining three edges under by ½ inch and press. The prepared pocket will measure approximately 6 inches wide and 5 inches high. A rectangular pocket is useful for organizing small items without adding extra bulk to the exterior.
Attach the pocket before assembling the lining. Center the prepared pocket on the right side of one lining panel, placing its finished top edge approximately 2 inches below the panel’s raw top edge. Stitch close to the folded side and bottom edges, leaving the hemmed top open. Backstitch at both upper corners to reinforce them. If you prefer two compartments, add a vertical dividing seam through the pocket and lining, choosing a position that suits the belongings you plan to carry.
3. Sew the Bag Body and Shape the Boxed Corners
Join the exterior panels with their right sides together. Match the top edges and clip the sides and bottom. Keep both handle loops folded safely inside the panels, clear of the stitching path. Sew the two side seams and the bottom seam with a ½-inch seam allowance, leaving the entire top open. Backstitch at the beginning and end of each seam. You may sew these seams separately to make pressing easier and to maintain an accurate seam allowance at the lower corners.
Press the exterior seams before shaping the base. Open the side and bottom seam allowances where possible, using an iron setting appropriate for the denim. Avoid flattening the fabric so aggressively that it becomes shiny. If bulky seam intersections make feeding difficult later, use a folded scrap or a suitable leveling aid behind the presser foot. Do not force the needle through resistant layers. Careful pressing at this stage helps the small denim tote bag develop a cleaner outline.
Form the first boxed corner. With the exterior still wrong side out, pull the front and back layers apart at one lower corner. Flatten that corner into a triangle so the side seam lies directly over the bottom seam. Feel through the layers or use a pin to check that the seams align. Smooth the surrounding fabric without stretching it. Draw a line perpendicular to the aligned seam, positioning it where the triangle measures exactly 3 inches across.
Stitch and trim both exterior corners. Sew directly along the marked 3-inch line and backstitch at both ends. Repeat the process on the second lower corner, checking that its marked line is the same length. After confirming both corners match, trim away the triangular tips, leaving a ½-inch allowance beyond each new seam. Turn the exterior right side out and gently shape the base. The boxed corners create the 3-inch bag depth and reduce the front width to approximately 8 inches.
Assemble the lining while leaving a turning opening. Place the lining panels right sides together, with the pocket facing inward. Sew both side seams using a ½-inch allowance. Sew the bottom seam in two sections, leaving an opening approximately 4 inches long in its center. Backstitch securely on either side of that gap. Press the seams, then box both lower lining corners using the same 3-inch method as the exterior. Trim the corner tips, keeping the ½-inch allowances.
Add an optional closure before joining the layers. If you want a magnetic snap, follow the hardware manufacturer’s installation instructions. Center each half on its lining panel, placing the snap center approximately 1½ inches below the raw top edge. Reinforce the attachment area on the wrong side with suitable interfacing or a fabric patch. Check the alignment before making any cuts. Keep the snap clear of the top stitching path, and omit it if you prefer a simple open-top Small denim bag pattern.
4. Attach the Lining and Finish the Small Denim Bag
Place the exterior inside the lining with right sides facing. Keep the exterior right side out and the lining wrong side out. Slide the exterior into the lining so their right sides touch. Match the side seams and raw top edges, then clip around the opening. The handle loops should remain sandwiched between the two layers, pointing down into the bag. Only their aligned raw ends should sit at the top edge where the joining seam will capture them.
Sew continuously around the top opening. Use a ½-inch seam allowance and keep the fabric layers aligned as you work. Sew slowly across the handle ends, checking that your machine feeds the thicker areas evenly. Reinforce those attachment areas with a second pass over a short section if needed. Before turning the bag, inspect the seam all the way around. Make sure no handle loop, pocket edge, or loose fold has accidentally become caught in the stitching.
Turn the bag through the opening in the lining. Gently draw the exterior and handles through the 4-inch gap left in the lining’s bottom seam. Work gradually rather than pulling hard against the opening. Shape the exterior corners with your fingers or a blunt turning tool. Fold the lining opening’s seam allowances inward by ½ inch and close it with a narrow machine seam or a neat hand stitch. Push the lining into the bag and settle its corners into the base.
Press and topstitch the upper edge. Roll the joining seam between your fingers until the lining sits just inside the denim edge. Press carefully, keeping the iron away from any hardware that could be damaged by heat. Topstitch around the opening approximately ⅛ inch from the edge, moving the handles out of the sewing path. For an additional finishing line, sew another row about ⅜ inch below the top. Both rows help keep the lining in place.
Inspect the finished construction before using the bag. Check the handle attachments, boxed corners, pocket corners, and closed turning opening. Trim loose threads and confirm that any snap operates smoothly. Place a few light everyday belongings inside to assess the shape and comfort of the handles. This compact design is intended for small personal items; its load capacity depends on your fabric, stitching, and reinforcement. Repair any skipped stitches before putting the handmade denim bag into regular use.
Personalize the design with manageable changes. Contrast topstitching, a fabric label, or a small embroidered detail can add interest without changing the construction. Apply exterior decorations before sewing the body so their backs remain hidden behind the lining. For future versions, adjust the handle length or pocket arrangement to suit your needs. If you change the body dimensions, recalculate the corner shaping as well. The relationship between panel width and boxed depth determines the final proportions of your Small denim bag pattern.
Frequently Asked Questions
Is this small denim bag pattern suitable for beginners?
Yes, it is approachable for someone who can sew a straight seam and maintain a consistent seam allowance. The most unfamiliar steps are likely to be boxing the corners and joining the lining. Practice a boxed corner on two scrap rectangles first if you want to understand the shape before working on your bag. Choosing medium-weight denim and omitting the optional snap also makes the first version easier to manage.
Can I make the bag from an old pair of jeans?
Yes, provided the fabric is strong enough and the available sections fit the cutting measurements. Open the jeans along their seams to expose usable areas, then inspect them carefully. Avoid heavily worn sections for the bottom and handles. If you need to piece smaller scraps together, join them into a larger fabric panel first, press the seams, and then cut the required rectangles from that prepared panel.
Do I need interfacing for a denim bag?
Interfacing is optional for firm denim but useful for lightweight or stretchy fabric. It can help the bag maintain its shape and stabilize areas around closures. Test your chosen interfacing on a scrap to check the feel and appearance before applying it to the main pieces. Remember that additional layers increase seam bulk, so very thick denim may be easier to sew without full-panel interfacing.
Why does the finished bag have an 11-inch opening but an 8-inch front?
The rectangular panels produce an opening that measures approximately 11 inches across when flattened after the side seams are sewn. Boxing the bottom introduces a 3-inch depth. That depth takes up part of the original flattened width, leaving a front face approximately 8 inches wide at the base. This is a normal feature of a tote made from rectangular panels with boxed corners.
What should I do if my sewing machine struggles with the denim?
Stop and check the needle condition, threading, and thickness of the fabric stack. Use an appropriate denim needle and test on scraps that reproduce the same number of layers. Sew slowly over bulky intersections and keep the presser foot level where possible. If the machine still struggles, choose lighter denim or use sturdy cotton webbing for the handles instead of folded denim strips.
Can I add a zipper instead of a magnetic snap?
A zipper requires a different upper-edge assembly, so it should be planned before cutting and sewing. This tutorial uses a simple open top with an optional snap. A recessed zipper generally needs extra zipper panels and revised lining instructions. For a first bag, complete the original construction so you understand how the exterior, handles, and lining fit together before adapting the closure.
How should I clean the finished denim bag?
Follow the care requirements of the denim, lining, interfacing, and hardware. Spot cleaning is a useful first option for small marks. If all materials are washable, wash gently and reshape the bag while damp. Test dark denim for color transfer and avoid washing it with pale items until you know how it behaves. Allow the bag to dry fully before storing it.
Conclusion
This Small denim bag pattern explains how to prepare sturdy fabric, cut accurately sized panels, make folded handles, add an interior pocket, and create a rectangular base with boxed corners.
Joining the lining through the top opening gives the bag a clean interior, while careful pressing and topstitching provide a tidy finish. The result is a compact denim tote that can be personalized through fabric choice, thread color, and simple decorative details.
Take your time with the measurements and handle placement, especially when sewing your first version. Once you understand the construction, you can make thoughtful adjustments for different everyday needs. Please leave your honest opinion about the tutorial and share your suggestions. Which denim color, pocket arrangement, or finishing detail would you choose for your own handmade bag?