
If you’re looking for a fun, practical, and adorable crochet project, learning how to make a crochet cookie keychain – step by step tutorial is a fantastic place to start. These mini crochet cookies are not only charming but also make perfect handmade gifts, accessories for your bags, or even a cute addition to your keyring. Whether you’re a beginner or a seasoned crocheter, this easy project is sure to bring joy.
In this how to make a crochet cookie keychain – step by step tutorial, we’ll walk you through the entire process from start to finish. You’ll learn the basic materials you need, stitches to use, how to shape your cookie, and tips on assembling it into a keychain. This tutorial is written in simple language, following Google AdSense content guidelines, and optimized for readers who want clear, helpful instructions.
The beauty of how to make a crochet cookie keychain – step by step tutorial lies in its simplicity and customization. You can change the “flavor” of your cookie by using different yarn colors or adding details like mini chocolate chips or icing swirls. It’s a creative way to practice your crochet skills and produce something delightful.
Materials Needed for Your Crochet Cookie Keychain
To begin your journey into how to make a crochet cookie keychain – step by step tutorial, you’ll need a few simple materials. Most of them are probably already in your crochet toolkit. The required supplies are budget-friendly and easy to find.
First, choose your yarn wisely. For a traditional cookie look, go with beige or light brown for the base, and dark brown for the chocolate chips. Cotton or acrylic yarn in a DK or worsted weight is ideal for this project. Thicker yarn will make your keychain bulkier, while thinner yarn gives a more delicate look.
Next, you’ll need a crochet hook. A 3.5 mm or 4 mm hook typically works best with DK or worsted yarn. It’s important to match your hook size to your yarn for a neat, uniform finish.
A yarn needle is essential for weaving in ends and stitching your parts together. Choose one with a blunt tip and a wide eye to make sewing easier. Fiberfill stuffing is also necessary to give your cookie a soft, plump shape.
Don’t forget to grab a keychain ring. You can find these at craft stores or online in bulk. Opt for a sturdy ring with a small chain attached so you can sew or tie your crochet piece to it securely.
Lastly, have a pair of sharp scissors handy and a stitch marker if you prefer tracking your rounds. Once all materials are ready, you’re set to follow this how to make a crochet cookie keychain – step by step tutorial!
Step-by-Step Instructions to Crochet the Cookie
Now that you’ve gathered your supplies, let’s dive into the heart of the how to make a crochet cookie keychain – step by step tutorial. This pattern uses basic crochet techniques suitable for beginners.
Start with a magic ring or adjustable ring. This is the center of your cookie. Into the ring, crochet 6 single crochets (sc). Pull the ring tight and join with a slip stitch. This will form round one of your cookie.
For round two, increase in each stitch around. This means placing 2 sc in each stitch, ending with 12 stitches. Always use a stitch marker if you want to keep track of your rounds easily while working in spirals.
Round three will alternate between 1 sc in the first stitch and 2 sc in the next. Repeat this pattern to get 18 stitches. This shaping creates a flat circular piece – the perfect cookie base. Repeat similar increases in the following round to gradually make your cookie larger.
After four to five rounds of increasing, stop and maintain the stitch count for one or two rounds. This forms the body of the cookie. Make sure to crochet evenly for a round shape.
Once the desired size is reached, fasten off and leave a tail for sewing. Make two identical circles. You’ll sandwich these together and stuff them to create the keychain’s plump cookie shape.
Before closing, add a bit of fiberfill stuffing between the two pieces. Then, sew them together using a yarn needle and the leftover tail. You’re almost done with the main part of the how to make a crochet cookie keychain – step by step tutorial.
Decorating and Assembling the Keychain
Your cookie wouldn’t be complete without decorations! One of the highlights of the how to make a crochet cookie keychain – step by step tutorial is customizing the design. Let’s add some chocolate chips or icing.
For chocolate chips, cut small pieces of dark brown yarn and sew or glue them onto the surface randomly. You can also crochet tiny circles or stitch V-shaped embroidery to mimic chips.
Want to add icing? Use white or pink yarn and embroider swirls on the top of the cookie. A chain stitch embroidery technique gives a nice raised texture. This gives your cookie keychain a playful, fun twist.
Once your cookie is fully decorated, it’s time to attach it to your keychain ring. Use the yarn tail or a strong thread to sew the cookie securely to the metal loop or chain part of the keychain ring.
Make sure the attachment is tight so the cookie doesn’t slip off with use. Reinforce the connection if needed by wrapping and knotting the yarn several times.
Give your keychain a quick inspection – trim off any loose yarn ends, and fluff up the cookie by adjusting the stuffing. Now your crochet cookie keychain is ready to be shown off!
This how to make a crochet cookie keychain – step by step tutorial proves how easy it is to turn yarn into a cute, functional craft item. With just a bit of creativity, you can make dozens of unique cookie keychains.
Tips for Customizing and Gifting Crochet Cookie Keychains
One of the best parts of following a how to make a crochet cookie keychain – step by step tutorial is the freedom to customize it. You’re not limited to a single flavor or color. Let your creativity shine!
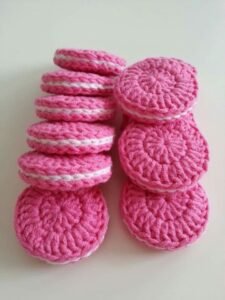
Try making a double chocolate version by using dark brown yarn as the base and beige for the chips. Or go for a strawberry cookie look with pink yarn and red “sprinkles.” The sky is the limit when it comes to cookie variations.
Personalize your keychain even more by adding initials or tiny crochet shapes like hearts or stars on the surface. These little touches make the item feel more special and personal.
If you’re planning to gift your crochet cookie keychain, consider packaging it nicely. A small paper bag, clear plastic box, or a handmade tag can elevate your gift presentation and show your love.
These keychains make fantastic party favors, birthday gifts, or stocking stuffers. You can even sell them at local markets or online if you enjoy making them in bulk.
Another idea is to attach them to a zipper pull or backpack – they’re more than just keychains! This flexibility is what makes this how to make a crochet cookie keychain – step by step tutorial so enjoyable.
Don’t forget to take a photo of your finished product and share it with other crochet lovers. You might even inspire someone else to start their crochet journey!
FAQ – Crochet Cookie Keychain Tutorial
Q: Can beginners follow this crochet cookie keychain tutorial?
A: Absolutely! This how to make a crochet cookie keychain – step by step tutorial is perfect for beginners. It uses basic stitches like single crochet and includes simple shaping techniques.
Q: How long does it take to make one crochet cookie keychain?
A: Depending on your skill level, it usually takes about 1–2 hours to complete one cookie. Faster crocheters may finish in under an hour.
Q: What size should the finished keychain be?
A: The finished size typically ranges between 2.5 to 3 inches in diameter, depending on your yarn and hook size. It’s a compact and lightweight accessory.
Q: Can I wash the crochet cookie keychain?
A: Hand washing is recommended. If you use acrylic yarn, it’s more durable, but always avoid harsh scrubbing to maintain the shape and decorations.
Q: What kind of stuffing should I use?
A: Polyester fiberfill works best. It’s lightweight, easy to work with, and maintains the shape of your crochet cookie over time.
Q: How do I securely attach the keyring?
A: Use strong yarn or embroidery thread to tightly sew the crochet piece to the metal ring. Reinforce with extra loops or a small jump ring if needed.
Conclusion
We hope this guide on how to make a crochet cookie keychain – step by step tutorial has inspired you to pick up your hook and start creating! This project is easy, quick, and offers so much room for personalization. Whether you’re making a gift or just want a cute addition to your keyring, a crochet cookie keychain is the perfect handmade touch.
You’ve learned what materials to use, how to shape and decorate your cookie, and how to securely attach it to a keyring. You also picked up tips for customization and gifting, as well as helpful answers to common questions.
Now it’s your turn! Give this tutorial a try and let your creativity flow. Don’t forget to leave a sincere comment below telling us what you thought about the tutorial. We’d also love to hear your suggestions for future crochet keychain projects.