
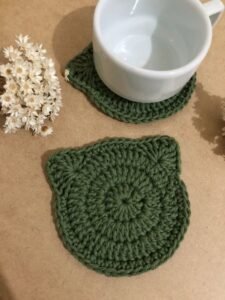
Learning how to make a cat-shaped coaster – step by step tutorial is a fun and creative project for all craft lovers. This type of coaster not only protects your furniture but also adds a touch of personality to your home décor. Whether you’re a crochet enthusiast or prefer sewing, this adorable design will bring charm to your table settings. It’s perfect for cat lovers, and it makes an excellent handmade gift for friends and family.
When following a cat-shaped coaster – step by step tutorial, you can experiment with different colors, materials, and sizes. You might choose to replicate your own cat’s coloring or use playful, bright shades for a more whimsical look. Because the project is small and manageable, it’s also a great way to practice new stitches or techniques without feeling overwhelmed.
Another great thing about the cat-shaped coaster – step by step tutorial is its versatility. You can adjust the shape to make a minimalist silhouette, a cartoon-style cat face, or even a more detailed design with ears, whiskers, and eyes. Plus, you can make a matching set to suit different occasions or seasons, ensuring your table always has a unique and inviting touch.
Materials and Tools Needed for a Cat-Shaped Coaster
Before beginning your cat-shaped coaster – step by step tutorial, it’s important to prepare your materials and tools. This preparation will make your crafting process smooth and enjoyable.
First, select your yarn or fabric. If you’re crocheting, cotton yarn is an excellent choice because it’s durable, easy to wash, and absorbs moisture well. For sewing, choose a sturdy fabric such as felt or cotton blend that holds its shape.
Choose the right crochet hook for your yarn. Typically, a 4mm to 5mm hook works for medium-weight cotton yarn, but always check your yarn label for guidance. If sewing, make sure you have sharp fabric scissors and matching thread.
A yarn needle is essential for weaving in loose ends if crocheting. For fabric versions, a sewing needle or sewing machine will make the process faster and neater.
You may also want to have some embellishments ready, such as buttons for eyes, embroidery thread for whiskers, or small fabric pieces for added details.
Lastly, prepare a flat workspace with good lighting. This will make it easier to keep your stitches or seams even, and it will help prevent mistakes.
Creating the Cat’s Head Base
The base is the starting point in your cat-shaped coaster – step by step tutorial. This part forms the main shape of the coaster and determines its size and proportion.
If crocheting, begin with a magic ring or chain loop. Work double crochet stitches into the loop to form a circle. Keep your stitches even so the base remains flat.
Continue working in rounds, increasing evenly so the circle grows without curling. This will form the main face area of the cat-shaped coaster.
If you’re sewing, cut two identical circle shapes from your chosen fabric. Make sure they’re large enough to fit under a cup or mug comfortably.
Join the fabric pieces together using a basic stitch, leaving a small opening to insert padding if desired. Then close the seam for a smooth finish.
For both crochet and fabric versions, this is the perfect stage to choose your primary color. Neutral tones can create a realistic look, while bold colors make the design playful.
Adding the Ears and Features
The defining characteristic of a cat-shaped coaster – step by step tutorial is, of course, the cat ears and facial details. This is where your coaster gains personality and charm.
For crochet versions, create small triangles for ears by working in rows or rounds. Attach them securely to the top of the coaster base.
In fabric versions, cut two triangle shapes and stitch them onto the top edge of the circle. You can use contrasting fabric for a cute effect.
To add eyes, you can use buttons, safety eyes, or embroidered circles. Position them evenly for a balanced look.
For the nose, a small triangle or oval works well. Embroider whiskers using straight stitches for a neat finish.
This step allows for creative customization—some may prefer a realistic face, while others go for a cartoon-inspired style. Every choice you make here adds to the uniqueness of your coaster.
Finishing and Using Your Cat-Shaped Coaster
The final stage in the cat-shaped coaster – step by step tutorial is finishing the piece and making it ready for use.
Weave in all loose ends carefully if crocheting. This will prevent unraveling and ensure a tidy appearance.
For fabric versions, make sure all seams are secure and trim any excess threads. This step enhances both durability and aesthetics.
You can add a border around the coaster to frame it. A crochet border in a contrasting color or a fabric bias tape edge can give a professional look.
If your coaster doesn’t lie completely flat, you can block it. Dampen the coaster slightly, shape it by hand, and let it dry on a flat surface.
Consider making a set of these coasters in various colors. They can be seasonal—such as autumn shades, winter whites, or bright summer tones.
With your cat-shaped coaster finished, you’ll have a functional and decorative item that brings personality to any table setting.
FAQ – Frequently Asked Questions
1. Can beginners make a cat-shaped coaster?
Yes, the design is simple enough for beginners, especially if they know basic crochet stitches or simple sewing techniques.
2. What’s the best yarn for coasters?
Cotton yarn is the most durable and absorbent option for crocheted coasters.
3. How do I make the coaster larger?
Increase the number of rounds in the base before adding ears and features.
4. Can I wash the coaster?
Yes, cotton yarn versions can be hand-washed or machine-washed gently. Fabric versions depend on the material used.
5. Do I need special tools for sewing versions?
A basic sewing kit is enough, but a sewing machine can speed up the process.
6. Can I make these as gifts?
Absolutely. Cat-shaped coasters are thoughtful handmade gifts for cat lovers.
Conclusion
By following this cat-shaped coaster – step by step tutorial, you’ve learned how to create an adorable and practical accessory for your home. From preparing materials to shaping the base, adding ears, and personalizing features, each step allows you to express your creativity.
These coasters not only serve a functional purpose but also make your space more inviting and fun. They’re easy to customize, quick to make, and perfect for personal use or gifting.
I’d love to hear your honest opinion and see your creative versions. Share your suggestions so we can keep improving these tutorials for all craft enthusiasts.