
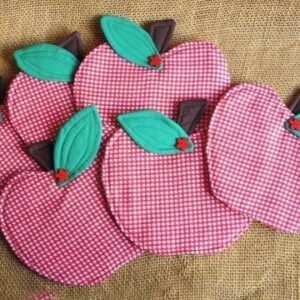
Learning how to sew an apple shaped coaster – 🍎 – step by step tutorial is a creative and enjoyable project that combines functionality with charm. An apple-shaped coaster not only protects your table surfaces from heat and moisture but also adds a touch of cozy, handmade style to your home décor. Whether you are a beginner looking for a simple sewing task or an experienced crafter searching for a quick and fun project, this design is an excellent choice.
When you start following how to sew an apple shaped coaster – 🍎 – step by step tutorial, you will see that the process is easy to personalize. You can choose fabrics in red, green, or yellow tones to mimic different apple varieties, or go for patterned fabrics to give the coaster a more playful appearance. The beauty of this project is that you can adjust it for different styles—minimalist, rustic, or even modern.
Another reason why learning how to sew an apple shaped coaster – 🍎 – step by step tutorial is so rewarding is its practicality. These coasters are easy to wash, durable, and can be made in sets for seasonal decorations or gifts. Plus, because of their small size, they are a great way to use up fabric scraps from other sewing projects, making them both economical and environmentally friendly.
Materials and Tools Needed for Sewing an Apple Shaped Coaster
Before starting the how to sew an apple shaped coaster – 🍎 – step by step tutorial, it is essential to gather all your materials and tools. Having everything ready ensures a smooth and enjoyable sewing experience.
Start with your fabric selection. For the apple shape, cotton fabric is ideal because it is durable, washable, and easy to sew. You can choose a red fabric for a classic look, green for a fresh style, or yellow for a warm and cheerful effect.
You will also need a piece of green fabric for the apple leaf and brown fabric for the stem. These contrasting colors will help bring the apple design to life and add visual interest.
A pair of sharp fabric scissors will make cutting your shapes easier and more precise. A fabric marker or chalk is also useful for tracing the apple template onto your fabric.
For the inner layer, you can use batting or felt to give the coaster some thickness and absorbency. This layer is important for protecting your table from heat and moisture.
Finally, make sure you have matching thread, a sewing needle or sewing machine, and a flat working surface with good lighting. With your tools and materials prepared, you are ready to move to the next step.
Cutting and Preparing the Apple Shape
The first hands-on stage of how to sew an apple shaped coaster – 🍎 – step by step tutorial is cutting the apple shapes. This step is simple but crucial for achieving a neat and professional look.
Begin by creating or printing an apple template. The size can vary depending on your preference, but it should be large enough to hold a cup or mug comfortably.
Place the template on your chosen apple-colored fabric and trace it using a fabric marker or chalk. Cut out two identical apple shapes—these will form the front and back of your coaster.
Next, cut one apple shape from batting or felt for the middle layer. This will give your coaster structure and softness.
For the leaf, use your green fabric and cut a small, elongated oval shape. For the stem, cut a short rectangular piece from the brown fabric.
Once all pieces are cut, arrange them together to visualize how the finished coaster will look. This step helps ensure that all elements are proportional and aligned before sewing.
Sewing the Apple Coaster
Now comes the exciting part of the how to sew an apple shaped coaster – 🍎 – step by step tutorial—sewing your pieces together.
Place the two apple-shaped fabric pieces right sides together, with the batting or felt layer on top of them. This sandwiching technique will hide the seams inside once turned right side out.
Insert the stem and leaf between the two apple fabric layers at the top, making sure they are pointing inward. Pin everything securely in place to prevent shifting while sewing.
Using a sewing machine or hand stitching, sew around the edge of the apple shape, leaving a small opening at the side or bottom for turning the coaster right side out.
Once stitched, trim any excess fabric from the seam allowance, especially around curves, to help the coaster lie flat. Be careful not to cut through the stitching.
Turn the coaster right side out through the opening, gently pushing out the curves and corners with a blunt tool. Then press the coaster flat with an iron for a crisp finish.
To close the opening and add durability, topstitch around the entire apple shape about 1/8 inch from the edge. This will secure all layers and give your coaster a polished appearance.
Decorating and Finishing Touches
The last creative step in the how to sew an apple shaped coaster – 🍎 – step by step tutorial is adding any decorative details you want.
You can stitch a few lines on the leaf to create realistic veins, or use embroidery to add texture to the apple surface.
For a playful touch, you can sew a small fabric patch in a contrasting color to mimic a highlight or bite mark on the apple.
If you enjoy hand embroidery, consider adding small seed details or stitching the word “apple” somewhere on the coaster.
You can also use fabric paint to add subtle shading or patterns, but make sure it is heat-resistant and washable.
Once decorated, give your coaster a final press with the iron to smooth out any wrinkles and set the stitches.
Now your apple-shaped coaster is ready for use or gifting. Making multiple coasters in different colors can create a fun, fruit-themed set for your kitchen or dining room.
FAQ – Frequently Asked Questions
1. Can beginners make this apple-shaped coaster?
Yes, this project is simple enough for beginners and is a great way to practice basic sewing skills.
2. What is the best fabric to use?
Cotton is ideal for its durability, washability, and ease of sewing.
3. How do I make the coaster heat-resistant?
Adding a batting or felt layer helps insulate against heat from cups and mugs.
4. Can I sew this coaster by hand?
Absolutely. While a sewing machine is faster, hand stitching works perfectly for this small project.
5. How do I keep the coaster flat?
Pressing the coaster with an iron after sewing and trimming seam allowances helps keep it flat.
6. Can I wash the coaster?
Yes, it can be gently hand-washed or machine-washed depending on the fabric used.
Conclusion
By following this how to sew an apple shaped coaster – 🍎 – step by step tutorial, you have learned how to create a charming and practical home accessory. From preparing materials to cutting the apple shapes, sewing, and adding decorations, each step offers room for creativity and personalization.
This project is ideal for all skill levels, eco-friendly when using fabric scraps, and makes a thoughtful handmade gift. The finished coasters bring warmth and character to any table while protecting surfaces from damage.
I would love to hear your honest feedback and see your own unique versions of this project. Share your suggestions so we can continue creating helpful and inspiring tutorials for crafters everywhere.