
If you love mixing creativity with functionality, learning Crochet Paw Keychain – Step by Step Tutorial is a perfect choice. Handmade accessories are not only trendy but also meaningful, as they carry a personal touch and charm. A crochet paw keychain is small, easy to carry, and makes a thoughtful gift for pet lovers. Whether you are new to crochet or an experienced crafter, this tutorial will guide you through every detail needed to make your own.
The best part about a crochet paw keychain is its versatility. You can attach it to your keys, bags, or even use it as a decorative piece for your workspace. With only a few materials and some basic crochet stitches, you can create an adorable accessory in no time. This step-by-step guide will help you understand the process clearly, ensuring that even beginners can follow along without difficulty.
Crafting something by hand gives you a sense of accomplishment. By following this Crochet Paw Keychain – Step by Step Tutorial, you will not only practice new skills but also create something practical and adorable. This project is also budget-friendly, as it requires very little yarn and only basic tools. In the next sections, we will break down everything you need to know, from materials and stitches to detailed instructions for completing your paw keychain.
Materials and Tools You Will Need
To begin your crochet paw keychain – step by step tutorial, gathering the right tools and supplies is essential. Fortunately, this project is simple and does not require expensive materials. Most of the items can be found in any local craft store or even from leftover yarn you already have at home.
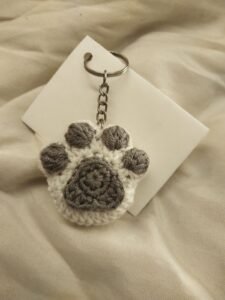
First, you will need yarn. Cotton yarn is recommended because it is durable and provides a neat finish. You can choose colors that match your style, but many people prefer a classic white or brown paw, or even fun colors like pink or blue for a playful look. Using scrap yarn also works perfectly since the project is small.
Second, make sure to have the appropriate crochet hook. A 2.5mm to 3.5mm hook is usually ideal for small accessories like keychains. Using the correct hook size helps maintain tight stitches, which is important for the shape and durability of your paw keychain.
You will also need a pair of scissors to trim the yarn neatly. A yarn needle is useful for weaving in the ends and sewing the paw pads securely onto the base. These tools are essential for giving your keychain a polished and finished appearance.
Don’t forget the keychain ring or clasp. This hardware allows you to attach the paw to your keys or bag easily. They are inexpensive and come in various shapes and sizes, so you can select the one that suits your design best.
Lastly, you may use some stuffing if you want the paw to be slightly puffy. A little fiberfill adds dimension and makes the paw more eye-catching. However, stuffing is optional; if you prefer a flat design, you can skip it. With these materials ready, you are all set to start your crochet journey.
Step by Step Instructions for Making the Paw
Now that your materials are prepared, let’s dive into the crochet paw keychain – step by step tutorial. The process is straightforward and enjoyable, making it an excellent project for both beginners and experienced crafters.
Begin by crocheting the main paw base. You can start with a magic ring and work in rounds to create a small oval or circle, depending on your preferred paw shape. The base usually requires single crochet stitches, which are simple yet effective for building a sturdy background.
Next, focus on the paw pads. The paw design typically consists of one large central pad and four smaller toe pads. To make the large pad, crochet a slightly bigger circle and keep it flat by controlling the number of increases. For the smaller pads, create four tiny circles with just a few stitches each. These details bring the paw to life.
After crocheting the pads, position them onto the base. Arrange the large pad at the bottom center and place the four smaller pads evenly above it to form the toes. This step requires a bit of patience, but the result will be adorable. Use your yarn needle to sew the pads securely onto the base, ensuring they are firmly attached.
If you want a three-dimensional look, add a bit of fiberfill stuffing under the pads before sewing them down completely. This creates a puffy and soft effect, giving your keychain extra charm. On the other hand, if you prefer a sleek design, leave the pads flat.
Once the pads are in place, finish by attaching the keychain ring. Crochet a small loop at the top of the paw and slip the ring through it. Make sure the loop is reinforced with tight stitches so that it can withstand daily use. With that, your crochet paw keychain is ready to be admired and used.
Finally, weave in all loose ends with your yarn needle and trim the excess yarn. This small detail ensures your keychain looks clean and professional. At this stage, you can proudly say you have completed your first crochet paw keychain.
Creative Variations and Design Ideas
One of the wonderful aspects of the crochet paw keychain – step by step tutorial is that it allows endless customization. With just a few adjustments, you can create a variety of unique designs that reflect your personality or make the perfect gift for others.
Experimenting with colors is one of the easiest ways to personalize your paw keychain. You could use natural shades like brown, beige, or gray for a realistic pet paw. Alternatively, bright and bold colors such as neon pink, yellow, or turquoise can give your accessory a playful and modern twist. Multi-colored yarn also creates an eye-catching effect.
Another fun variation is adding embroidery. After finishing the paw, use a contrasting yarn to stitch tiny hearts, initials, or even a pet’s name onto the surface. This makes the keychain extra special and meaningful, especially if it is a gift for a friend who loves animals.
You can also play with size. By adjusting the hook size and yarn thickness, you can create a tiny miniature paw or a slightly larger version to use as a bag charm. Smaller versions are delicate and subtle, while larger ones make bold statements.
Adding embellishments is another creative idea. Beads, buttons, or small bells can be sewn into the design, making the paw not only visually appealing but also fun and interactive. These little details add character and make your creation stand out.
If you want to create a themed set, try making multiple paw keychains in different colors and attach them to a single ring. This can represent a group of pets or simply create a colorful accessory. With creativity, the possibilities are endless.
Tips for Beginners and Common Mistakes to Avoid
For those new to crochet, the crochet paw keychain – step by step tutorial is a wonderful project to start with. However, like any craft, there are common mistakes beginners might encounter. Knowing these in advance can help you avoid frustration and achieve better results.
One common mistake is using yarn that is too thick or too thin. Since the project is small, medium-weight cotton yarn works best. Thicker yarn may make the paw look bulky, while very thin yarn can make the details difficult to see.
Another issue beginners face is inconsistent tension. Crocheting too tightly makes the project stiff, while loose stitches can cause gaps. Practice keeping an even tension so your keychain looks neat and balanced.
Misplacing the paw pads is another challenge. It is important to arrange the pads symmetrically before sewing them down. Take a moment to check the placement and adjust if needed. This ensures the paw shape looks natural and cute.
Skipping the weaving-in process is a mistake many beginners make. Loose yarn ends can unravel over time, so always weave them in securely with a yarn needle. This small step greatly improves durability.
Lastly, some beginners forget to secure the loop that holds the keychain ring. If it is not reinforced, it may break after frequent use. Double-check that the loop is strong enough to handle daily wear and tear.
By keeping these tips in mind, your experience with this crochet paw keychain project will be smoother and more enjoyable. Practice makes perfect, and every attempt helps you improve your crochet skills.
FAQ About Crochet Paw Keychain – Step by Step Tutorial
1. How long does it take to make a crochet paw keychain?
It usually takes between 30 minutes to an hour, depending on your skill level and the design complexity.
2. What is the best yarn for making a crochet paw keychain?
Cotton yarn is highly recommended because it is durable and gives a neat finish. However, you can also experiment with acrylic yarn for colorful results.
3. Can beginners follow this tutorial easily?
Yes, this project is beginner-friendly. The stitches used are basic, and the step-by-step approach makes it easy to follow along.
4. Do I need to stuff the paw with fiberfill?
Stuffing is optional. Adding fiberfill gives the paw a puffy look, while leaving it unstuffed creates a flat design. Both styles work well.
5. How can I make my keychain more durable?
Make sure to crochet with consistent tension, sew the pads securely, and reinforce the loop that attaches the keychain ring. These steps ensure longevity.
6. Can I sell crochet paw keychains that I make?
Yes, handmade keychains are popular at craft fairs or online shops. Just ensure your stitches are neat and the product is finished cleanly.
Conclusion
The Crochet Paw Keychain – Step by Step Tutorial is a delightful project that combines creativity, practicality, and charm. From gathering materials to completing the final stitches, every step offers an enjoyable crafting experience. With endless customization options, you can make each keychain unique and personal.
Whether you are creating it as a gift, for personal use, or even to sell, this small project brings big satisfaction.
Now that you know the process, it’s time to pick up your yarn and hook to start your own paw keychain. I hope this tutorial inspires you to keep crocheting and experimenting with new designs. Don’t forget to leave your honest opinion and share suggestions—I’d love to know how your crochet paw keychain turns out!