
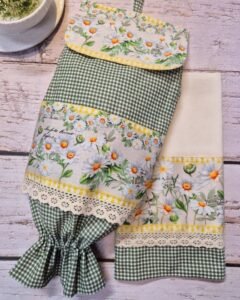
If you are interested in learning how to make a fabric bag puller-step by step tutorial, you are in the right place. Creating a fabric bag puller is a simple yet rewarding sewing project that combines practicality with creativity. Whether you want to personalize your bags, give them a unique look, or create handmade gifts, a fabric bag puller is a great option. This project requires only basic sewing skills and materials that are easy to find, making it ideal for both beginners and experienced makers.
When learning how to make a fabric bag puller-step by step tutorial, you will discover that this accessory is not only decorative but also very functional. Fabric pullers make it easier to open and close zippers on bags, purses, and pouches. They can be made in different shapes, sizes, and styles, so you can match them with your favorite bag designs. Adding your personal touch will turn a simple zipper puller into a charming and practical detail.
Another benefit of following a fabric bag puller tutorial is that it gives you a chance to recycle fabric scraps from other projects. Instead of throwing away leftover material, you can transform it into a beautiful and useful accessory. This way, you save money, reduce waste, and enjoy the satisfaction of creating something new from items you already have. Now, let’s go through the process carefully in this guide so you can confidently make your own pullers at home.
Materials You Need to Make a Fabric Bag Puller
To start with the how to make a fabric bag puller-step by step tutorial, gathering the right materials is essential. You will need small fabric scraps, preferably cotton or other durable fabrics. Cotton is highly recommended because it is sturdy, easy to work with, and comes in countless colors and patterns. Choose fabrics that complement or contrast with the bag where the puller will be attached.
In addition to fabric, you will also need scissors, a sewing machine (or needle and thread if sewing by hand), pins, and an iron. Having these tools ready will make the process smoother and more enjoyable. For added durability, you might want to include interfacing. Interfacing gives the fabric more structure and ensures the puller lasts longer without fraying or losing shape.
Another important element in making your puller is hardware. Small key rings, D-rings, or lobster clasps work perfectly as connectors between the puller and the bag. These items are inexpensive and easy to find in craft or sewing supply stores. They not only make the puller functional but also add a professional finish to your project.
Thread color also plays a role in the outcome. You may use matching thread for a subtle look or contrasting thread to create a bold decorative effect. For example, using white thread on dark fabric will highlight the stitches, giving a handmade touch that stands out. This detail adds personality and style to your final creation.
Finally, keep a ruler or measuring tape nearby to ensure accuracy. Precision is key when cutting fabric strips or aligning pieces. Even small differences in measurements can affect how neat the final product looks. By having everything ready before starting, you avoid interruptions and stay focused on the sewing process.
Having all materials organized and easily accessible also makes it easier to repeat the process and create multiple pullers. Once you learn the method, you may want to produce a variety of pullers in different fabrics and sizes to match your entire collection of bags.
Step-by-Step Process to Make a Fabric Bag Puller
The core of this how to make a fabric bag puller-step by step tutorial is learning the sewing process itself. Start by cutting a strip of fabric measuring approximately 2 inches wide and 6 inches long. This size is common, but you can adjust it depending on the look and size you prefer for your puller.
Next, fold the fabric strip in half lengthwise, with the right side of the fabric facing outward. Press it with an iron to create a crisp fold line. Then open it up and fold the edges toward the center crease, similar to how you would prepare fabric for making bias tape. Fold the strip again along the center, encasing the raw edges inside, and press firmly. This step ensures the puller has no exposed edges and is neat.
Now it is time to sew. With your sewing machine or hand stitching, sew along both long edges of the folded strip. This secures the folds in place and gives the puller extra durability. Keep your stitches straight and consistent for a clean finish. If you use contrasting thread, make sure your lines are even, as they will be visible.
After sewing, insert one end of the fabric strip through the key ring, D-ring, or clasp. Fold the strip over about half an inch and stitch across to secure the hardware in place. Double-stitch this area for extra strength, especially if you plan to use the puller on bags that will be handled frequently.
Once attached, trim any loose threads and give the puller a final press with the iron. Your fabric bag puller is now ready to use! At this stage, you can experiment with decorative touches, such as adding small buttons, charms, or embroidery to personalize the design further.
This step-by-step approach allows even beginners to succeed. By repeating the process, you gain confidence and may even develop your own variations of the puller. The key is patience and practice, which will eventually lead to perfect results.
Tips to Personalize Your Fabric Bag Puller
When learning how to make a fabric bag puller-step by step tutorial, personalization makes the project more enjoyable. Instead of sticking to plain fabrics, experiment with colorful prints or bold patterns. Using seasonal fabrics like florals for spring or darker tones for winter gives your pullers a thematic touch.
Another idea is to use embroidery to embellish the puller. Adding initials, small flowers, or geometric shapes with embroidery thread can make the puller truly unique. This extra effort turns a simple accessory into something special and personalized.
You can also play with textures. Denim, linen, canvas, or even faux leather can be used for sturdier pullers. Combining two types of fabric in a single puller creates a contrasting look that is stylish and modern. This is a fun way to test your creativity while making the project practical.
For those who enjoy eco-friendly crafting, fabric pullers are a perfect opportunity to upcycle. Old clothing, fabric leftovers, or textile samples can all be transformed into beautiful pullers. This not only reduces waste but also gives sentimental value to the accessory if made from fabric that holds memories.
Adding small accessories such as beads, ribbons, or charms is another great way to enhance the design. Beads can be stitched onto the fabric, while ribbons may be tied alongside the puller for a playful look. The options are endless and depend entirely on your personal taste.
Lastly, remember that personalization does not always mean adding more details. Sometimes simplicity creates the most elegant result. A neat, solid-colored puller made with precision can look just as attractive as one full of decorations. The beauty of this project is that you are in control of the final design.
Benefits of Making Fabric Bag Pullers
Creating a fabric bag puller using the how to make a fabric bag puller-step by step tutorial comes with several advantages. The first and most obvious benefit is functionality. Zippers are often small and hard to grip, but a puller makes opening and closing bags much easier. This is especially useful for children, elderly people, or anyone with dexterity issues.
Another advantage is durability. Store-bought zipper pulls sometimes break or wear out quickly, but handmade fabric pullers can be reinforced to last longer. By choosing strong fabrics and sewing them with care, you ensure that your pullers withstand frequent use.
Fabric pullers are also cost-effective. Instead of buying replacements, you can make your own at virtually no cost if you use leftover fabric and supplies you already own. This makes it a budget-friendly project, particularly for families who use multiple bags and pouches.
The creative benefit cannot be ignored either. Making pullers allows you to experiment with colors, patterns, and techniques, which stimulates creativity and brings joy to the crafting process. It is a project that combines practicality with artistic expression.
Another key benefit is that fabric pullers make great handmade gifts. They are small, useful, and customizable, making them perfect as thoughtful tokens for friends and family. Adding a personal touch like embroidery makes them even more special.
Finally, making your own pullers contributes to sustainable living. By repurposing fabric scraps and reducing waste, you make an eco-friendly choice. This aligns with modern values of conscious consumption and sustainable crafting.
FAQ About Fabric Bag Pullers
1. What fabric is best for making a bag puller?
Cotton is the most recommended fabric because it is strong, easy to sew, and widely available. However, denim, canvas, and linen are also excellent choices for durability.
2. Can I sew a fabric bag puller by hand?
Yes, you can sew by hand if you don’t have a sewing machine. Just make sure to use strong stitches and double-sew the area where the hardware is attached.
3. How long does it take to make a fabric puller?
On average, it takes about 20 to 30 minutes to complete one puller. As you gain practice, you will be able to finish them even faster.
4. Can I wash a fabric bag puller?
Yes, most fabric pullers can be hand-washed or machine-washed, depending on the fabric used. Avoid delicate decorations if you plan to wash them frequently.
5. Do I need special tools to make a puller?
No, basic sewing supplies such as scissors, thread, fabric, and either a sewing machine or needle are enough. Hardware like key rings can be purchased cheaply at craft stores.
6. Can fabric pullers be made in bulk?
Absolutely! Once you master the process, you can make several pullers in one sitting. They are quick projects that are easy to replicate in batches.
Conclusion
In this article, we explored how to make a fabric bag puller-step by step tutorial, covering everything from the materials needed to the sewing process, personalization tips, and the many benefits of creating your own pullers. This simple sewing project allows you to recycle fabric, save money, and add style and function to your bags.
By following the instructions and tips provided, you can create durable and unique fabric bag pullers tailored to your taste. We also answered some common questions in the FAQ section to help you along the way. Now it’s your turn to give it a try and enjoy the satisfaction of crafting something useful and beautiful.
I would love to hear your opinion and suggestions about this tutorial. Share your experiences, improvements, or creative ideas so we can inspire each other and make sewing even more enjoyable.