
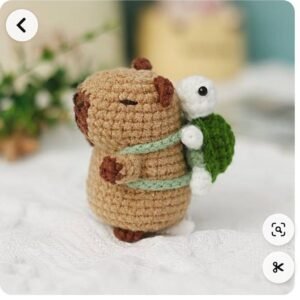
If you are passionate about crochet and love creating cute animal figures, then this Capybara Amigurumi- Step by Step Tutorial is perfect for you. The capybara, known as the world’s largest rodent, has recently become a beloved character in crafting communities thanks to its calm personality and adorable appearance. In this tutorial, we will dive deep into the process of crocheting a capybara amigurumi from start to finish. Whether you are a beginner looking for a new project or an experienced crocheter searching for something unique, this guide will help you achieve an amazing result.
When making your capybara, the goal is not only to follow a set of stitches but also to create a piece filled with charm and personality. Crochet amigurumi patterns allow us to combine technical skills with creativity, resulting in handmade items that bring joy and cuteness into everyday life. By carefully working through each step of this Capybara Amigurumi- Step by Step Tutorial, you will see your yarn transform into a soft and delightful animal.
Throughout this article, we will explain the entire process in detail, from choosing materials to sewing the parts together. You will also learn useful tips to make your stitches consistent and your capybara more realistic. In addition, this guide will provide an organized way to approach amigurumi projects, so that even beginners can follow along without feeling overwhelmed. By the end of this article, you will have the knowledge and confidence to crochet your very own capybara.
Materials and Preparation for Capybara Amigurumi
Before you begin working on your Capybara Amigurumi- Step by Step Tutorial, it is important to gather all the necessary materials. Choosing the right yarn, hook size, and accessories will make a big difference in the quality of your finished project. For amigurumi, it is usually best to use cotton or acrylic yarn, as they provide durability and a smooth texture.
Another essential item is the crochet hook. The hook size should match the thickness of your yarn, but many crocheters prefer to use a slightly smaller hook to keep the stitches tight. This prevents the stuffing from showing through and makes the capybara look neat and polished. Scissors, stitch markers, and a yarn needle will also be needed to cut, count, and sew the pieces together.
Stuffing is an equally important element in amigurumi projects. Using high-quality fiberfill ensures that your capybara will be soft, lightweight, and hold its shape well. Some crafters also like to insert safety eyes or embroider the eyes with yarn for a more handmade touch. These details can completely change the character of your capybara, giving it an expression that feels alive.
To prepare, it is a good idea to create a small test swatch to check your stitch tension. This step can save you time later on and help you adjust your technique if the stitches are too loose or too tight. Consistent stitches will give your capybara a professional and tidy finish.
Once you have all materials at hand, organize your workspace so you can crochet comfortably. A well-lit environment and a comfortable chair will make the process much more enjoyable. Keeping your tools within reach will also save time and prevent interruptions during your project.
Finally, keep in mind that amigurumi requires patience. Each small part of the capybara needs to be crocheted separately and then assembled. Preparing yourself mentally for this creative journey is just as important as preparing your tools and yarn.
Step by Step Crochet Instructions
Now that you are ready, let’s go into the detailed process of this Capybara Amigurumi- Step by Step Tutorial. The body of the capybara is usually made first, starting with a magic ring technique to ensure a tight and clean base. This circular method is the foundation of most amigurumi and prevents any gaps at the bottom.
As you work through the rounds, you will increase stitches evenly to shape the body. Paying attention to stitch counts is crucial here, and using a stitch marker can help you keep track. The body should gradually form into an oval or cylindrical shape, resembling the capybara’s natural body structure.
After the main body is finished, you will move on to the head. The head is typically crocheted separately, beginning once again with a magic ring. Increasing and then decreasing stitches allows you to create a rounded form. The placement of the eyes is best done before closing the head entirely, as it is easier to attach them at this stage.
The legs, ears, and tail are small but important parts of your amigurumi. Each is crocheted individually and then sewn onto the body. The legs should be firm enough to support the toy if you want it to sit upright. The ears can be made flat or slightly folded to add character. The tail, though small, adds charm and completes the capybara’s look.
Assembly is one of the most delicate steps. Take your time to sew the parts neatly with a yarn needle, making sure they are aligned properly. Stuff each part before sewing it closed, ensuring the capybara remains soft but well-shaped.
Finally, consider adding details such as embroidered eyebrows, a small nose, or even accessories like a scarf or tiny hat. These personal touches turn your project into something truly unique and give your capybara extra personality.
Tips for Beginners and Common Mistakes
Crocheting a Capybara Amigurumi- Step by Step Tutorial might seem intimidating at first, but with patience and practice, anyone can do it. Beginners should start slowly and focus on mastering basic stitches such as single crochet, increases, and decreases. These form the backbone of most amigurumi patterns.
One common mistake is not maintaining consistent stitch tension. Loose stitches can create holes where the stuffing shows through, while overly tight stitches make crocheting uncomfortable. The best approach is to practice until you find a balance that feels comfortable but secure.
Another challenge is joining the parts together. Beginners often rush this stage, which can lead to uneven placement of limbs or a crooked head. To avoid this, pin the parts in place first and then sew carefully. Taking a few extra minutes here can make a huge difference in the final result.
Counting stitches incorrectly is also a frequent issue. Always use stitch markers to indicate the beginning of each round, and count your stitches often. This small habit prevents the frustration of realizing too late that your piece has become lopsided.
It is also worth noting that using the right materials makes the process easier. Low-quality yarn may split or break, while poor stuffing can cause lumps. Investing in good supplies is a wise choice, especially for projects you want to last.
Lastly, don’t be afraid of mistakes. Every crocheter has to redo stitches sometimes, and this is part of the learning process. Each attempt will make you more confident and skilled in creating amigurumi animals.
Creative Ideas to Customize Your Capybara
The beauty of following a Capybara Amigurumi- Step by Step Tutorial is that you can personalize the final design however you like. While the basic shape remains the same, small details and accessories can make your capybara truly unique.
For example, you can experiment with different yarn colors. A traditional capybara might be brown or beige, but you can make yours pastel, rainbow-colored, or even patterned for a whimsical effect. Children often love bright, playful colors that make the toy stand out.
Adding accessories is another fun way to customize. A tiny bow, hat, or even a mini scarf can give your capybara a festive look. Seasonal accessories, such as a Santa hat for Christmas or bunny ears for Easter, make your creation even more versatile.
You might also want to experiment with size. By using thicker yarn and a larger hook, you can create a big, huggable capybara. Conversely, using thin yarn and a small hook allows you to make a mini version that works as a keychain or desk decoration.
For advanced crafters, embroidery can add expressive features. A stitched mouth, whiskers, or even rosy cheeks made with blush can give your amigurumi extra charm. These small touches often turn a good crochet project into a great one.
Lastly, consider making a whole family of capybaras in different sizes. This creates a delightful set that can be displayed together, making your project feel more complete and visually appealing.
FAQ About Capybara Amigurumi
1. How long does it take to make a Capybara Amigurumi?
The time varies depending on your skill level. Beginners might take several days, while experienced crocheters could finish in a few hours.
2. What is the best yarn for Capybara Amigurumi?
Cotton yarn is often recommended because it is strong and gives a smooth finish. Acrylic yarn is also popular for its softness and affordability.
3. Can I make Capybara Amigurumi without safety eyes?
Yes, you can embroider the eyes using yarn or thread if you prefer a completely handmade look, which is also safer for small children.
4. Do I need to know advanced stitches for this project?
No, most amigurumi patterns use simple stitches like single crochet, increases, and decreases. As long as you are comfortable with these, you can make a capybara.
5. How do I keep my stitches tight and even?
Practice and using the right hook size help. Choosing a smaller hook than usual for your yarn will make the stitches tighter and prevent gaps.
6. Can I wash my Capybara Amigurumi?
Yes, but it is best to hand wash gently with mild soap and let it air dry to preserve its shape and details.
Conclusion
This Capybara Amigurumi- Step by Step Tutorial has guided you through every stage of creating your own adorable crochet capybara.
From preparing materials to crocheting each part and adding personal touches, you now have all the knowledge needed to bring this project to life. Amigurumi is more than just a craft—it is a way to create meaningful handmade pieces that spread joy.
Now it’s your turn to pick up your yarn and hook and try this project yourself. Once finished, share your opinion and suggestions. Your feedback is valuable, and it helps other crochet enthusiasts feel inspired to make their own capybara amigurumi too.