
Creating a wallet for coins and money- step by step tutorial is a fun and practical project that allows you to make something useful while learning basic crafting techniques. Handmade wallets are becoming increasingly popular because they are customizable, sustainable, and unique. Whether you want a compact wallet for your daily needs or a small accessory to gift someone, this guide will help you create it with ease.
In this article, we will walk you through everything you need to know about making a wallet for coins and money- step by step tutorial. From the materials required to detailed instructions, we will cover each part carefully so you can follow along without feeling overwhelmed. Even if you are a beginner, this tutorial will give you the confidence to create your own stylish and functional wallet.
Another great advantage of learning how to make a wallet for coins and money- step by step tutorial is that it allows you to experiment with fabrics, patterns, and designs. You can choose colors and textures that match your personal style while saving money by crafting it yourself. Plus, handmade wallets often last longer than many store-bought options because you can use sturdy materials and high-quality stitching techniques.
Materials Needed for Wallet for Coins and Money- Step by Step Tutorial
To begin with, having the right materials is essential when making a wallet for coins and money- step by step tutorial. Choosing good-quality fabric, durable thread, and a strong zipper will ensure your wallet lasts for years. You don’t need expensive supplies; in fact, you can even use fabric scraps or recycle old clothes to create a sustainable and eco-friendly wallet.
First, you will need fabric for the main body of the wallet. Cotton is the most common choice because it is easy to sew and available in many patterns. If you prefer a sturdier wallet, you can use denim or canvas. A fun idea is to mix two fabrics to create a unique look, such as floral patterns on the outside and solid colors inside.
Next, gather the basic sewing tools: scissors, pins, a sewing machine (or needle for hand-sewing), and matching thread. You will also need a zipper if you want a coin section with a secure closure. Velcro or snap buttons can be added to keep the wallet folded neatly.
Don’t forget to prepare interfacing, which is a material used between fabric layers to give the wallet shape and structure. This will prevent it from feeling flimsy. You can find interfacing in craft stores or repurpose it from old bags and pouches.
Optional materials include decorative elements like small patches, embroidery, or beads to personalize your wallet. These little details make your wallet for coins and money- step by step tutorial not only functional but also stylish and unique.
Finally, prepare a clean, well-lit workspace where you can lay out all your materials. Having everything ready before you start sewing will make the process smoother and more enjoyable, especially for beginners.
Cutting and Preparing the Fabric Pieces
Once you have gathered all the materials for your wallet for coins and money- step by step tutorial, it’s time to cut the fabric pieces. Precision is very important at this stage because uneven pieces can make sewing difficult later on. Take your time to measure carefully before cutting.
Start by deciding the size of your wallet. A standard wallet for coins and money usually measures about 8 inches by 4 inches when open. Mark these dimensions on the fabric using chalk or a fabric pen, remembering to leave an extra half-inch around all sides for seam allowance.
Cut two pieces for the outside layer and two for the lining. If you are adding a coin pocket, cut an additional small rectangle that will hold the zipper section. This pocket can be placed inside the wallet to store coins securely.
For added structure, cut pieces of interfacing the same size as your main fabric pieces. Attach the interfacing to the wrong side of the fabric using an iron if it is fusible, or simply sew it in place if it is non-fusible.
At this stage, you can also prepare any decorative details you want to include. For example, you might want to add a small patch or some embroidery to the front panel before sewing everything together. This step is much easier to do now rather than after the wallet is assembled.
Finally, organize all the fabric pieces in the order they will be sewn. Having a clear plan before moving on to the next steps will save time and help you avoid mistakes.
Sewing the Wallet for Coins and Money- Step by Step Tutorial
Now comes the most exciting part: sewing your wallet for coins and money- step by step tutorial together. Don’t worry if you are a beginner; this project uses simple stitching techniques that are easy to learn.
Start by sewing the coin pocket. Attach the zipper to the small rectangle piece you cut earlier, making sure the zipper opens smoothly. Then sew the sides of the pocket closed, leaving the zipper at the top. This pocket will be sewn into the main body of the wallet later.
Next, sew the outer layers and lining pieces together. Place the outer fabric and lining fabric right sides together, with the interfacing layer on the outside. Sew along the edges, leaving a small opening to turn the fabric right side out.
Turn the fabric right side out and press it with an iron to make it smooth and neat. At this point, you should have two main panels: one for the front and one for the back of the wallet.
If you are adding sections for cards or bills, fold small pieces of fabric and sew them inside the wallet before attaching the front and back panels together. These sections add functionality, making the wallet suitable for both coins and money.
Finally, sew the front and back panels together along the sides and bottom, leaving the top open if you want a folding wallet. If you prefer a zippered wallet, attach the zipper along the top edge before closing the sides.
Once everything is sewn, trim any excess threads and give the wallet one last press with the iron. Your handmade wallet for coins and money- step by step tutorial is now almost complete!
Adding Finishing Touches and Personalization
The final step in making your wallet for coins and money- step by step tutorial is adding the finishing touches. This is where you can get creative and make your wallet truly unique.
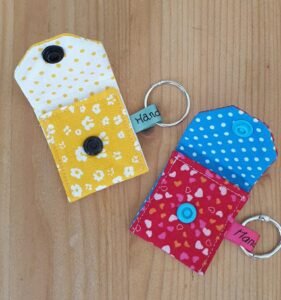
One popular option is adding a button or snap closure to keep the wallet neatly folded. You can also sew a small loop and attach a keyring, turning your wallet into a multipurpose accessory.
If you love decorative details, consider adding embroidery or fabric paint to personalize your wallet. For example, you could stitch your initials on the front panel or paint a small design that reflects your personality.
Another idea is to line the inside with a brightly colored fabric for a fun surprise every time you open the wallet. Mixing patterns and textures can make the wallet more visually interesting.
Don’t forget to double-check all seams to ensure they are secure. A well-stitched wallet will last much longer and withstand daily use.
Finally, take a moment to admire your work. You have created a practical, beautiful, and personalized wallet for coins and money- step by step tutorial from start to finish!
FAQ about Wallet for Coins and Money- Step by Step Tutorial
1. Can I make the wallet without a sewing machine?
Yes, you can sew the entire wallet by hand using a strong needle and thread. It will take more time but the result will be just as functional.
2. What type of fabric works best for a wallet?
Cotton, canvas, or denim are great choices because they are durable and easy to work with. You can also use leather or faux leather for a more professional look.
3. How long does it take to make a wallet for coins and money?
For beginners, it might take about 2–3 hours, while experienced crafters can finish it in under an hour.
4. Can I wash the wallet in the washing machine?
If you use fabric like cotton or canvas, yes. However, wallets made with leather or delicate decorations should be cleaned by hand.
5. Is this project suitable for kids to try?
Yes, with adult supervision, kids can help with measuring, cutting, and even some simple stitching. It’s a fun family project!
Conclusion
In this article, we covered everything you need to know about making a wallet for coins and money- step by step tutorial.
From gathering materials and cutting fabric pieces to sewing and adding creative touches, we broke the process into simple steps so anyone can follow along.
Now it’s your turn to create a personalized wallet that suits your needs and style. We hope you found this tutorial helpful and inspiring. Please leave your honest opinion and any suggestions for future tutorials—we’d love to hear from you!