
Learning how to make a Lunch Box Bag- Step by Step Tutorial can be both fun and practical. A lunch box bag is a convenient way to carry meals, snacks, and drinks to school, work, or outdoor activities while keeping everything organized and fresh. By following this Lunch Box Bag- Step by Step Tutorial, you will not only save money but also have the freedom to customize the bag’s size, design, and style according to your personal taste.
This project is perfect for beginners who want to practice basic sewing skills or for anyone who enjoys DIY crafts. Using simple materials and tools, you can create a reusable and eco-friendly lunch box bag that can be used daily. Plus, it’s a sustainable alternative to disposable bags, helping to reduce plastic waste while giving you something stylish and functional to carry your food in.
In this detailed guide, we will explore the materials you need, explain the sewing process clearly, and give you tips for making your Lunch Box Bag- Step by Step Tutorial a success. By the end of this article, you will have the confidence to create your own lunch bag at home and maybe even make some as gifts for friends and family.
Materials Needed for Lunch Box Bag
Before starting the Lunch Box Bag- Step by Step Tutorial, it is important to gather all the necessary materials. Having everything ready will make the sewing process smooth and enjoyable. You will need fabric for the outer layer and lining, interfacing or padding for structure, thread, scissors, pins, a zipper or Velcro closure, and a sewing machine. Choosing the right materials is essential for durability and practicality.
When selecting fabric for your Lunch Box Bag- Step by Step Tutorial, consider materials that are sturdy and easy to clean. Cotton canvas, denim, or even laminated fabric works well because they resist stains and moisture. The lining fabric should also be washable since it will come in contact with food containers.
Interfacing or padding gives the lunch box bag shape and helps it stand upright. You can choose fusible interfacing that adheres to the fabric with heat or sew-in interfacing if you prefer. For insulation, a layer of thermal batting can be added to help keep food warm or cold for longer periods.
The closure system is another important element in this Lunch Box Bag- Step by Step Tutorial. A zipper gives a secure finish, while Velcro or snap buttons offer convenience for quick opening and closing. Choose according to your preference and sewing experience.
Handles are essential for carrying the lunch box bag comfortably. You can use matching fabric strips, cotton webbing, or pre-made straps. Make sure they are strong enough to hold the weight of your lunch containers.
Finally, gather basic sewing tools such as measuring tape, sewing clips or pins, marking chalk, and an iron. Being organized will help you complete each step without interruptions and make the entire Lunch Box Bag- Step by Step Tutorial experience more enjoyable.
Cutting and Preparing the Fabric Pieces
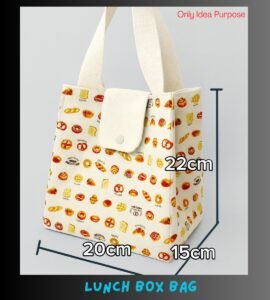
Once your materials are ready, the next step in the Lunch Box Bag- Step by Step Tutorial is to cut and prepare all the fabric pieces. Accurate measurements are key to ensuring that all parts fit together correctly. Start by deciding the size of your lunch box bag based on your needs. A standard size might be around 10 inches wide, 8 inches tall, and 6 inches deep, but you can adjust as needed.
Use a ruler and fabric chalk to mark the pieces before cutting. For the outer fabric, cut two rectangles for the front and back, two smaller rectangles for the sides, and one long strip for the bottom and sides combined if you prefer fewer seams. Repeat the same process for the lining fabric.
Cut interfacing pieces to match the outer fabric dimensions. If you are using thermal batting for insulation, cut it slightly smaller so it fits inside neatly without adding bulk to the seams. Fuse or sew the interfacing onto the outer fabric pieces as instructed by the manufacturer.
For the handles, cut two long strips of fabric or webbing. If using fabric, fold and stitch the strips to create sturdy straps. Positioning them correctly on the bag is important for balance and comfort when carrying.
If your Lunch Box Bag- Step by Step Tutorial includes pockets, cut additional fabric pieces for them now. Pockets can be added inside or outside the bag for holding utensils, napkins, or small snacks separately from the main compartment.
Lay out all pieces on a flat surface to make sure you have everything prepared before moving on to the sewing steps. This organized approach saves time and avoids mistakes as you follow the Lunch Box Bag- Step by Step Tutorial carefully.
Sewing the Lunch Box Bag Step by Step
Now comes the most exciting part of the Lunch Box Bag- Step by Step Tutorial—assembling and sewing the bag. Start by sewing any pockets onto the lining or outer fabric pieces. Fold the edges of the pocket pieces, stitch them neatly, and attach them where desired before constructing the main bag body.
Next, sew the outer fabric pieces together. Begin by joining the front and back panels to the side panels, then add the bottom piece. Use a ½-inch seam allowance and press the seams open with an iron for a professional finish. Repeat the same process with the lining pieces, leaving a small opening at the bottom to turn the bag right side out later.
If you are adding a zipper to your Lunch Box Bag- Step by Step Tutorial, sew it to the top edges of the outer fabric and lining before assembling the final layers. For Velcro or snap closures, attach them after the bag is sewn but before finishing the top edge.
With both outer and lining bags complete, place them right sides together and stitch around the top edge, sandwiching the handles between the layers. Make sure the handles are positioned evenly so the bag hangs straight when carried.
Turn the bag right side out through the opening in the lining. Press the top edge neatly and topstitch around it for added strength and a clean look. Close the lining opening with a small seam by hand or machine.
At this point in the Lunch Box Bag- Step by Step Tutorial, your lunch box bag should be fully functional. Check all seams for strength, and give the bag a final press with the iron to set its shape before using it.
Personalizing and Maintaining Your Lunch Box Bag
One of the best parts about following a Lunch Box Bag- Step by Step Tutorial is the ability to personalize your creation. You can choose fabrics in fun colors, seasonal prints, or even add embroidery for a unique touch. Personalization makes the bag not only functional but also stylish and one-of-a-kind.
Consider adding labels or small decorative patches to the exterior for a fun design element. If making lunch box bags for family members, you can customize each one with their favorite colors or initials for easy identification.
Another idea is to use waterproof lining fabric for easy cleaning. Spills are common in lunch bags, so having a wipeable interior saves time and keeps the bag fresh for everyday use.
To maintain your lunch box bag, wash it regularly according to the fabric care instructions. Removable linings can make cleaning even easier since you can take them out and wash them separately.
Over time, you can make different sizes or shapes using the same Lunch Box Bag- Step by Step Tutorial method. A smaller version works great for snacks, while a larger one can hold meals for picnics or road trips.
By experimenting with fabrics and accessories, you can turn a simple lunch box bag into a fashionable and eco-friendly accessory you’ll enjoy carrying every day.
FAQ About Lunch Box Bag Step by Step Tutorial
Q1: Is this project suitable for beginners?
Yes, the Lunch Box Bag- Step by Step Tutorial is beginner-friendly. With basic sewing skills, you can complete this project successfully.
Q2: What fabric works best for lunch box bags?
Sturdy fabrics like cotton canvas, denim, or laminated fabric work best because they are durable and easy to clean.
Q3: How long does it take to make one lunch box bag?
On average, it takes two to three hours for beginners, depending on the size and design details.
Q4: Can I make the lunch box bag machine-washable?
Yes, using washable fabrics and lining materials ensures your lunch box bag can be cleaned easily.
Q5: Do I need a sewing machine for this project?
While a sewing machine makes the process faster, you can also sew the bag by hand if you prefer. It just takes more time and patience.
Conclusion
In this article, we explored the Lunch Box Bag- Step by Step Tutorial in detail, from gathering materials to sewing and personalizing your lunch bag.
We covered practical tips, creative ideas, and a complete guide so that even beginners can make a functional and stylish lunch box bag at home.
Now it’s your turn to try this Lunch Box Bag- Step by Step Tutorial and enjoy the satisfaction of creating something useful and eco-friendly. Share your thoughts, opinions, and suggestions so we can continue providing helpful guides for DIY enthusiasts like you.