
Creating a Mini bag made with scraps- Step by Step Tutorial is a fantastic way to transform leftover fabrics into something stylish, useful, and eco-friendly. This project not only reduces waste but also allows crafters to showcase their creativity. Making a mini bag is an excellent idea for beginners because it requires minimal materials, and the end result is both functional and adorable.
The beauty of a Mini bag made with scraps- Step by Step Tutorial lies in its versatility. You can choose fabrics in different colors, patterns, and textures to create a unique design that reflects your personal style. Whether you want a simple bag for daily use or a gift for a loved one, this tutorial will help you create a practical and eye-catching accessory using only leftover materials.
Additionally, the Mini bag made with scraps- Step by Step Tutorial teaches valuable sewing skills that can be applied to other projects. From learning how to measure and cut fabric to sewing seams and adding finishing touches, this guide will help you gain confidence with every step. Even if you are new to crafting, you will find this process simple, enjoyable, and rewarding.
Materials and Tools Needed for the Mini Bag
To start your Mini bag made with scraps- Step by Step Tutorial, gather all the materials in advance. This will make the process smoother and help you stay organized.
First, collect your fabric scraps. These can be pieces left over from previous projects, old clothing, or even fabric samples you no longer need. Choosing different colors and textures will make your mini bag truly unique.
Second, you will need a sewing machine or needle and thread if you prefer hand-sewing. A sewing machine will make the process faster, but hand-sewing adds a personal touch and works well for beginners.
Third, get a pair of sharp scissors to cut the fabric neatly. You will also need pins or clips to hold the pieces together while sewing. Measuring tools like a ruler or fabric tape are essential to ensure accuracy in cutting.
Fourth, consider using a small zipper, button, or snap closure for the top of the bag. This step is optional but gives your mini bag a professional look and keeps items secure.
Fifth, you might want to add a small piece of lining fabric inside the bag. It makes the mini bag sturdier and more durable while giving it a neat finish.
Finally, gather some decorative elements such as ribbons, lace, or fabric flowers. These can be added later to personalize the mini bag and make it look even more charming.
Step-by-Step Instructions for Making the Mini Bag
Now let’s start the Mini bag made with scraps- Step by Step Tutorial. The following steps will guide you from preparing the fabric to assembling and finishing your mini bag.
Begin by sorting your fabric scraps and choosing the pieces you want to use. Try to coordinate colors and patterns for a balanced look, or go for a patchwork style with random pieces for a fun, artistic design.
Measure and cut two rectangles of the same size for the front and back of the mini bag. The size depends on how big you want the bag to be, but a good starting point is around 8×6 inches.
If you want to add lining, cut the same size from your lining fabric. This will be sewn inside later to give the bag extra strength and a neat interior finish.
Next, place the two main fabric pieces with the right sides facing each other. Pin the edges together so the pieces stay in place when sewing. Do the same with the lining fabric if you are using one.
Sew along three sides of the main fabric, leaving the top open. If you are adding a lining, sew it the same way. Trim the corners slightly so they look neat when you turn the bag right-side out.
Finally, turn the bag right-side out, insert the lining inside if you made one, and finish the top edge with a hem. Add a zipper, button, or snap closure to complete your mini bag.
Creative Ideas for Decorating the Mini Bag
One of the best things about the Mini bag made with scraps- Step by Step Tutorial is how creative you can be with decorations. You can personalize your bag to match your style or make it suitable for gifting.
Try adding fabric appliqués or patches to the front of the bag. These can be shaped like flowers, animals, or geometric patterns to give the bag a fun and colorful look.
Another idea is to use embroidery to add initials, names, or simple designs. Hand-stitched embroidery gives the bag a charming handmade appearance.
Ribbons and lace trims can be sewn along the edges for a more feminine and elegant style. This is especially nice if you want the mini bag to look like a small purse.
You can also use fabric paint or stencils to add creative designs. This works well on plain fabrics and allows you to customize the bag with unique patterns.
For a rustic or eco-friendly vibe, try using wooden buttons or natural twine for closures and decorations. These small details give the mini bag a unique personality.
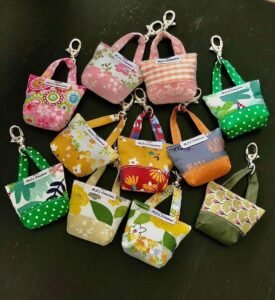
Finally, you can attach a small strap or handle to turn the mini bag into a tiny crossbody or handbag, making it more functional for daily use.
Tips for Beginners and Common Mistakes to Avoid
If you are new to sewing, this Mini bag made with scraps- Step by Step Tutorial is a perfect project to build confidence. However, there are some tips to make the process smoother.
Always measure your fabric carefully before cutting. Accurate measurements ensure that the bag pieces fit together properly and look professional.
Take your time when sewing, especially around the corners. Sewing slowly helps you maintain straight seams and avoid crooked lines.
Press your fabric pieces with an iron before sewing. This makes the fabric easier to handle and helps achieve neat results.
Do not skip the step of pinning or clipping the fabric before sewing. It keeps everything aligned and prevents shifting during stitching.
If you are using a zipper for the first time, practice on a scrap piece of fabric before attaching it to the mini bag. This will make the process less intimidating.
Finally, remember that handmade items do not have to be perfect. Small imperfections add character and show the love and effort you put into creating your mini bag.
FAQ about Mini Bag Made with Scraps
Q1: Can I make the mini bag without a sewing machine?
Yes, you can hand-sew the entire mini bag using a simple backstitch. It will take longer but will still look great.
Q2: What types of fabric work best for this project?
Cotton fabrics are easy to work with, but you can also use denim, linen, or canvas for a sturdier mini bag.
Q3: How big should the mini bag be?
The size depends on your preference, but a common size is 8×6 inches. You can adjust it according to your needs.
Q4: Can children make this mini bag?
Yes, with adult supervision. It is a simple project that kids can enjoy, especially the decorating part.
Q5: How can I make the bag more durable?
Adding a lining, using strong stitches, and reinforcing the seams will make the bag sturdier and last longer.
Q6: Is this project eco-friendly?
Absolutely! Using leftover fabric scraps reduces waste and gives new life to old materials.
Conclusion
This Mini bag made with scraps- Step by Step Tutorial has shown you how to turn leftover fabric into a beautiful and practical accessory.
From gathering materials to sewing and decorating, each step helps you learn new crafting skills while creating something useful.
Now that you have all the instructions, give it a try and enjoy the process of making your own mini bag. We would love to hear your opinions and suggestions in the comments. Share your ideas, ask questions, and let us know how your project turned out!