
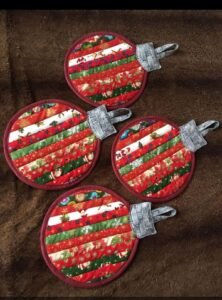
If you have been searching for a creative and festive DIY project, this Christmas coasters – step by step tutorial is the perfect choice for the holiday season. Handmade coasters bring a warm, personal touch to your Christmas décor, making your table settings even more special. Plus, creating them yourself allows you to personalize every detail, from the yarn colors to the patterns and sizes. In this guide, you will learn how to craft these beautiful accessories with simple materials and basic crochet skills, all while enjoying the festive spirit.
The best part about this Christmas coasters – step by step tutorial is that it is beginner-friendly, yet produces results that look professional and charming. You can craft coasters shaped like snowflakes, Christmas trees, or even Santa hats – the possibilities are endless. Each handmade coaster can become a cherished part of your holiday traditions or a thoughtful gift for family and friends. And since we are focusing on SEO optimization, the term Christmas coasters – step by step tutorial will be highlighted throughout this article to help readers easily find this content online.
Before diving into the crafting process, it’s essential to gather the right materials and understand the basic techniques. In this Christmas coasters – step by step tutorial, we will go through the necessary tools, simple crochet stitches, and tips for adding festive embellishments. Whether you are looking to decorate your own home or create a unique handmade gift, this guide will walk you through each stage so you can enjoy the process and the result.
Materials and Tools Needed
To begin this Christmas coasters – step by step tutorial, the first step is gathering the right materials. You will need yarn in Christmas colors such as red, green, white, and gold to capture the holiday spirit. Cotton yarn is usually the best choice because it is durable, washable, and provides a nice finish for coasters. Make sure to select a medium-weight yarn so the coasters will be sturdy yet soft.
Next, you will need a crochet hook that matches your yarn weight. Most patterns for Christmas coasters – step by step tutorial recommend using a 4mm or 5mm hook for best results. Having the right hook size ensures your stitches are even and your coaster lies flat on the table. Along with the hook, don’t forget scissors for trimming yarn ends and a yarn needle for weaving in the loose threads at the end of your project.
Another useful tool for this Christmas coasters – step by step tutorial is a stitch marker, especially if you are new to crocheting in the round. Stitch markers help you keep track of the beginning and end of each round, preventing mistakes as you work through the pattern. They are not strictly necessary but can make the process much easier and less stressful.
You might also want to have some festive embellishments ready. Small decorative items like buttons shaped as stars, snowflakes, or tiny bells can be sewn onto the coasters for an extra holiday touch. This Christmas coasters – step by step tutorial encourages creativity, so you can personalize each piece to suit your style and décor theme.
Finally, make sure you have a flat, well-lit workspace to crochet comfortably. Having all your tools organized before starting the Christmas coasters – step by step tutorial will make the crafting process smoother and more enjoyable. Preparation is key to a stress-free and fun crochet session.
Once you have everything ready, you are set to start making your beautiful holiday coasters. The next section will guide you through the basic stitches needed for this project.
Learning the Basic Crochet Stitches
This Christmas coasters – step by step tutorial uses a few fundamental crochet stitches, making it perfect for beginners. The most common stitches you will need to learn are the chain stitch, single crochet, and slip stitch. These form the foundation of most crochet projects, including coasters.
The chain stitch is the starting point for almost every crochet pattern. In this Christmas coasters – step by step tutorial, you will begin with a series of chain stitches to create the center of your coaster. Practice making even chains before starting the actual pattern to keep your work neat.
Next is the single crochet stitch, which gives your coaster a sturdy texture. Single crochet stitches are tight and dense, making them ideal for coasters because they prevent cups or mugs from tipping over. This Christmas coasters – step by step tutorial will use single crochets to form the main body of the coaster.
The slip stitch is another essential technique for this project. It is used to join rounds together neatly, creating a smooth and professional finish. In this Christmas coasters – step by step tutorial, slip stitches will help you transition between rounds without leaving gaps in the pattern.
If you are completely new to crochet, take a few minutes to practice these stitches before starting your coaster. Having a good grip on the basics will make following the Christmas coasters – step by step tutorial much easier and more enjoyable.
You may also encounter increases in the pattern. Increasing simply means adding extra stitches in the same space to make the circle grow. This Christmas coasters – step by step tutorial will guide you through when and where to increase to keep your coaster flat and even.
Once you are comfortable with these stitches, you will be ready to move on to creating the coaster itself. The following section provides the step-by-step instructions for crafting a basic Christmas coaster.
Step by Step Instructions
To begin the Christmas coasters – step by step tutorial, start with a magic ring or a small loop made with chain stitches. This will form the center of your coaster. Work six single crochet stitches into the ring and pull it tight to close the center neatly.
For the second round, make two single crochets in each stitch around, ending with a slip stitch to join the round. This increase will start forming a flat circle, the base of your Christmas coasters – step by step tutorial.
In the third round, alternate between one single crochet in the next stitch and two single crochets in the following stitch. Continue this pattern all the way around to keep the circle growing evenly. This Christmas coasters – step by step tutorial ensures your coaster stays flat instead of curling up.
For the fourth round, increase the number of single crochets between increases. For example, work two single crochets in the next two stitches, then two single crochets in the next one. This keeps the circle expanding smoothly. Follow the Christmas coasters – step by step tutorial carefully for stitch counts in each round.
Continue adding rounds until your coaster reaches the desired size. Most coasters measure about four to five inches in diameter. This Christmas coasters – step by step tutorial allows you to adjust the size by simply adding or stopping rounds as needed.
Finally, finish the coaster with a slip stitch and cut the yarn, leaving a tail for weaving in. Your basic Christmas coaster is now complete and ready for decoration.
Decorating Your Christmas Coasters
This part of the Christmas coasters – step by step tutorial is where creativity comes alive. Adding decorative elements can transform a simple coaster into a festive piece of holiday art.
You can use contrasting yarn colors to add borders or stripes to your coasters. For example, a red base with a green border looks very festive. This Christmas coasters – step by step tutorial encourages experimenting with different color combinations.
Embellishments like small bows, crocheted snowflakes, or even tiny bells can be sewn onto the coasters. These decorative touches make each piece unique and charming. Following this Christmas coasters – step by step tutorial, you can even add appliqués shaped like Christmas trees or stars.
Another fun idea from this Christmas coasters – step by step tutorial is to use metallic yarn for a bit of sparkle. Gold or silver threads woven into the border can make the coasters look elegant and festive.
If you want a rustic look, consider using natural twine or jute yarn for part of the coaster. This adds texture and gives a handmade, cozy feel to your decorations following the Christmas coasters – step by step tutorial.
The final step is to block your coasters if needed. Blocking involves dampening the coasters and shaping them to dry flat, ensuring a polished finish for your holiday creations.
FAQ about Christmas Coasters – Step by Step Tutorial
Q1: Can beginners follow this Christmas coasters – step by step tutorial?
Yes, this tutorial is designed for beginners and uses basic stitches like chain, single crochet, and slip stitch.
Q2: What type of yarn is best for Christmas coasters?
Cotton yarn is ideal because it is absorbent, durable, and holds its shape well.
Q3: How long does it take to make one coaster?
On average, one coaster takes about 30–45 minutes, depending on your skill level and pattern complexity.
Q4: Can I wash the coasters?
Yes, if you use cotton or washable yarn, your coasters can be gently hand-washed and air-dried.
Q5: Can I sell coasters made from this Christmas coasters – step by step tutorial?
Absolutely! Handmade coasters make wonderful items for craft fairs or online shops.
Q6: How can I make different shapes like stars or trees?
Once you master the circle pattern, you can find simple crochet appliqué patterns to sew onto the coasters for variety.
Conclusion
In this article, we covered the complete Christmas coasters – step by step tutorial, from gathering materials and learning basic stitches to creating, decorating, and customizing your holiday coasters.
By following these instructions, you can craft beautiful, functional, and festive coasters for your home or as heartfelt gifts.
We hope this guide inspires you to start your own set of Christmas coasters this holiday season. Please leave a sincere opinion and share any suggestions for future tutorials—we’d love to hear your thoughts and ideas!