
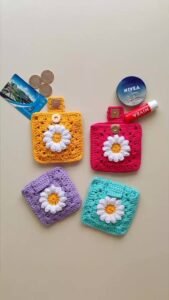
Learning how to create an Easy to make mini crochet bag- Step by Step Tutorial is a fantastic way to combine creativity, practicality, and fun. This project is ideal for crochet enthusiasts of all skill levels, including complete beginners. A mini crochet bag is not only a beautiful handmade accessory but also a functional item you can use every day or gift to someone special.
With this Easy to make mini crochet bag- Step by Step Tutorial, you will discover how simple materials and basic stitches can be transformed into a stylish accessory. The beauty of crochet bags is that they can be customized in endless ways. You can choose your favorite colors, add decorative elements like buttons or tassels, and make each bag truly unique.
Throughout this Easy to make mini crochet bag- Step by Step Tutorial, we will cover everything from the supplies you need to the detailed steps for creating your mini bag. By the end, you will have a charming, handmade bag ready to use or give as a thoughtful gift.
Materials Needed for Your Mini Crochet Bag
Before diving into the crochet process, it is important to prepare all the materials required for the Easy to make mini crochet bag- Step by Step Tutorial. Having everything on hand will make the process smoother and more enjoyable.
First, you need yarn. Cotton yarn is often recommended because it provides a sturdy and durable texture for bags. However, acrylic yarn can also be used if you want a softer feel and vibrant colors.
Second, choose the right crochet hook size. For most mini bags, a 4 mm or 5 mm hook works well. The hook size will affect the tightness of your stitches and the overall size of the bag.
Third, you will need a tapestry needle to weave in the yarn ends neatly. This will give your bag a professional, clean finish.
Fourth, consider adding a lining to your bag for extra strength. Fabric scraps in complementary colors work perfectly for this purpose.
Fifth, you may want to add embellishments such as buttons, zippers, or beads to give your bag a personalized touch.
Finally, a good pair of scissors is essential for cutting yarn and trimming any loose ends after completing your project.
Step-by-Step Crochet Instructions
Now let’s move on to the detailed Easy to make mini crochet bag- Step by Step Tutorial. Follow these instructions carefully to create your beautiful mini bag.
Start by making a slip knot and chaining a length according to the desired width of your bag. For a small bag, around 25–30 chains should be enough.
Next, work single crochet stitches across the chain to form the foundation row. This step creates a strong base for your bag.
Continue crocheting rows of single crochet stitches until your piece reaches twice the height you want for your bag. You are essentially creating one long rectangle that will be folded in half later.
Once your rectangle is ready, fold it in half and use single crochet stitches or a tapestry needle to join the sides. Leave the top open to form the bag’s opening.
For the handles, chain a length long enough for comfortable carrying. Attach each end of the chain to the inside of the bag and secure it firmly with slip stitches or by sewing it on.
Finally, weave in all loose ends with your tapestry needle and trim any excess yarn for a neat finish.
Adding Decorative Details and Variations
A great advantage of the Easy to make mini crochet bag- Step by Step Tutorial is the freedom to personalize your project. There are many ways to make your bag stand out.
First, you can experiment with different yarn colors. Stripes, color blocks, or even multicolored yarn can add a fun, vibrant look to your mini bag.
Second, add embellishments like buttons or beads. These little details can turn a simple bag into a stylish accessory.
Third, consider adding a lining for extra durability. A fabric lining helps the bag keep its shape and prevents small items from poking through the stitches.
Fourth, you can crochet a flap and attach a button to create a secure closure for your mini bag. This adds both functionality and style.
Fifth, if you want a crossbody bag, simply make the handle longer so it can be worn over the shoulder or across the body.
Lastly, try different stitch patterns such as half double crochet or shell stitches for a unique texture and design.
Tips for Beginners and Common Mistakes to Avoid
This Easy to make mini crochet bag- Step by Step Tutorial is beginner-friendly, but here are some tips to ensure the best results.
First, keep your tension consistent. Uneven tension can cause your bag to look lopsided or lose its shape. Practice on a small swatch if needed.
Second, count your stitches at the end of each row to prevent accidental increases or decreases that could distort the shape.
Third, choose sturdy yarn for better durability. Thicker yarn makes the bag stronger and more practical for daily use.
Fourth, if you are new to crochet, start with a simple design before trying complex stitch patterns or decorations.
Fifth, always secure your yarn ends properly to prevent unraveling over time. This is especially important if the bag will be used frequently.
Finally, be patient with yourself. Crochet is a skill that improves with practice, and each project helps you become more confident.
FAQ About Mini Crochet Bags
Q1: How long does it take to make a mini crochet bag?
A small bag can often be completed in 2–4 hours, depending on your crochet speed and design complexity.
Q2: What is the best yarn for mini crochet bags?
Cotton yarn is recommended for its durability and structure, but acrylic yarn works well if you prefer soft textures and bright colors.
Q3: Can I wash my mini crochet bag?
Yes, most crochet bags can be hand washed with mild detergent. Always check your yarn label for care instructions.
Q4: Do I need to add a lining to my crochet bag?
A lining is optional but adds strength and prevents small items from poking through the stitches.
Q5: Can beginners follow this tutorial successfully?
Absolutely! This Easy to make mini crochet bag- Step by Step Tutorial uses basic stitches suitable for all skill levels.
Q6: Can I sell the bags I make from this tutorial?
Yes, handmade crochet bags are popular at craft fairs and online marketplaces, making them great for small business projects.
Conclusion
In this article, we explored the Easy to make mini crochet bag- Step by Step Tutorial in detail, from gathering materials to adding personal touches and avoiding common mistakes.
By following the instructions, you can create a functional, beautiful, and customizable accessory that reflects your style.
Now it’s your turn to try this project at home. After finishing your mini crochet bag, please share your honest opinion and suggestions so we can keep bringing more creative and helpful tutorials for you to enjoy.