
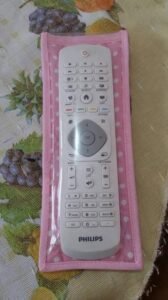
Creating a remote control cover is a simple yet highly effective way to protect your devices while adding a touch of style to your living room. This Remote control cover- Step by Step Tutorial will guide you through the entire process, ensuring that even beginners can make a functional and beautiful accessory. Whether you want to keep your remote free from dust, scratches, or simply make it easier to find among the sofa cushions, this guide has you covered.
One of the main advantages of making your own remote control cover is the flexibility to choose materials, colors, and patterns that match your home décor. Store-bought covers can be practical, but they often lack the personal touch that a handmade one provides. By following this Remote control cover- Step by Step Tutorial, you can create a unique and customized piece that serves both style and functionality.
Additionally, crafting your own remote control cover is a fun and inexpensive project. You don’t need advanced sewing or crafting skills to succeed; all you need are some basic materials, a bit of creativity, and this comprehensive Remote control cover- Step by Step Tutorial. Let’s explore the materials required and the easy steps to make a durable and stylish cover for your remote control.
Materials You Will Need
To begin this Remote control cover- Step by Step Tutorial, you must gather the right materials to ensure your project goes smoothly. The first and most important item is the fabric of your choice. Cotton, felt, or even old T-shirts work perfectly for this project. Choose a material that is easy to handle and sturdy enough to withstand daily use.
Next, you will need sewing essentials. These include scissors, thread, a needle, and pins. If you have access to a sewing machine, it will make the process quicker, but hand stitching works just as well for a remote control cover. A simple ruler or measuring tape will help you achieve accurate dimensions, ensuring the cover fits perfectly.
Adding a touch of personalization can make your remote control cover stand out. Consider decorative elements like buttons, ribbons, or even small pockets for storing batteries or other accessories. These details may seem small, but they significantly enhance the final look of your handmade cover.
Another important item to have on hand is some form of padding or lining material. This helps protect the remote from accidental drops or bumps. Felt or thin foam works wonderfully and is easy to sew into the fabric layers without adding unnecessary bulk.
Finally, keep an iron nearby. Pressing your fabric pieces before and after sewing gives the cover a neat and professional appearance. It also helps the seams lay flat, making your remote control cover look polished and well-made.
Having all materials prepared in advance will save time and make the entire crafting process smoother. With everything ready, you can move on to the next step of this Remote control cover- Step by Step Tutorial without interruptions.
Measuring and Cutting the Fabric
The first practical step in this Remote control cover- Step by Step Tutorial is measuring the remote control accurately. Use a measuring tape to determine the length, width, and thickness of the remote. Add an extra inch on each side to allow for seams and a comfortable fit. This additional space ensures the remote slides in easily without being too tight.
After noting the measurements, transfer them onto your chosen fabric using a fabric marker or chalk. Remember to mark two pieces: one for the front and one for the back of the remote control cover. If you plan to add a flap or pocket, measure and mark those pieces as well before cutting.
Cutting the fabric accurately is crucial for achieving a neat final product. Use sharp fabric scissors to avoid frayed edges. For beginners, drawing straight lines with a ruler before cutting can help maintain precision and avoid mistakes.
If you’re using a lining or padding, repeat the same process on that material. The lining should be the same size as the outer fabric pieces so they align perfectly when sewn together. This step ensures the remote control cover remains both functional and aesthetically pleasing.
Labeling each piece after cutting can help you stay organized, especially if your design includes multiple components. This simple step prevents confusion later when you start assembling the cover.
Once the fabric pieces are ready, you can proceed to the next stage of this Remote control cover- Step by Step Tutorial, where we begin assembling everything into a cohesive product.
Sewing the Remote Control Cover
Now comes the most exciting part of this Remote control cover- Step by Step Tutorial: sewing the pieces together to form the actual cover. Begin by placing the two main fabric pieces with the right sides facing each other. Pin them together along the edges to keep them aligned during sewing.
Start sewing along the sides and bottom edges, leaving the top open. This open section will be where you slide the remote control in and out. If you want a flap closure, sew it separately and attach it to the back piece before stitching the main sections together.
For added durability, consider using a double stitch or backstitch along the seams. This prevents the fabric from fraying and ensures your remote control cover lasts longer even with frequent use.
After sewing the main sections, turn the cover right side out. Use a blunt object like a pencil to push out the corners for a clean finish. At this stage, press the cover with an iron to smooth out any wrinkles and set the seams neatly.
If you included lining or padding, sew it to the inside of the cover using small, neat stitches. This step adds protection to your remote while keeping the outer design intact and stylish.
Finally, if desired, attach decorative elements such as buttons, ribbons, or small fabric appliqués. These extras give your remote control cover a personalized and creative touch.
Adding the Finishing Touches
The last stage of this Remote control cover- Step by Step Tutorial focuses on small details that make a big difference. Start by checking the fit of your remote control inside the cover. It should slide in easily but remain secure when in use.
If the cover feels too loose or too tight, make minor adjustments by resewing certain areas. A snug but comfortable fit ensures the remote stays protected without making it hard to remove or insert.
Consider adding a closure mechanism for extra security. Velcro strips, snap buttons, or small ties work perfectly to keep the remote safely inside the cover when not in use. Choose an option that matches your fabric style and personal preference.
Some people like to include a small loop at the top of the remote control cover for hanging it on a hook or wall organizer. This keeps the remote in a consistent location, reducing the chance of losing it in the sofa cushions.
Decorative stitching around the edges can also enhance the overall look. Use contrasting thread colors for a playful appearance or stick to matching tones for a classic design.
Once you are satisfied with the look and functionality, give the entire cover one final press with the iron. This step ensures a crisp, professional finish that makes your handmade project look store-bought.
FAQ about Remote Control Covers
1. Why should I make a remote control cover instead of buying one?
Making your own cover allows you to customize size, fabric, and design, ensuring it fits your remote perfectly while matching your home décor.
2. What type of fabric is best for a remote control cover?
Cotton, felt, or durable synthetic fabrics work best because they are easy to clean, sew, and handle.
3. Do I need a sewing machine for this project?
No, hand stitching works well, though a sewing machine makes the process faster and gives a cleaner finish.
4. Can I wash the remote control cover?
Yes, most fabric covers can be hand-washed or machine-washed, depending on the materials used.
5. How can I make the cover more durable?
Use quality thread, reinforce seams, and consider adding a lining or padding for extra protection.
6. Is it possible to add pockets or compartments to the cover?
Absolutely! You can customize your cover with pockets for batteries, notes, or even a pen holder if you like.
Conclusion
In this Remote control cover- Step by Step Tutorial, we explored every stage of creating a practical and stylish cover for your remote.
From choosing materials to sewing and adding final touches, each step was designed to help beginners and experienced crafters alike succeed.
Now that you know how simple and rewarding it is to make your own remote control cover, we encourage you to try it yourself. Share your results, leave a sincere opinion, and suggest new ideas for future tutorials—we’d love to hear from you!