
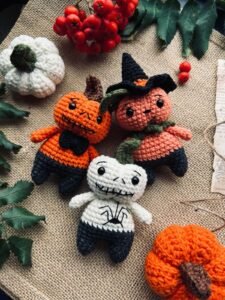
Learning how to make a Mini pumpkin keychain in amigurumi- Step by Step Tutorial is a wonderful way to combine creativity, crochet skills, and seasonal charm. Amigurumi, the Japanese art of crocheting small stuffed creatures or items, has become increasingly popular among craft lovers. A mini pumpkin keychain is not only cute and practical but also makes for a fantastic handmade gift or accessory.
This Mini pumpkin keychain in amigurumi- Step by Step Tutorial will guide you through the entire process, from gathering materials to finishing your project with style. With easy-to-follow instructions, even beginners can create this adorable keychain while improving their crochet techniques. The end result is a miniature pumpkin that is both decorative and functional, perfect for autumn or Halloween themes.
By making a Mini pumpkin keychain in amigurumi- Step by Step Tutorial, you will not only learn the basic crochet stitches but also gain confidence in shaping, stuffing, and assembling small projects. This skill set will open the door to creating other fun amigurumi designs in the future, expanding your crafting possibilities and creativity.
Materials Needed for the Mini Pumpkin Keychain
Before starting the Mini pumpkin keychain in amigurumi- Step by Step Tutorial, it is essential to gather all the required materials. The main material is yarn, and for this project, cotton yarn or acrylic yarn works best. Choose bright orange for the pumpkin body, green for the stem, and brown or black for optional decorative details.
Next, you need a suitable crochet hook. A small hook size, such as 2.5mm or 3mm, is ideal for creating tight stitches that prevent stuffing from showing through. Tight stitches give the pumpkin a neat, professional appearance and help maintain its shape.
Stuffing material is also necessary to give the mini pumpkin its characteristic roundness. Polyester fiberfill is widely used because it is soft, lightweight, and easy to handle. You only need a small amount for each keychain, making it affordable and convenient.
Keychain findings, such as metal rings and small chains, are essential for turning your crocheted pumpkin into a functional accessory. These pieces are easy to find at craft stores and add practicality to your handmade item.
A tapestry needle will help you weave in the yarn ends and sew the stem to the pumpkin body. Scissors are also required for trimming excess yarn and achieving a clean finish.
Finally, consider using stitch markers if you are new to amigurumi. They help you keep track of rounds, ensuring accuracy and consistency throughout the project.
Crocheting the Mini Pumpkin Body
The next step in the Mini pumpkin keychain in amigurumi- Step by Step Tutorial is creating the pumpkin body. Begin with a magic ring, which is essential in amigurumi projects for forming a tight, closed starting point. Into this ring, crochet six single crochet stitches to form the first round.
Continue crocheting in a spiral, increasing stitches evenly around each round to expand the pumpkin shape. Typically, you increase every second or third stitch to keep the round shape symmetrical and smooth. This step gradually forms the sphere that will become your pumpkin.
Once you reach the desired width for your mini pumpkin, begin working even rounds without increases. These rounds create the middle section, giving the pumpkin its height and structure. Make sure to maintain consistent tension for a uniform appearance.
After completing several even rounds, start decreasing stitches to close the pumpkin top. Work evenly spaced decreases until only a small opening remains. Before closing completely, insert the stuffing material, shaping the pumpkin to your preference.
Pull the yarn tail tightly to close the opening securely. Weave the end through several stitches for reinforcement, ensuring that the stuffing stays in place and the pumpkin maintains its shape over time.
At this stage of the Mini pumpkin keychain in amigurumi- Step by Step Tutorial, you have completed the basic pumpkin body, which serves as the foundation for the remaining details and assembly.
Adding the Stem and Keychain Attachment
The next part of the Mini pumpkin keychain in amigurumi- Step by Step Tutorial involves crocheting the stem and attaching the keychain hardware. Begin the stem by using green yarn to create a small chain or magic ring with just a few single crochet stitches. This piece should be short and narrow, resembling a real pumpkin stem.
Attach the stem to the top center of the pumpkin using your tapestry needle. Sew it securely to withstand handling and regular use as a keychain accessory. The stem adds a touch of realism and completes the pumpkin’s natural look.
For the keychain attachment, insert a metal ring through the stitches at the top near the stem. Some crafters prefer to add a small chain between the ring and the pumpkin for extra length and flexibility, making the keychain more practical.
Check that the attachment is firmly secured before proceeding. A loosely attached ring can come off with regular use, so reinforce it with extra stitches if necessary.
Optional decorative details can be added at this stage. Use contrasting yarn colors to embroider tiny lines on the pumpkin’s body, mimicking the ridges seen on real pumpkins. This simple detail enhances the handmade charm of your creation.
Once the stem and keychain hardware are in place, your mini pumpkin keychain is nearly finished. The final steps involve shaping and final touches for a polished look.
Finishing Touches and Tips for Beginners
The last stage in the Mini pumpkin keychain in amigurumi- Step by Step Tutorial focuses on shaping, finishing, and helpful tips for beginners. Begin by gently molding the stuffed pumpkin with your hands, ensuring it has a smooth, round appearance.
If desired, use a long yarn tail to wrap around the pumpkin body several times, creating subtle grooves that imitate natural pumpkin sections. Secure the yarn ends neatly at the bottom to maintain the effect without visible knots.
Check all yarn ends and weave them securely into the pumpkin body. This step prevents loose threads from unraveling over time, giving your project durability and a clean finish.
For beginners, maintaining even tension throughout the project is crucial. Uneven tension can lead to a lopsided or misshapen pumpkin. Practice on small swatches if needed before starting the actual keychain.
Consider making several mini pumpkins in different colors for variety. White, yellow, or even multicolored yarns create unique seasonal decorations and thoughtful handmade gifts for friends and family.
Finally, remember that patience is key. Amigurumi requires attention to detail, but the results are rewarding. Each project improves your skills and brings you closer to mastering the art of crocheting mini creations.
FAQ about Mini Pumpkin Keychain in Amigurumi
1. Is this project beginner-friendly?
Yes, the Mini pumpkin keychain in amigurumi- Step by Step Tutorial is perfect for beginners. It uses basic stitches and simple shaping techniques.
2. How long does it take to complete one keychain?
Typically, it takes one to two hours, depending on your crochet speed and experience level.
3. Can I use leftover yarn for this project?
Absolutely. This project is ideal for using small amounts of leftover yarn from other crochet creations.
4. How do I keep the pumpkin shape firm?
Use tight stitches and adequate stuffing to maintain structure and prevent sagging over time.
5. Can I make larger or smaller pumpkins?
Yes, adjust the number of rounds and stitch increases to create different sizes while following the same basic steps.
6. Do I need special tools for attaching the keychain?
No, basic craft pliers or even your hands can secure the keychain ring firmly in place.
Conclusion
In this Mini pumpkin keychain in amigurumi- Step by Step Tutorial, you learned how to gather materials, crochet the pumpkin body, add the stem and keychain hardware, and finish with professional touches.
This small but charming project is perfect for beginners and experienced crocheters alike.
Now it’s your turn to try making your own mini pumpkin keychain. Share your honest opinions, suggestions, and experiences so others can learn and enjoy this delightful amigurumi project as well.