
If you have ever wanted to create a beautiful swan using crochet techniques, this Swan amigurumi tutorial- Step by Step Tutorial will guide you through the entire process. Amigurumi is the Japanese art of knitting or crocheting small stuffed yarn creatures, and swans are a perfect project for both beginners and experienced crafters. They symbolize elegance, love, and grace, making them a popular choice for handmade gifts and home décor.
Learning to crochet a swan might look complicated at first, but with the right instructions, anyone can master it. This Swan amigurumi tutorial- Step by Step Tutorial has been designed to be easy to follow while still teaching you the essential techniques for shaping, assembling, and decorating your swan. By the time you finish, you will have a unique handmade creation that you can display proudly or give to someone special.
Throughout this article, you will find clear directions on how to choose materials, crochet the different parts of the swan, and put everything together beautifully. We will also give you helpful tips to avoid common mistakes and share creative ideas to customize your swan so it truly reflects your personal style. Following this Swan amigurumi tutorial- Step by Step Tutorial, you can bring a touch of handmade magic into your home while learning a relaxing and rewarding craft.
Materials and Tools for the Swan Amigurumi Tutorial
Before starting the Swan amigurumi tutorial- Step by Step Tutorial, it is essential to prepare all the materials and tools you will need. Having everything ready beforehand will make the process smoother and more enjoyable.
First, you will need yarn in white for the swan’s body. Acrylic yarn is ideal because it is soft, easy to handle, and available in many colors. If you prefer a more luxurious look, cotton yarn provides a smooth texture that gives the swan a polished finish.
Next, you will need a crochet hook that matches your yarn’s thickness. Using the right hook size is important to achieve neat stitches and the proper shape. Too big of a hook might leave gaps, while too small of a hook can make the work too tight.
Stuffing material such as polyester fiberfill will be used to fill the swan’s body and head, giving it a soft yet firm shape. This type of stuffing is lightweight, washable, and perfect for amigurumi projects.
You will also need a yarn needle for sewing pieces together, small scissors for cutting yarn, and stitch markers to keep track of your rounds. These simple tools make a big difference in keeping your project organized and professional-looking.
Finally, to add personality to your swan, consider using small safety eyes or embroidery thread for the eyes and a contrasting yarn color for the beak. These small details bring your amigurumi to life and make it truly charming.
Once you have all these materials ready, you can confidently move on to the next steps of the Swan amigurumi tutorial- Step by Step Tutorial and start creating your handmade masterpiece.
Step-by-Step Instructions to Crochet the Swan
Now we come to the heart of the Swan amigurumi tutorial- Step by Step Tutorial: learning how to crochet the swan step by step. Each part will be made separately and then assembled to form the complete figure.
Start with the body by working in continuous rounds using the magic ring technique. This method creates a tight, closed center, perfect for amigurumi projects. Increase stitches gradually to shape the body, then continue straight rounds to build height before decreasing to close the top.
Stuff the body firmly but evenly as you go. This ensures the swan keeps its shape without lumps or gaps. Take your time with this step because the quality of the stuffing affects the final appearance.
For the head, repeat the same process on a smaller scale. Begin with a magic ring, increase stitches to form a smooth sphere, and stuff it before closing. Leave a long tail of yarn to sew the head securely onto the body later.
The neck is a signature feature of the swan. Crochet it as a long tube, gradually shaping it with slight increases or decreases to give it a graceful curve. Stuff lightly so it stays flexible while holding its shape.
Next, crochet the wings using simple flat pieces shaped with increases and decreases. These can be sewn on either side of the body, slightly curved outward for a natural look.
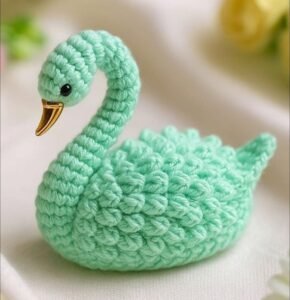
Finally, make the beak and eyes using contrasting yarn or embroidery thread. The beak is usually orange, while the eyes can be black or dark brown for realism. With all parts completed, assemble your swan carefully, stitching each piece securely in place.
Tips for a Perfect Amigurumi Swan
Even though the Swan amigurumi tutorial- Step by Step Tutorial provides clear instructions, a few extra tips can help make your swan look even better.
Choose good-quality yarn for a smooth finish. Higher-quality yarns create more defined stitches, making the final result neater and more durable.
Use stitch markers when working in rounds. It is easy to lose track of where a round begins, especially for beginners, so this small tool prevents mistakes and confusion.
Do not overstuff the swan’s neck. A little flexibility gives it a natural curve, while too much stuffing makes it stiff and awkward-looking.
Experiment with sizes by using different yarn weights and hook sizes. Thicker yarn and larger hooks create bigger swans, while thinner yarn and smaller hooks produce delicate miniature versions.
Take your time sewing the parts together. Neatly stitched pieces give your swan a professional appearance and prevent parts from coming loose over time.
Lastly, have fun customizing your swan. Add a tiny crown, a colorful scarf, or even small flowers on the wings to give it personality and charm.
Creative Ways to Use Your Crochet Swan
Once you have completed the Swan amigurumi tutorial- Step by Step Tutorial, there are many creative ways to use your handmade swan. These ideas will help you make the most of your beautiful creation.
Use your swan as a decorative piece for your living room, bedroom, or nursery. Its elegant shape adds a touch of handmade beauty to any space.
Make several swans in different sizes and arrange them together as a family set. This creates a charming centerpiece for tables or shelves.
Attach a small loop to the top and turn your swan into a Christmas ornament. Handmade decorations always stand out and make the holidays more personal.
Gift your swan to friends or family. Handmade presents show care and thoughtfulness, making them more meaningful than store-bought items.
Use your swan as part of a baby mobile or crib decoration. Its soft texture and gentle shape make it a safe and adorable addition to a nursery.
Some crafters even sell their amigurumi creations online or at local markets. If you enjoy making swans, this hobby can become a small source of income.
FAQ About Swan Amigurumi Tutorial- Step by Step Tutorial
1. Is this tutorial beginner-friendly?
Yes, the Swan amigurumi tutorial- Step by Step Tutorial is perfect for beginners and uses basic stitches like single crochet, increase, and decrease.
2. How long does it take to complete a swan?
Depending on your experience, it usually takes 4–6 hours to finish one swan.
3. What yarn works best for this project?
Acrylic or cotton yarn is recommended because it is soft, easy to handle, and holds its shape well.
4. Can I customize the swan’s size and colors?
Absolutely! Using different yarn weights and colors lets you create unique swans in any style you like.
5. How do I clean a crochet swan?
Hand wash gently with mild soap and cold water, then air dry to maintain its shape and softness.
Conclusion
This Swan amigurumi tutorial- Step by Step Tutorial has guided you through every step of creating a graceful crochet swan, from gathering materials to assembling the final details.
We explored tips, creative uses, and customization ideas to make your swan truly unique.
Now it is your turn to try this project and see how enjoyable and relaxing amigurumi can be. Once you finish your swan, share your honest opinions and suggestions. We would love to hear your experiences and ideas for future tutorials!