
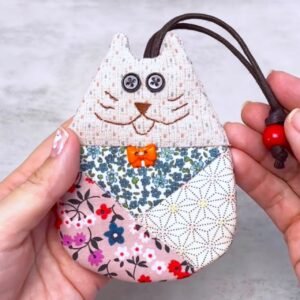
If you are looking for a fun and practical DIY project, this How to make a cute key cover 💗- Step by Step Tutorial is perfect for you. Making a key cover is not only a creative way to personalize your keys, but it also adds protection and makes them easier to identify. Whether you want to create a charming gift for a friend or a cute addition to your own key collection, this tutorial will guide you through the process from start to finish. With this How to make a cute key cover 💗- Step by Step Tutorial, you can turn simple keys into adorable accessories.
This article is designed for crafters of all skill levels, so even if you are a beginner, you will be able to follow the steps confidently. We will provide detailed explanations for each material, technique, and step so you can achieve the best results. By following the How to make a cute key cover 💗- Step by Step Tutorial, you will learn how to combine creativity with practical skills, creating a finished piece that is both functional and aesthetically pleasing.
Before we start with the actual instructions, it is important to gather all necessary materials. Having everything ready in advance makes the How to make a cute key cover 💗- Step by Step Tutorial smooth and enjoyable. From selecting the right yarn or fabric to choosing decorations, each element contributes to the charm and durability of the key cover. Keep reading to learn every detail.
Materials You Will Need
To begin this How to make a cute key cover 💗- Step by Step Tutorial, you need some basic materials. First, choose your main material. You can use yarn, fabric, or felt depending on the look you want. Soft and durable materials are ideal because they provide comfort when handling the key and prevent scratching surfaces.
Next, you will need a key as your template. This helps ensure that the cover fits perfectly. The How to make a cute key cover 💗- Step by Step Tutorial emphasizes measuring the key carefully before starting to avoid errors in size. Precision is key to creating a snug, functional cover.
You will also need a crochet hook or needle, depending on your chosen material. For yarn projects, a hook of the correct size is crucial to achieve even stitches. For fabric or felt, a sewing needle and thread are necessary. Following the How to make a cute key cover 💗- Step by Step Tutorial, you will see how these tools make the crafting process much easier.
Other essential items include scissors, stitch markers, and optionally glue for embellishments. These small tools help in finishing the cover neatly and professionally. The How to make a cute key cover 💗- Step by Step Tutorial encourages having all these on hand before starting.
Lastly, think about decorations such as buttons, beads, or small charms. The How to make a cute key cover 💗- Step by Step Tutorial provides suggestions for personalizing your key cover to make it truly unique and eye-catching.
Step-by-Step Instructions
The first step in the How to make a cute key cover 💗- Step by Step Tutorial is to create the base. This is usually done by forming a small pouch that fits over the key. If you are using yarn, start with a chain or magic ring and build the pouch with single or double crochet stitches. This forms a tight structure that will hold the key securely.
Next, shape the key cover to follow the contours of the key. The How to make a cute key cover 💗- Step by Step Tutorial shows how to measure and adjust as you go. Make sure the top and bottom sections are even, so the key slides in smoothly without being too tight or loose.
After the basic shape is ready, it’s time to work on the opening. Leave enough space for the key’s handle to stick out, or add a flap for easier access. The How to make a cute key cover 💗- Step by Step Tutorial explains how to ensure this opening is both practical and aesthetically pleasing.
Once the shape is perfect, you can move on to the decorative details. Add colors, patterns, or small embellishments as suggested in the How to make a cute key cover 💗- Step by Step Tutorial. Personal touches make your key cover stand out and reflect your creativity.
Finally, finish the key cover neatly by weaving in loose ends and reinforcing any weak spots. The How to make a cute key cover 💗- Step by Step Tutorial emphasizes the importance of finishing touches to make the product durable and long-lasting.
Tips and Tricks for Best Results
Following this How to make a cute key cover 💗- Step by Step Tutorial, you might encounter some challenges. One tip is to maintain consistent tension if you are using yarn. Uneven stitches can affect the shape and fit. Practicing a few swatches before starting your key cover can help.
Using stitch markers is another helpful technique. They help keep track of rounds and critical points. The How to make a cute key cover 💗- Step by Step Tutorial shows how markers can prevent mistakes and save time.
Experimenting with colors and textures can elevate your key cover design. The How to make a cute key cover 💗- Step by Step Tutorial encourages creative combinations that make your key cover unique. Mixing bright and neutral colors can create a playful or elegant look.
If using fabric, consider reinforcing the cover with interfacing. This adds structure and prevents stretching over time. The How to make a cute key cover 💗- Step by Step Tutorial explains how small adjustments like this improve durability.
Take breaks as needed. Crocheting or sewing small items can strain your hands. Following the How to make a cute key cover 💗- Step by Step Tutorial, enjoy the process and work at your own pace.
Remember, customization is key. Adding charms, buttons, or embroidery not only personalizes your key cover but also gives it character. The How to make a cute key cover 💗- Step by Step Tutorial encourages exploring all these options.
Decorating and Personalizing Your Key Cover
Once the base cover is complete, you can add decorations. The How to make a cute key cover 💗- Step by Step Tutorial suggests using tiny bows, beads, or embroidered designs to make the cover visually appealing. Personalization is what makes each key cover special.
Using themed colors for holidays or events is another great idea. Following the How to make a cute key cover 💗- Step by Step Tutorial, you could create seasonal designs like hearts for Valentine’s Day or pumpkins for Halloween.
Adding a small charm or tag with initials is also popular. The How to make a cute key cover 💗- Step by Step Tutorial shows that these tiny additions increase the cover’s charm and make it a perfect gift.
Consider combining different materials. For example, a crochet base with fabric appliqué can create a unique texture. The How to make a cute key cover 💗- Step by Step Tutorial highlights that experimenting with materials leads to creative results.
Using glitter or shiny thread can add sparkle, making the cover more eye-catching. Following the How to make a cute key cover 💗- Step by Step Tutorial, you can learn to add these effects without compromising durability.
Finally, always finish neatly. Weaving ends and securing decorations ensures that your key cover stays intact over time. The How to make a cute key cover 💗- Step by Step Tutorial emphasizes the importance of a professional finish.
FAQ About How to Make a Cute Key Cover 💗- Step by Step Tutorial
1. Is this tutorial suitable for beginners?
Yes, the How to make a cute key cover 💗- Step by Step Tutorial is designed with clear, step-by-step instructions suitable for all skill levels.
2. What materials can I use?
You can use yarn, fabric, felt, or any combination, as explained in the How to make a cute key cover 💗- Step by Step Tutorial.
3. How long does it take to make a key cover?
Depending on your experience, it can take between 30 minutes to a few hours.
4. Can I make different designs?
Absolutely! The How to make a cute key cover 💗- Step by Step Tutorial encourages personalization with colors, patterns, and decorations.
5. How do I ensure the key cover fits snugly?
Measure your key carefully and follow the step-by-step instructions in the How to make a cute key cover 💗- Step by Step Tutorial for a perfect fit.
6. Can these key covers be gifted?
Yes, they make charming, handmade gifts, as suggested in the How to make a cute key cover 💗- Step by Step Tutorial.
Conclusion
This article provided a complete guide on the How to make a cute key cover 💗- Step by Step Tutorial, covering materials, instructions, tips, and decoration ideas.
By following the steps carefully, you can create a functional and adorable key cover that is perfect for personal use or gifting.
We hope this tutorial inspires you to get creative and make your own unique designs. Please share your honest opinions and suggestions in the comments, as your feedback helps us bring more helpful tutorials like this one.