
If you’re looking for a festive and creative way to decorate your holiday table, this Easy Crochet Christmas Cutlery Holder Tutorial-Step by Step Tutorial is the perfect project to try. Handmade crochet decorations always bring a touch of warmth and personality to any event, and during Christmas, they make your setup even more special. A crochet cutlery holder is both functional and beautiful, providing an elegant place to display your forks, knives, and spoons while showcasing your crafting skills.
In this tutorial, we’ll guide you through the process of making your very own crochet Christmas cutlery holder, even if you’re a complete beginner. It’s an enjoyable and relaxing project that allows you to use your favorite yarn colors—reds, greens, whites, or even sparkly metallic threads—to match your Christmas décor. You can make several of these adorable cutlery holders to impress your guests or even gift them as part of a handmade holiday set.
Before we dive into the steps, it’s important to remember that this Easy Crochet Christmas Cutlery Holder Tutorial-Step by Step Tutorial focuses on simplicity and accessibility. You don’t need advanced crochet skills to create something stunning. With just basic stitches, a few materials, and a little creativity, you can produce a festive and reusable decoration that will become a part of your yearly Christmas tradition. Let’s explore how to make your table setting stand out with this lovely DIY idea.
Materials and Preparation
To start this Easy Crochet Christmas Cutlery Holder Tutorial-Step by Step Tutorial, gather the basic crochet tools and materials. You’ll need yarn, a crochet hook, scissors, and a yarn needle for finishing touches. Choose cotton or acrylic yarn depending on your desired texture and durability. Cotton gives a soft and natural feel, while acrylic provides sturdiness and vibrant colors.
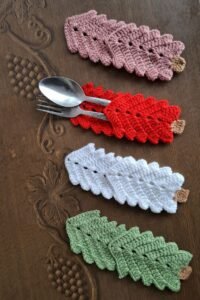
Pick classic Christmas colors such as red, green, white, or gold. Mixing two or three colors will add an extra festive charm. You can also use leftover yarn from previous projects, making this craft eco-friendly and budget-conscious.
Next, select a hook size that suits your yarn weight. Usually, a 3.5 mm to 4.5 mm hook works well for this project. A tighter stitch will create a neat look, perfect for holding cutlery without sagging. Make sure to have a comfortable workspace with good lighting so you can see your stitches clearly.
Before beginning the actual project, consider the shape and size you want for your cutlery holder. Some crafters prefer rectangular pockets, while others make small pouches with drawstrings or decorative buttons. The design possibilities are endless, allowing you to personalize each holder.
You may also want to prepare small embellishments like mini crochet stars, holly leaves, or bows to attach later. These tiny details can transform a simple design into something eye-catching and festive. Lastly, take a few minutes to practice your basic stitches, especially single crochet and half double crochet, as they form the foundation of this tutorial.
Now that you’re ready, it’s time to start creating your crochet Christmas cutlery holder and watch your handmade holiday decoration come to life.
Step-by-Step Instructions
In this section of the Easy Crochet Christmas Cutlery Holder Tutorial-Step by Step Tutorial, we’ll go through the process of crocheting the holder from start to finish. Begin by making a foundation chain according to your desired width—usually around 18 to 22 stitches. This will determine the width of your holder.
Once your chain is ready, work in rows using single crochet stitches. Continue until your piece measures about 8 to 10 inches in length. This rectangular base will later be folded to form the pocket for the cutlery. Keep your stitches even and consistent to ensure a clean and professional look.
When your base piece is done, fold the bottom portion upward to create the pocket where the utensils will be inserted. Leave about 3 inches of the upper part unstitched to serve as the flap. Sew or crochet along the sides to close the edges of the pocket. You can use slip stitches for a seamless finish or whipstitch for a visible, decorative edge.
To give your holder a Christmas touch, switch colors halfway through or add stripes of red and white to mimic a candy cane. You can also crochet a small border using contrasting yarn—gold or silver looks especially festive. These details make your piece unique and visually appealing.
For an optional embellishment, crochet a small Christmas tree or star applique and sew it onto the front of the holder. It’s a great way to personalize your creation and make it stand out. You could even embroider initials or tiny snowflakes for a more custom touch.
By the end of this step, your crochet Christmas cutlery holder will start taking shape beautifully. All that’s left are the finishing touches that will make it truly shine.
Adding Details and Finishing Touches
The magic of this Easy Crochet Christmas Cutlery Holder Tutorial-Step by Step Tutorial lies in the little details that make your craft stand out. After assembling your holder, you can enhance it with creative embellishments that match your Christmas theme.
One lovely addition is a crocheted bow or ribbon. Use metallic yarn or a shiny thread to tie around the holder for a festive sparkle. It not only keeps the cutlery in place but also adds a decorative touch that impresses guests.
Another idea is to crochet small shapes like stars, bells, snowflakes, or holly leaves and attach them with hot glue or thread. These handmade ornaments can be reused each year and even coordinated with your Christmas tree décor for a cohesive holiday look.
You can also personalize each cutlery holder with name tags. Crochet small circles or rectangles and embroider your guests’ initials. Attach them using a safety pin or stitch them onto the holder. This transforms your cutlery holders into place cards—an elegant touch for your holiday dinner.
For a rustic effect, use natural jute twine or wooden buttons as part of your design. These materials add warmth and texture, giving your piece a cozy handmade vibe. The combination of natural and festive elements enhances the Christmas atmosphere around the table.
Finally, make sure all yarn ends are neatly woven in with a tapestry needle. This step ensures that your holder looks clean and professional, ready to impress everyone at your festive gathering.
Creative Variations and Gift Ideas
A great thing about the Easy Crochet Christmas Cutlery Holder Tutorial-Step by Step Tutorial is its flexibility. Once you master the basic version, you can adapt it into various designs and themes. You can make holders shaped like stockings, mittens, or even Santa hats. Each version brings its own charm and adds variety to your table setting.
You might also want to create a set of matching items. For instance, you can crochet napkin rings or coasters that coordinate with your cutlery holders. This creates a beautifully unified holiday décor that looks thoughtful and inviting.
Beyond decorating your table, these crochet cutlery holders make fantastic handmade gifts. They’re small, quick to make, and perfect for friends and family who appreciate handmade crafts. Tie a ribbon around a set of them, and you’ve got a charming holiday present.
If you sell handmade items, these holders are also a great product idea for craft fairs or online shops. People love purchasing festive and practical handmade decorations, especially around Christmas. With unique colors and patterns, you can easily stand out.
You can even make themed sets for other holidays—Valentine’s Day, Easter, or Thanksgiving—by simply changing the colors and decorative elements. Crochet projects like this allow endless creativity, and every version reflects your personal touch.
Let your imagination guide you as you continue to explore this fun and rewarding crochet craft. Each new variation will help you refine your skills and bring joy to those who receive your creations.
Easy Crochet Christmas Cutlery Holder
1. Can beginners make this crochet cutlery holder?
Yes, absolutely. This project is ideal for beginners because it uses basic stitches like single crochet and slip stitch. The instructions are simple, and the final result looks impressive even for those new to crochet.
2. What type of yarn is best for this project?
Cotton yarn is highly recommended because it’s soft, durable, and easy to clean. However, acrylic yarn works well too, especially if you want vibrant colors that stand out during the holidays.
3. How long does it take to make one cutlery holder?
Depending on your skill level, one piece can be completed in about 45 minutes to an hour. Once you get used to the pattern, you can make multiple holders quickly for a complete table set.
4. Can I wash my crochet cutlery holder?
Yes, you can hand wash it gently with mild soap and cold water. Lay it flat to dry to maintain its shape and texture. Avoid machine drying to prevent stretching.
5. Can I customize the size of the holder?
Definitely. Simply adjust your foundation chain and row count according to your desired width and length. This flexibility makes it easy to adapt the pattern to different cutlery sizes.
6. Is it possible to add more decorations to the holder?
Of course. You can add beads, embroidery, or crochet appliques to make it more festive. Just make sure the embellishments are securely attached for safety and durability.
Conclusion
In this Easy Crochet Christmas Cutlery Holder Tutorial-Step by Step Tutorial, you learned how to create a festive and practical decoration for your holiday table. With just a few materials and basic crochet skills, you can design a charming holder that adds a handmade touch to your celebrations.
We explored how to prepare your materials, follow the step-by-step process, add finishing details, and even experiment with creative variations. Each handmade piece brings warmth and personality to your Christmas décor, making the season more meaningful.
Now it’s your turn to bring this idea to life. Gather your yarn, hook, and festive spirit, and start crocheting! Don’t forget to share your experience—leave a sincere opinion below and offer suggestions for future tutorials. Your feedback helps inspire more creative projects for everyone who loves crochet and the holiday spirit.