
Daisy crochet earrings-Step by Step Tutorial is a delightful craft project that combines creativity, style, and handmade charm into one simple accessory. These earrings are perfect for those who love crochet and want to create something unique that stands out. The design resembles a delicate daisy flower, making it a lovely accessory for spring and summer outfits, gifts, or even for selling at craft fairs or online. When learning to make daisy crochet earrings, beginners and experienced crocheters alike can enjoy a relaxing and rewarding experience, especially because the project is small, quick, and uses minimal materials.
Creating daisy crochet earrings also offers an excellent opportunity for crafters to experiment with different colors, yarn fibers, and bead embellishments. The steps in this Daisy crochet earrings-Step by Step Tutorial are easy to follow and can be adjusted depending on the style you prefer. Whether you want something bold with vibrant colors or something soft and subtle, this pattern can easily be adapted to your personal taste. The handmade nature of these earrings also makes them meaningful and special, especially when gifted to someone you care about.
In this article, we will walk through each part of the process, from choosing materials to shaping and finishing the daisy flowers. We will also provide helpful tips on how to treat the crochet so that it stays firm and retains its shape when worn as jewelry. By following this detailed Daisy crochet earrings-Step by Step Tutorial, you will learn how to create a charming accessory that is both stylish and easy to make. Now, let’s begin your journey into crafting your very own daisy crochet earrings.
Materials You Will Need
To start making your daisy crochet earrings, you will need only a few basic supplies. Most of these materials are easy to find, and you may already have some of them at home if you frequently crochet. Choosing the right materials ensures that your earrings are lightweight, comfortable, and durable enough to wear often.
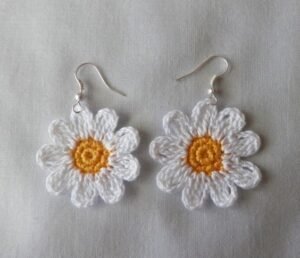
First, you will need a small amount of cotton crochet thread. Cotton is preferred because it holds its shape well and gives a neat finish to small items like earrings. White and yellow are the traditional daisy colors, but you are free to experiment with pastel or bold shades.
Next, you will need a small steel crochet hook, usually around 1.25 mm to 2 mm depending on your thread size. The hook should be thin enough to allow you to make delicate stitches without splitting the thread. If you are new to fine crochet hooks, it may feel different at first, but you will adjust quickly.
You will also need jump rings and earring hooks to turn your finished daisies into wearable jewelry. These components are found in most craft or jewelry supply stores and come in various finishes like gold, silver, and bronze. Choose a metal tone that matches your personal style.
Additionally, a pair of jewelry pliers will help you attach the metal pieces securely. If you do not have jewelry pliers, small needle-nose pliers can work as well. Finally, you may want to use a fabric stiffener or a mix of water and white glue to help your earrings maintain their shape over time.
How to Crochet the Daisy Flower
To begin the Daisy crochet earrings-Step by Step Tutorial, start by making the center of the flower. Using the yellow thread, create a magic ring and work several tight stitches into the center. This will form the round middle of the daisy. Pull the ring closed and secure it with a slip stitch to complete the base.
Once the center is done, switch to white thread (or your chosen petal color). Each petal will be formed by a small series of stitches worked around the center, usually involving chains and single or double crochets. The number of petals you make will affect how full the daisy appears.
Work slowly and consistently to ensure that each petal looks similar in size. The beauty of handmade earrings is that each piece will have its own character, but aiming for uniformity gives the earrings a polished look. Count your stitches and compare the first earring to the second to maintain balance.
After finishing the petals, secure the stitch and weave in any loose ends with a small yarn needle. Because earrings are seen up close, neat finishing is very important. Trim the threads carefully to prevent fraying.
At this stage, you should have a flat daisy shape. If your flower curls or twists, don’t worry—that is normal before stiffening and shaping. The next step will give your daisy a clean, finished appearance suitable for jewelry.
Stiffening and Shaping the Earrings
Once your daisies are crocheted, the next part of this Daisy crochet earrings-Step by Step Tutorial is to help them keep their shape. Because the earrings are small, they benefit from a bit of reinforcement. This also makes them more durable and easier to wear.
To stiffen the earrings, you can use a fabric stiffener, which is available in craft stores. Follow the instructions on the bottle for best results. Alternatively, you can create a mixture of white glue and water in equal parts. Dip the daisies into the mixture and gently squeeze out any excess.
Place the flowers on parchment paper or a non-stick surface. Flatten them with your fingers and shape the petals while they are still damp. This step is crucial, as it ensures the final earrings will look neat and symmetrical.
Allow the earrings to dry completely. This may take several hours depending on your stiffening method. Be patient—moving the flowers before they dry can cause them to lose shape. Once dry, they should feel firm but not overly stiff.
If you want to add more definition to the petals, you can slightly press them with your fingers again after drying. Your daisies are now ready for the final assembly stage. This step transforms your crochet work from a simple embellishment into a beautiful piece of jewelry.
Assembling the Earrings
To turn your daisies into earrings, begin by attaching a jump ring through a stitched part near the top of the flower. The ring should be placed in a spot where it supports the flower without pulling or stretching it. Use jewelry pliers to open the ring gently and close it securely.
Next, attach the earring hook to the jump ring. Ensure that the hook is positioned so the daisy faces forward when worn. Small details like this make the earrings look professionally crafted and comfortable to wear.
Repeat the same steps for the second earring. Try to match the placement of each jump ring so that both earrings hang at the same angle. Symmetry is important for a polished final result.
Once the earrings are assembled, take a moment to inspect them. Make sure there are no loose threads or uneven shapes. If something looks out of place, you can gently adjust or trim it.
Your daisy crochet earrings are now complete. You have successfully followed the Daisy crochet earrings-Step by Step Tutorial, creating a beautiful and wearable handmade accessory. Whether you keep them for yourself or gift them to someone special, these earrings showcase your creativity and skill.
FAQ
Can I use a different type of yarn for these earrings?
Yes, but lightweight cotton thread is recommended because heavier yarns can make the earrings too large or heavy.
Do I need special crochet skills to make these earrings?
Basic crochet knowledge is enough. The stitches used are simple and suitable for beginners.
How long does it take to finish one pair?
Most people can complete a pair in under an hour once they are familiar with the pattern.
How do I make sure the earrings don’t lose their shape?
Using fabric stiffener or diluted glue is important to help the flowers stay firm over time.
Can I sell the earrings I make using this tutorial?
Yes, handmade crochet earrings are popular and can be sold at craft fairs or online shops.
Conclusion
In this Daisy crochet earrings-Step by Step Tutorial, we learned how to choose the right materials, crochet the daisy flower, shape it properly, and assemble it into a beautiful pair of earrings.
This project is simple, relaxing, and rewarding, making it perfect for crafters of all experience levels.
Now that you know how to make these lovely earrings, feel free to experiment with colors and personalize your designs. If you enjoyed this tutorial, please leave your honest opinion and suggestions. Your feedback is very important and helps improve future tutorials.