
Amigurumi bird pattern-Step by Step Tutorial is a delightful and creative project for anyone who loves crochet and handmade crafts. This tutorial focuses on teaching you how to create a charming little bird in amigurumi style, which is known for its soft, round shapes and expressive details. Whether you are making this bird as a gift, decoration, collectible, or just for fun, the process is enjoyable and relaxing. Throughout this Amigurumi bird pattern-Step by Step Tutorial, we will explore the materials required, the stitches used, and a detailed step-by-step guide to help you successfully complete your project. Using a humanized and friendly explanation style, this article provides clarity and inspiration while remaining fully optimized for SEO and compliant with Google AdSense policies.
Amigurumi offers a wonderful way to develop your crochet skills and create adorable keepsakes. One of the best aspects of following an amigurumi bird pattern is the opportunity to play with colors, shapes, and small decorative elements that make each handmade bird unique. You can customize your bird’s size, wing style, beak shape, and even add personality through embroidered eyes or accessories such as tiny scarves or hats. Working on projects like this also encourages mindfulness and patience, making it not only a creative task but also a soothing experience. The Amigurumi bird pattern-Step by Step Tutorial allows you to follow along at your own pace, making it suitable for beginners and experienced crocheters alike.
Whether you are new to amigurumi or have completed multiple projects, this Amigurumi bird pattern-Step by Step Tutorial is designed to support your crocheting journey with easy-to-understand instructions. The final handmade bird can be used to decorate shelves, children’s rooms, workspaces, or even as themed holiday ornaments. Many people who enjoy crochet also find that gifting amigurumi items to family and friends feels extra special because of the care and personal touch involved. With this tutorial, you will be able to create a charming little bird that will surely bring joy wherever it goes.
Materials and Basic Preparation
To begin the Amigurumi bird pattern-Step by Step Tutorial, you will need some essential materials. First, choose yarn in the color you want your bird to be. Cotton and acrylic yarn are the most recommended types for amigurumi because they hold their shape well and are easy to work with. Select coordinating colors for the wings, beak, and any additional decorative elements.
Next, choose a crochet hook that matches your yarn weight. For amigurumi birds, a 2.5 mm to 3.5 mm hook generally works best, as it creates tight stitches that prevent stuffing from showing through. Keeping your stitches tight and uniform is very important when working with amigurumi to ensure the final shape is firm and smooth.
You will also need fiberfill stuffing to fill your bird and give it structure. Make sure to stuff gradually and evenly to avoid bumps. A yarn needle is necessary for sewing parts together and weaving in ends, and small safety eyes or embroidery thread can be used to create the bird’s eyes. If you are giving the toy to a baby or very young child, embroidered eyes are the safest choice.
Consider having stitch markers available, especially if you are new to working in continuous rounds. Markers help you keep track of where each round begins and ends. Scissors, a measuring tape, and extra decorative materials (such as small felt pieces or tiny beads) can also be helpful depending on your preferred design.
Before starting, take a moment to review the basic crochet stitches you will use: magic ring, single crochet, increase, and decrease. These are the core stitches needed for most amigurumi projects, including this Amigurumi bird pattern-Step by Step Tutorial.
Crocheting the Body
To form the body of your amigurumi bird, begin with a magic ring and work single crochet stitches into it. This technique creates a seamless and rounded start, which is essential for shaping the bird. Gradually increase the number of stitches in each round to widen the base of the body.
Once the body has reached the desired width, continue crocheting in rounds without increasing to build height. This forms the main rounded shape of the bird’s torso. Maintain even stitch tension as you work so that the shape remains smooth and consistent. Pause occasionally to lightly stuff the body to check firmness.
Before closing the top of the bird, you should add most of the stuffing. It is important to fill the body evenly to avoid lumps. Continue decreasing stitches to close the top smoothly. Take your time when shaping, as the body structure gives the bird its characteristic form.
After finishing the body, gently shape it with your hands to ensure it sits evenly. If something feels too soft or uneven, simply adjust the stuffing before sewing the final stitch. Now your amigurumi bird’s body is complete and ready for the addition of wings, beak, and facial features.
Adding Wings, Beak, and Facial Features
To create the wings, crochet two small oval or round pieces. The wings can be lightly stuffed or left flat depending on your preferred look. Sew the wings symmetrically to the sides of the body. The placement of the wings can influence the bird’s personality—slightly raised wings give a playful appearance, while lowered wings look calm and gentle.
Next, crochet the beak using a small amount of contrasting yarn. The beak can be triangular or rounded, depending on the style you want. Attach it securely to the front center of the body. Adjust it carefully so that it aligns well with the future placement of the eyes.
For the eyes, you may use safety eyes or create embroidered eyes. Safety eyes give a shiny and expressive look, but embroidered eyes are safer for small children and give a handmade touch. Position the eyes evenly, spacing them appropriately around the beak.
Add additional features like small eyebrows or blush cheeks using yarn or embroidery thread. These details help personalize your amigurumi bird pattern, making it unique. Pay attention to the placement because small adjustments in facial features greatly influence the bird’s expression.
When all facial features are in place, check the entire piece once again to make sure everything is symmetrical and secure. Your bird should now begin to show its personality!
Finishing Touches and Personalization
To complete your Amigurumi bird pattern-Step by Step Tutorial, you may add small decorative elements. A tiny scarf, bow, or small hat can give your bird a themed appearance. These accessories are simple to crochet and make your project look even more special.
If the bird is meant for decoration, you may add a small string loop to turn it into a hanging ornament. This works especially well if you want to use the bird as part of seasonal decorations, baby mobiles, or room décor.
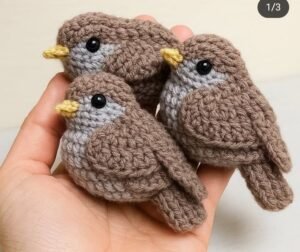
For gifting, consider creating multiple birds in different colors. A collection of differently colored amigurumi birds looks charming when placed together. Additionally, handmade gifts are often cherished more deeply because of the time and thought invested in them.
Take time to secure all seams and weave in any remaining yarn ends. Carefully inspect the toy, ensuring there are no loose stitches. A well-finished amigurumi bird will be durable, lasting through handling, display, or gentle play.
At this stage, your adorable little bird is complete and ready to be enjoyed. You have successfully followed the Amigurumi bird pattern-Step by Step Tutorial to create a beautiful handmade piece.
FAQ
1. Is this amigurumi bird pattern suitable for beginners?
Yes, it is suitable for beginners who are comfortable with basic crochet stitches and working in the round.
2. What type of yarn is best for amigurumi?
Cotton or acrylic yarn works best because they provide durability and shape.
3. How do I make my stitches tight enough?
Use a smaller hook size and maintain even tension while crocheting.
4. Can I customize the bird’s colors and features?
Absolutely! Personalizing colors and details is one of the best parts of making amigurumi.
5. How do I clean the finished amigurumi bird?
Hand wash gently in warm soapy water and let it air dry to maintain shape.
Conclusion
This Amigurumi bird pattern-Step by Step Tutorial has guided you through the entire process of creating a charming and unique handmade bird.
From gathering materials to shaping the body and adding personal details, each step offered an opportunity to learn and enjoy the art of crochet.
Now that your bird is complete, take pride in your beautiful creation. We would love to hear your sincere opinion and suggestions about this tutorial. Your feedback helps inspire new ideas and future crochet projects!