
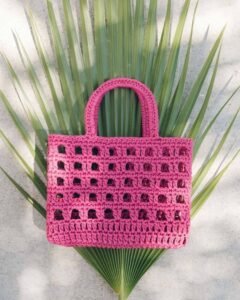
Miniature crocheted bag-Step by Step Tutorial is a delightful and creative project for crochet lovers who enjoy making small accessories with personality. This type of miniature bag can be used as a keychain, a decorative charm for larger bags, or even as a small gift to friends and family. Throughout this article, we will explore a clear and humanized explanation, ensuring that even beginners can follow along comfortably. We will also highlight the important keywords and maintain SEO optimization while providing a detailed and structured guide.
Creating a miniature crocheted bag is not only fun but also useful for practicing important crochet techniques, especially for those who want to work on tighter stitching and shaping skills. These tiny projects are also excellent for using leftover yarn, allowing you to craft something adorable without needing to buy a lot of materials. The Miniature crocheted bag-Step by Step Tutorial ensures that crafters of all skill levels feel supported and confident throughout the process.
This tutorial is especially enjoyable during leisure time because it does not require many tools or complex steps. Once you understand the rhythm, you can make several of these small bags quickly, and even create themed collections. Some people like to make them in seasonal colors, gift them as teacher appreciation tokens, or use them as accessories for dolls. With this Miniature crocheted bag-Step by Step Tutorial, the possibilities are endless, and creativity is fully encouraged.
Materials Needed for the Miniature Crocheted Bag
First, gather all the tools and materials before starting the project. Having everything prepared makes the crocheting process smoother and more enjoyable. You will need yarn, a crochet hook, scissors, and a yarn needle. Choose a yarn thickness that is easy to work with and comfortable to handle, especially if you are a beginner.
Make sure to select a crochet hook size that matches your yarn. For miniature projects, smaller hooks help create tighter stitches, giving the bag a neat and well-defined structure. You may also want to include a small metal keychain ring if you plan to turn your bag into a charm.
If desired, embellishments can be added, such as small beads, buttons, or tiny bows. These details will enhance the personality of your miniature crocheted bag and help it stand out. Feel free to experiment with different textures and colors to make each piece unique.
If your intention is to practice the Miniature crocheted bag-Step by Step Tutorial several times, keep a small container or pouch for your leftover yarn bits. These scraps often work perfectly for miniature items and prevent unnecessary waste.
Before beginning, make yourself comfortable. Good lighting and a relaxed space are important for enjoyable crochet. Remember, this process should be calming and creative, not rushed or stressful.
How to Start the Base of the Miniature Bag
To start the miniature crocheted bag, you will usually begin with a chain foundation. The number of chains will determine the width of your bag, so keep in mind how small or large you want your final result to be. A common starting point is around 6 to 12 chains, depending on the yarn and hook size.
Once the chain foundation is ready, you will work single crochet stitches along the length of the chain. This creates a sturdy base. When you reach the end, you continue working around the other side of the chain to form a loop. This technique helps shape the bottom of the bag.
After forming the base, the body of the bag is built by crocheting in rounds. This means you continue creating rows of stitches without turning your work. Crocheting in a spiral pattern keeps the bag seamless and neat. At this stage, you can start to see the miniature bag take shape.
As you work through the rounds, maintain a consistent tension. Uneven tension can cause the bag to look bumpy or loose. If needed, practice on a scrap piece first to feel more confident. The Miniature crocheted bag-Step by Step Tutorial does not require advanced skills, but comfort with single crochet stitches is helpful.
Continue adding rounds until the bag reaches the height you want. Some people prefer a slightly taller bag, while others like a tiny pouch look. This step is customizable, allowing you to personalize the project.
When the body of the bag is completed, prepare to make the finishing touches. The next steps include creating handles, adding decoration, or attaching the keychain accessory depending on your final goal.
Creating the Handles and Finishing the Bag
At this stage of the Miniature crocheted bag-Step by Step Tutorial, the bag body should be complete. Now, it is time to make the handles. The handles are usually created by chaining a few stitches and then attaching them to the opposite side of the bag. This creates a cute miniature strap.
Measure carefully where to place the handles so they look symmetrical. You may count stitches around the top opening to find the best position. This ensures the final result looks polished and neat. If you prefer a shorter handle, chain fewer stitches. For a longer handle, chain more.
Once the straps are attached, use a yarn needle to weave in any loose ends. This step is essential for a clean finish. Weaving ends properly also prevents unraveling over time.
If you want to turn the miniature bag into a keychain, simply attach the key ring to the strap. This adds both function and charm to the piece. Many people love using these miniature bags as accessories for backpacks, tote bags, and purses.
Now comes the fun part: decorations. You may add tiny bows, beads, embroidery details, or even small appliqués to personalize the miniature bag. Each detail adds character and uniqueness.
Finally, examine your finished miniature crocheted bag. Admire your work and feel proud of the creativity and patience involved in making something handmade and special.
Tips, Variations, and Creative Inspiration
This Miniature crocheted bag-Step by Step Tutorial is highly versatile, meaning you can make endless variations of the basic design. Try experimenting with different yarn colors and textures to give the miniature bag different personalities.
Use pastel colors for a soft and delicate look. Choose vibrant tones for a playful and eye-catching style. Neutral shades are perfect for elegant or classic themes. The color combinations are limitless, so let your creativity guide the process.
You can also vary the stitch pattern. Instead of single crochet, try adding textured stitches like half-double crochet or puff stitches. This will give the bag a unique appearance and add dimension. Exploring stitch variations is a great way to grow your crochet skills.
These miniature bags also make thoughtful gifts. You can make sets for holidays, birthdays, party favors, or school teacher gifts. Because they are small, they can be made quickly, but the handmade effort makes them meaningful.
If you enjoy crafting, consider creating seasonal collections. For example, create miniature bags with Christmas colors, pastel spring shades, or autumn-toned yarns. This turns your craft into a joyful ongoing hobby.
Finally, share your creations with others. Whether you gift, sell, or display them, handmade items bring happiness and appreciation for the art of crochet.
FAQ
1. Can beginners follow this Miniature crocheted bag-Step by Step Tutorial?
Yes, beginners can follow this tutorial. The stitches required are basic, and the project is small, making it manageable for new crocheters.
2. What type of yarn works best for miniature bags?
Cotton yarn is a popular choice because it holds shape well, but any lightweight yarn can work. Avoid overly stretchy yarns.
3. How long does it take to make one miniature bag?
Most crocheters can complete one bag in about 30 minutes to 1 hour, depending on experience level.
4. Can I make the miniature bag larger?
Yes. Simply increase the number of chains at the beginning and add more rounds to the body.
5. What can I use the miniature bag for?
You can use it as a keychain, a decorative charm, a gift accessory, or even as an accessory for dolls.
Conclusion
In this Miniature crocheted bag-Step by Step Tutorial, we learned how to gather materials, create the base, shape the body, form the handles, and add personalized finishing touches.
This project is enjoyable, creative, and accessible to crocheters at all levels. These miniature bags are charming, useful, and make heartfelt handmade gifts.
If you enjoyed this tutorial, please leave your honest opinion and any suggestions. Your feedback helps inspire future creative ideas!