
Creating a festive atmosphere at home is even more special when you include handmade pieces, and this Crocheted Christmas tree for decoration-Step by Step Tutorial offers a creative way to bring warmth and charm to your holiday celebrations. Whether you enjoy decorating your home with traditional pieces or want to explore modern handmade ornaments, a crocheted Christmas tree is a beautiful addition that showcases your crafting skills. This project is ideal for beginners and experienced crafters alike, allowing you to personalize your décor with colors, textures, and creative details that make your homemade tree stand out.
When making this Crocheted Christmas tree for decoration-Step by Step Tutorial, you will discover how easy it is to transform simple yarn into a stunning decorative piece that brightens your home. Handmade trees can be placed on tables, shelves, desks, or incorporated into a decorative Christmas village. They can also be given as thoughtful gifts, offering friends and family something meaningful and unique. This project combines creativity, relaxation, and practicality, making it one of the most delightful holiday crafts you can create.
Another wonderful aspect of this Crocheted Christmas tree for decoration-Step by Step Tutorial is how customizable it is. You can choose traditional green yarn for a classic look or experiment with snowy whites, metallics, or pastels for a more modern style. You can crochet a minimalist tree or decorate it with beads, small ornaments, and even tiny lights. No matter which design you choose, your crocheted tree will become a cherished decoration you can use year after year. Below, you will learn all the steps, tips, and ideas needed to create a beautiful and festive crochet tree.
Choosing Materials for the Crocheted Christmas Tree
When following this Crocheted Christmas tree for decoration-Step by Step Tutorial, selecting the right materials is essential to ensure the tree looks structured and polished. One of the most important decisions is choosing the right yarn. Acrylic yarn is often preferred because it holds its shape well and is available in many festive shades. Cotton yarn, on the other hand, creates a clean stitch definition, giving your tree a crisp and elegant finish.
You will also need to choose an appropriate hook size to achieve firm and even stitches. A smaller hook creates tighter stitches, helping the tree maintain its shape. Depending on your yarn thickness, hooks between 2.5 mm and 4 mm usually work well. If you want a sturdier tree, opt for a smaller hook than the yarn label recommends. This helps keep the structure firm and prevents gaps.
To ensure your tree stands properly, you may use stuffing or a cone-shaped base. Stuffing gives the tree a soft look, while a foam or cardboard cone creates a firmer, taller structure. Both options work well, so you can choose whichever one best suits your design preference. If you use stuffing, make sure your stitches are tight enough that the filling does not show through.
Gather additional supplies such as scissors, a yarn needle for weaving in ends, and optional decorative items. These can include beads, stars, pom-poms, pearls, sequins, ribbons, or miniature ornaments. These embellishments allow you to personalize your tree and make it more festive. You can also crochet small decorations such as tiny stars, snowflakes, or garlands.
Before beginning, prepare a comfortable workspace with good lighting. Having everything organized makes the crocheting process smoother and more enjoyable. As you gather your materials, imagine the final look of your tree and choose items that help bring your creative vision to life. With everything ready, you can begin crafting a beautiful handmade decoration that captures the magic of the holiday season.
Step-by-Step Instructions to Crochet the Tree
To begin the Crocheted Christmas tree for decoration-Step by Step Tutorial, start by creating a magic ring. This foundation technique is ideal because it allows you to crochet tightly in the round, creating a firm base for the tree. After forming the ring, you will work several rounds of single crochet stitches, slowly increasing the stitch count to widen the base. Maintaining even tension is important so the bottom remains flat and balanced.
As you continue crocheting each round, the tree will gradually take on a cone shape. You achieve this by alternating rounds of increases with rounds of single crochet stitches. This gentle slope is what gives the tree its signature Christmas-tree silhouette. Take your time to keep the stitches consistent, as small inconsistencies become more noticeable in conical shapes.
Once you reach the desired width of the base, you will begin shaping the body of the tree. From this point forward, the number of increases becomes smaller, helping the tree narrow as it grows taller. You can adjust the height and width of your tree depending on how large you want the final piece to be. Whether you prefer a short and wide tree or a tall and slender one, this pattern can be easily adapted.
As you crochet upward, consider adding rows of textured stitches for a more detailed and decorative appearance. Shell stitches, picots, or puff stitches can create a layered effect that mimics tree branches. These textures add charm and visual interest, making your tree look intricate without requiring advanced techniques. Experimenting with different stitch patterns lets you create a unique and personalized design.
When you reach the top of the tree, decrease gradually until the cone closes neatly. Use a yarn needle to sew the final opening securely. At this stage, you can decide whether to stuff the tree or place it over a cone base. Stuffing gives a soft and cozy appearance, while a solid base offers stability. Both methods work well and contribute to a polished look.
After completing the tree’s structure, take a moment to shape it gently with your hands. Straighten any uneven areas and adjust the stuffing if needed. You now have a clean and well-crafted crochet tree that is ready for decorating. The next steps will help you bring your tree to life with festive details and creative embellishments.
Decorating Your Crocheted Christmas Tree
One of the most enjoyable parts of this Crocheted Christmas tree for decoration-Step by Step Tutorial is decorating the finished tree. You can keep it simple or add as many festive elements as you like. A popular option is to crochet a tiny star to place at the top. This adds a traditional and charming focal point that completes the design.
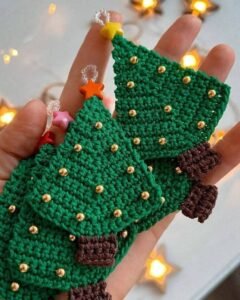
Adding small beads or pearls can create the effect of miniature Christmas ornaments. Sew them onto different parts of the tree to distribute color and shine evenly. These tiny embellishments add elegance and sparkle, making the tree stand out when displayed in your holiday décor. Choose colors that complement your yarn for a harmonious look.
For a playful style, attach tiny pom-poms or mini yarn balls. These give your tree a cheerful and whimsical appearance that children love. You can create a multicolored pom-pom garland or place individual pom-poms throughout the branches. This decoration style is ideal for more casual or colorful holiday themes.
Crocheting small garlands is another great way to personalize your tree. Use thin yarn or embroidery thread to create chains in contrasting colors. Wrap these chains gently around the tree to mimic decorative holiday garlands. You can even add metallic thread for extra shine and texture.
If you prefer a snowy winter look, lightly brush white yarn over the tree or use a white or silver thread to add small accents. This creates the illusion of snow-covered branches, giving your tree a magical and serene atmosphere. Small embroidered snowflakes also add a lovely seasonal touch.
Don’t forget to finish your tree with a sturdy base or stand. You can crochet a circular stand, attach the tree to a small wooden disk, or leave it free-standing if the shape is stable enough. A solid base adds professionalism and ensures your tree stays upright when displayed.
Helpful Tips and Adjustments for Beginners
If this is your first time attempting a Crocheted Christmas tree for decoration-Step by Step Tutorial, don’t worry—the process is beginner-friendly and easy to adapt. One helpful tip is to practice crocheting in the round before starting the tree. Working in continuous rounds takes a little practice, but once you get used to it, the project becomes much smoother.
Keeping track of your stitch count is essential. Because the tree shape relies on controlled increases, missing or adding stitches accidentally can affect the final shape. Using stitch markers makes it much easier to keep your rounds accurate and consistent, especially for beginners.
If you find your tree leaning or becoming uneven, stop and adjust your stitches or tension. Uneven tension is common for new crocheters, but it improves with practice. Don’t hesitate to unravel a few stitches and redo them—crochet is very forgiving, and even experienced crafters do this regularly.
Try experimenting with different yarns if you feel unsatisfied with your first attempt. Every yarn produces a slightly different texture and structure. A firmer yarn will create a more defined shape, while a softer yarn will make the tree look fluffier and more relaxed. Testing different combinations helps you discover what style you enjoy most.
Adding texture through decorative stitches can make your tree look more professional. Simple variations like alternating single and double crochet or adding small bobbles give the impression of layered branches. These textures not only improve the visual appeal but also help the tree hold its shape better.
Above all, enjoy the creative journey. Making a crocheted Christmas tree is a relaxing and festive activity that sparks inspiration. Each tree you create will become a unique handmade decoration filled with holiday spirit and personal creativity.
FAQ About Crocheted Christmas Trees for Decoration
Are crocheted Christmas trees easy for beginners?
Yes, this project is beginner-friendly, especially with simple stitches and a basic cone shape.
What yarn works best for crocheted Christmas trees?
Acrylic or cotton yarn works well because they hold shape and offer good stitch definition.
Should I stuff the tree or use a cone base?
Both options work. Stuffing makes it soft; a base makes it more structured.
Can I decorate the tree after finishing it?
Absolutely. You can add beads, stars, pom-poms, or mini garlands.
How tall can my crocheted Christmas tree be?
You can create any size—from small table-top pieces to larger decorative trees.
Can I gift crocheted Christmas trees?
Yes, they make meaningful handmade gifts for family and friends during the holidays.
Conclusion
This Crocheted Christmas tree for decoration-Step by Step Tutorial has guided you through choosing materials, crocheting the tree structure, and decorating it with festive charm.
By combining creativity with simple crochet techniques, you can produce a unique handmade decoration that brings joy to your holiday celebrations.
I hope this tutorial inspires you to create your own beautiful crochet trees and explore even more creative ideas. Please leave your sincere opinion and share suggestions for future tutorials—your feedback makes this crafting journey even more special.