
Creating a Beautiful crochet flower-Step by Step Tutorial is one of the most enjoyable and relaxing projects for crochet lovers. Right from the first stitch, this pattern invites you into a world of creativity, color, and texture. Crochet flowers are versatile, timeless, and suitable for all skill levels, making them a perfect option for beginners and experienced crocheters alike. In this article, we will use the expression Beautiful crochet flower-Step by Step Tutorial throughout the text to help you follow every part of the process clearly and to improve SEO performance. These flowers can be used to decorate clothes, hats, hair accessories, blankets, bags, and even home décor pieces.
One of the best things about making a Beautiful crochet flower-Step by Step Tutorial is the freedom you have when choosing colors, yarn types, and sizes. Whether you want something delicate and pastel or something bold and eye-catching, your flower can reflect your personal style. Each petal, each loop, and each stitch carries your creativity and becomes part of a beautiful handmade work. Even though this tutorial will guide you through a simple structure, you can personalize your flower during every step. This combination of guidance and creative freedom is what makes crochet flowers so loved around the world.
Before we begin working through the Beautiful crochet flower-Step by Step Tutorial, it is important to understand that this project does not require advanced skills or special tools. With just yarn, a hook, and a little patience, you can create a stunning flower that looks professional and charming. In the next sections, you will find detailed instructions, small tips to improve your technique, and suggestions for customizing your flower. Whether your goal is to decorate a project or simply enjoy a relaxing crochet moment, this tutorial will help you achieve a beautiful result.
Choosing the Right Materials for Your Beautiful Crochet Flower
The first step in the Beautiful crochet flower-Step by Step Tutorial is selecting your materials. Choosing the right yarn makes a big difference in the final appearance of your flower. Cotton yarn is often the favorite because it gives the flower structure and clarity, but acrylic yarn can also create a soft and charming result. The thickness of the yarn will determine the size of your flower, so select a yarn that matches the look you want.
Another important element in this Beautiful crochet flower-Step by Step Tutorial is your crochet hook. Using the hook size recommended for your yarn helps you achieve a neat and even stitch. A smaller hook creates tighter stitches and a more compact flower, while a larger hook results in a softer, looser effect. Beginners often prefer medium hook sizes because they are easier to handle.
Color selection also plays an essential role. A Beautiful crochet flower-Step by Step Tutorial gives you unlimited possibilities. You can make a flower with a single color or mix shades for a more detailed and layered effect. Bright colors make the flower stand out, while soft colors create a delicate, elegant look. Try experimenting with combinations to find what inspires you.
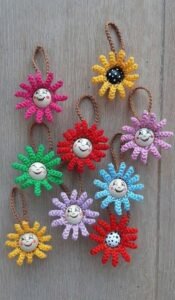
You may also want to include additional materials such as beads for the center or embroidery thread for decoration. These optional details add personality to your flower. Many crafters enjoy adding a small button in the middle for extra charm. Small touches like these can make your Beautiful crochet flower-Step by Step Tutorial even more unique.
Good lighting and a comfortable workspace are also essential. Having your tools organized and easily accessible makes the entire process more pleasant. It helps you focus on your stitches and maintain accuracy. These small preparations greatly contribute to a smooth crocheting experience.
With your yarn, hook, and workspace ready, you can now begin the creative journey of making your flower. The next steps will take you from the basic center to the beautifully shaped petals.
Creating the Center of the Beautiful Crochet Flower
The center is the foundation of the Beautiful crochet flower-Step by Step Tutorial, and it determines the flower’s stability and shape. Most crochet flowers begin with a magic ring or a small chain circle. This circle becomes the base for working single crochet or double crochet stitches that form the middle of the flower. If you are new to crochet, the magic ring may feel challenging at first, but it creates a neat and adjustable center.
Once the ring is ready, you will fill it with stitches. The number of stitches varies depending on the size of flower you want, but usually between six and ten stitches create a nice base. In this stage of the Beautiful crochet flower-Step by Step Tutorial, make sure your stitches are tight enough to avoid gaps but not so tight that the ring becomes difficult to close. A balanced stitch tension leads to a crisp, professional finish.
After completing the center stitches, pull the ring closed and join with a slip stitch. Your flower center should form a small, even circle. This circle is the anchor for the petals that you will build in the next steps. Make sure to weave in the tail of your yarn securely, as this keeps your flower strong and prevents the center from loosening.
Some variations of the Beautiful crochet flower-Step by Step Tutorial add an extra round around the center. This extra round can provide texture or color contrast. For example, you may switch yarn colors to highlight the center. Another option is to add back-loop-only rounds to give more dimension to your petals later.
Once the center is ready, take a moment to examine your stitches. A clean, round base ensures your petals will look symmetrical. If your center looks uneven, gently adjust the stitches with your hook. Small corrections at this stage result in a better final flower.
Now that the foundation is complete, you are ready to create the petals—the part of the flower that gives it beauty, softness, and character. This is the most fun and creative stage of the Beautiful crochet flower-Step by Step Tutorial.
Shaping the Petals Step by Step
Shaping the petals is the highlight of the Beautiful crochet flower-Step by Step Tutorial. Petals can be made in many ways, but a popular method is working several stitches into one base stitch to form each petal. This technique gives the flower volume and a natural, curved shape. You can use double crochet, half-double crochet, or treble crochet depending on your desired style.
Begin by choosing how many petals you want your flower to have. Most flowers have between five and eight petals. Insert your hook into the first stitch of the center and work a sequence such as: single crochet, half-double crochet, double crochet, half-double crochet, single crochet. This sequence creates a rounded petal. Repeat this same pattern around the center. Each repetition forms one petal in this Beautiful crochet flower-Step by Step Tutorial.
When you finish the first petal, slip stitch into the next base stitch to secure it. This small step helps define the separation between petals. Continue forming petals one by one. Although the process becomes repetitive, the petals will gradually take shape, and your flower will start to look beautifully detailed.
Color changes can also happen during the petal-making stage. Switching colors for the petals creates contrast and adds depth. A Beautiful crochet flower-Step by Step Tutorial that uses two or three colors makes the flower more realistic and visually appealing. Color transitions can be done smoothly by changing yarns at the end of a slip stitch.
After completing all the petals, you may choose to create a second layer. A double-layered flower looks fuller and more decorative. To make a second layer, simply work behind the first round of stitches. This makes the flower look more textured and dimensional.
Once you complete the petals, cut your yarn and weave in the ends neatly. Your flower should now have a full, soft, and beautiful appearance. The next section explains how you can use and customize your crochet flower in different creative ways.
Creative Uses and Decoration Ideas
A Beautiful crochet flower-Step by Step Tutorial offers endless possibilities for decoration. One of the most popular uses is attaching crochet flowers to hair accessories such as barrettes, headbands, or even hair ties. Simply sew the flower onto the accessory and it becomes a charming handmade detail. This is especially popular for children’s accessories.
Another wonderful use is in home décor. Crochet flowers can be added to table runners, curtains, cushions, or crocheted blankets. They bring a warm and cheerful touch to any room. Many crafters create collections of flowers and use them to decorate walls or festive garlands.
If you enjoy creating fashion pieces, you can attach your flower to hats, scarves, or handbags. Handmade flowers elevate the design and give your accessories a special, personalized look. A Beautiful crochet flower-Step by Step Tutorial makes it easy to make multiple flowers in different sizes to match any item.
Crochet flowers are also very popular in gift wrapping. Instead of using paper decorations, you can attach a flower to a ribbon or gift tag. It transforms a simple package into a memorable and thoughtful presentation. Many people keep the crochet flower as a keepsake.
Another creative idea is turning your flower into a brooch. By sewing a brooch pin on the back, you can wear your flower on clothing or bags. Brooches are versatile, elegant, and a favorite among handmade accessory lovers. This makes them a great homemade gift.
Finally, making several flowers can inspire you to create bigger projects such as floral garlands, bouquets, or wall art. With each flower you make, your technique improves and your creativity expands. This is one of the joys of following a Beautiful crochet flower-Step by Step Tutorial—you can take a simple idea and transform it into something meaningful and beautiful.
Frequently Asked Questions
1. Is this flower suitable for beginners?
Yes, this Beautiful crochet flower-Step by Step Tutorial is perfect for beginners. The stitches are simple and easy to learn.
2. What type of yarn works best?
Cotton yarn is ideal for structure, but acrylic yarn also works well and gives a softer look.
3. Can I make the flower larger or smaller?
Yes. Use thicker yarn and a larger hook to make a bigger flower, or thinner yarn and a smaller hook for a delicate one.
4. How many petals should my flower have?
Most crochet flowers have between five and eight petals, but the number is flexible.
5. Can I use multiple colors in the same flower?
Absolutely. Mixing colors adds depth and beauty to the petals.
6. Is a magic ring necessary?
It is recommended because it creates a tight center, but you can also start with a short chain circle.
7. Can children make this craft?
Children can help with colors and decoration, but the stitches should be done by someone familiar with crochet.
8. How long does it take to finish the flower?
Most people complete a flower in 20 to 40 minutes depending on skill level.
9. Can I use these flowers for clothing?
Yes, as long as you sew them securely onto the fabric to withstand washing.
10. Can I sell the flowers I make?
Of course. Handmade crochet flowers are popular items at craft fairs and online shops.
Conclusion
This Beautiful crochet flower-Step by Step Tutorial has guided you through every step of making a delicate, charming, and versatile crochet flower.
From choosing the right materials to shaping the petals and exploring creative uses, you’ve learned how to create a beautiful handmade piece that can decorate countless items. Crochet flowers are simple to make, customizable, and full of character.
If you enjoyed this tutorial, please leave your honest opinion and share suggestions for future projects. Your feedback helps inspire new ideas and improves upcoming guides!