
Starting a Crochet pattern for a Christmas hat-Step by Step Tutorial is one of the most delightful ways to prepare for the holiday season. This project combines creativity, warmth, and festive charm into a handmade accessory that can be worn or gifted. In this tutorial, you will learn the essential steps to create a beautifully crafted Christmas hat using basic crochet techniques. Whether you are a beginner or an experienced crocheter, this guide will help you complete a charming piece that captures the holiday spirit while strengthening your crafting skills.
This Crochet pattern for a Christmas hat-Step by Step Tutorial focuses on simplicity and clear instructions, making it accessible for anyone who wants to create a personalized winter accessory. Handmade items like this not only enhance holiday outfits but also become treasured keepsakes passed down through the years. With the right yarn, hook size, and step-by-step guidance, you will create a cozy hat that fits comfortably and looks professionally crafted. The tutorial provides all the details to ensure a smooth and enjoyable crafting experience.
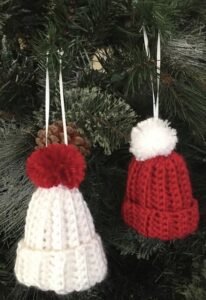
One of the main advantages of following this Crochet pattern for a Christmas hat-Step by Step Tutorial is the opportunity to customize your project. You can choose colors traditionally associated with the holidays, such as red, white, and green, or try modern combinations for a more unique look. The pattern allows variations in size, stitch texture, and decorative elements, making each hat special. Now, let’s explore the materials, instructions, and techniques that will guide you through this festive crochet journey.
Materials Needed for the Christmas Hat
To begin your Christmas hat project, gather all the essential materials. Yarn is the foundation of your hat, and it’s best to choose a soft, medium-weight yarn that is comfortable and warm for winter weather. Acrylic yarn works well for easy maintenance, while wool blends offer extra warmth and durability. Select colors that match the festive theme of your design idea.
The crochet hook size will depend on the yarn you choose. Most medium-weight yarns pair well with a 5.0 mm or 5.5 mm hook. Choosing the right hook size is important for achieving consistent tension and a polished finish. If you tend to crochet tightly, consider using a slightly larger hook for a softer fabric.
A stitch marker is helpful for identifying the beginning of each round, especially if you are working in continuous rounds. This small tool prevents confusion and helps maintain stitch accuracy. It is particularly useful when shaping the hat’s crown.
You will also need scissors with sharp blades to cut yarn cleanly without fraying. Clean cuts make sewing and finishing much easier and more professional-looking. Keeping a dedicated pair of crafting scissors ensures clean and precise trimming.
A yarn needle is necessary for sewing in loose ends and attaching any decorative elements, such as pompoms or appliqués. A large-eye needle works best because it accommodates different yarn thicknesses. Smooth finishing is essential for a neat and long-lasting hat.
Optional decorative elements, such as pompoms, crochet stars, or embroidered snowflakes, can personalize your Christmas hat even more. These additions enhance the festive look and make your handmade creation truly unique.
Starting the Base of the Hat
To begin the Crochet pattern for a Christmas hat, start with a magic ring or a chain circle. The magic ring method is preferred because it allows the top of the hat to close tightly, preventing gaps. This ensures the hat has a solid, clean crown that looks neat and fits well.
After forming your ring, crochet several single or half-double crochets into the center. This begins the shaping of the crown. The number of stitches will depend on the size you want, but it is important to crochet evenly and count carefully to avoid inconsistencies.
Increase stitches gradually in each round to expand the hat evenly. This is the key step in forming the rounded top. In most patterns, increases are placed evenly around each round to keep the shape symmetrical. Keep your stitch marker in place to help track the beginning of each round.
Continue increasing until the circle reaches the desired width, which determines the hat size. For adults, this is usually between six to seven inches in diameter. For children, the circle will be smaller. Following these general guidelines helps ensure your hat fits comfortably.
Once the increase rounds are complete, begin working even rounds with no increases. This step builds the body of the hat and determines its length. Continue crocheting in spirals or joined rounds, depending on your preferred method and the style you want to achieve.
Check the length frequently, especially if you want a slouchy hat or a traditional fitted Christmas hat. You can adjust the number of rounds to create the perfect fit. This step is where personal customization becomes most visible.
Creating the Brim and Details
The brim is one of the most important elements in a Crochet pattern for a Christmas hat-Step by Step Tutorial, as it provides structure, comfort, and style. Switching to a contrasting color like white is a classic choice for Christmas hats, creating a snowy or fluffy effect. This color change adds visual interest and highlights the festive theme.
You can choose from several stitch types for the brim. Ribbed brims are popular because they create elasticity and help the hat stay snug on the head. This is usually achieved by alternating front post and back post double crochets. This technique results in a stretchy, comfortable fit.
If you prefer a simple brim, you can crochet several rows of single or half-double crochets. This option is easy and works well for beginners. The key is to maintain an even tension so the brim lays smoothly and does not flare or tighten excessively.
Once the brim is complete, consider adding decorative touches to make your Christmas hat more festive. A pompom at the top is a traditional addition that brings a playful and cheerful look. You can purchase a pompom or make one using leftover yarn.
Another fun detail is adding small crochet appliqués, such as stars, holly leaves, or snowflakes. These decorations can be sewn onto the front of the hat, giving it an extra touch of holiday charm. Make sure they are securely attached so they remain in place.
To finish the brim, fasten off the yarn and weave in all loose ends with a yarn needle. Tidy finishing improves the appearance of your crochet project and ensures it lasts through many holiday seasons.
Finishing the Christmas Hat
Once you have completed the main structure and brim, it’s time to finalize your Crochet pattern for a Christmas hat-Step by Step Tutorial. Start by checking for loose stitches or uneven areas. Correcting these small details early ensures a clean and polished final result.
Trim any excess yarn strands and securely weave in all ends. This step not only improves the appearance of your hat but also prevents unraveling over time. A well-finished hat is more durable and comfortable to wear.
Shape the hat gently with your hands. If you used wool or wool-blend yarn, you may lightly steam block it to smooth out uneven stitches. Be careful not to overheat or press too hard, as excessive heat can damage fibers.
If you added a pompom, make sure it is securely tied and sits centered at the top of the hat. A pompom that shifts or loosens can affect the overall look and function of the hat. Reinforce it by double-knotting and weaving the ends inside.
Try on the hat or place it on a mannequin head to check the fit. Adjustments can be made at this stage, such as adding more rounds for length or tightening the brim slightly. Personalizing the fit ensures maximum comfort.
Your Christmas hat is now complete and ready to wear, gift, or display. Whether you made it for yourself or someone special, it carries handmade warmth and festive joy that only crochet creations can provide.
Crochet Pattern for a Christmas Hat
What yarn is best for a Christmas hat?
Soft acrylic or wool-blend yarns are ideal because they provide warmth and comfort while maintaining shape.
Can beginners make this Christmas hat?
Yes. This tutorial is beginner-friendly and explains every step clearly for new crocheters.
How long does it take to complete the hat?
Most people finish the hat in 2–4 hours, depending on experience and decorative details.
Can I adjust the size of the hat?
Absolutely. You can change the number of increase rounds and length to fit babies, children, or adults.
Is a pompom necessary?
No, but it adds a festive touch. You can use a store-bought one or create your own from yarn.
How do I care for the finished hat?
Handwash or machine wash on a gentle cycle, then lay flat to dry to maintain its shape.
Conclusion
This complete Crochet pattern for a Christmas hat-Step by Step Tutorial guided you through creating a cozy, charming, and festive handmade accessory.
You learned how to shape the crown, build the body, craft a beautiful brim, and add finishing details to personalize your hat.
Now it’s your turn to bring this project to life and enjoy the satisfaction of wearing something made with your own hands. Please leave your honest opinion and share suggestions for future tutorials—your feedback helps inspire new creative ideas!