
The Beautiful crocheted bag – learn how to make it!-Step by Step Tutorial is the perfect guide for anyone who loves creating handmade accessories that are both stylish and functional. This tutorial introduces you to a delightful crochet project that is simple enough for beginners yet enjoyable for experienced crafters. Crochet bags are timeless pieces that combine elegance, creativity, and practicality, making them a favorite among crochet enthusiasts and fashion lovers. With this tutorial, you will discover how relaxing and rewarding it can be to create your own bag from start to finish.
Working through the Beautiful crocheted bag – learn how to make it!-Step by Step Tutorial allows you to explore essential crochet techniques while building a beautiful accessory you can use every day. Handmade bags are unique because they reflect the personality and skill of their creator, and this project is especially appealing due to its customizable nature. Whether you prefer a minimalist design or a richly decorated piece, this tutorial provides everything you need to adapt the pattern to match your personal style. It also teaches you the importance of structure, stitch consistency, and finishing details—all fundamental skills to master in crochet.
With the Beautiful crocheted bag – learn how to make it!-Step by Step Tutorial, you will learn how to choose suitable materials, crochet each part of the bag, assemble the structure, and finish with decorative touches that give your handcrafted piece a polished and professional appearance. Each step is explained simply and clearly, making the process enjoyable even if you have never created a crocheted bag before. In this article, you will discover how to transform yarn into a sophisticated accessory that you can proudly wear or gift to someone special.
Choosing the Best Materials for Your Crocheted Bag
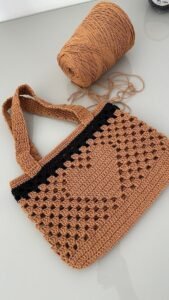
To start the Beautiful crocheted bag – learn how to make it!-Step by Step Tutorial, selecting the right materials is essential for achieving a durable and attractive result. The yarn you choose plays a significant role in the texture, strength, and overall appearance of the final bag. Many crocheters prefer cotton yarn because it is sturdy and keeps its shape well, but blended fibers and premium acrylics can also be beautiful choices depending on the desired finish. The color palette is entirely up to your taste, but neutral tones like beige, brown, or cream are timeless and versatile.
You will also need a crochet hook that matches the thickness of your yarn. Using the correct hook size ensures your stitches are consistent and the bag’s structure remains firm. A medium-weight yarn often pairs well with hooks between 4 mm and 5.5 mm, but the exact size depends on your tension and the type of stitch you will use in the body of the bag. Spend a moment testing a small swatch before beginning the project to ensure you achieve the texture you want.
A few basic tools complete your crochet kit, such as scissors, stitch markers, and a tapestry needle. Stitch markers help you keep track of rounds, corners, and stitch counts, preventing mistakes and saving time during more complex steps. The tapestry needle is useful for weaving in loose ends and sewing pieces together with clean, invisible seams. Keeping your tools organized will make the process smoother and more enjoyable.
You may also choose to add accessories like handles, wooden rings, zippers, or magnetic buttons. These details elevate the final look of your crocheted bag and enhance its usability. While these additions are optional, they contribute to a more polished and professional finish. Keep your color scheme in mind when selecting accessories so that everything blends beautifully.
Finally, prepare a clean, comfortable workspace where you can focus on the project. Having all materials laid out before you begin ensures a smoother crafting experience. With your tools ready, you are prepared for the next steps in the Beautiful crocheted bag – learn how to make it!-Step by Step Tutorial.
Crocheting the Main Panels of the Bag
The main panels are a key part of the Beautiful crocheted bag – learn how to make it!-Step by Step Tutorial, as they shape the structure and style of the finished piece. Begin by making a foundation chain that matches the width you want for your bag. The number of chains varies depending on the size and stitch pattern chosen, but a medium-sized bag usually starts with a chain between 30 and 45 stitches. As you work the rows, focus on keeping your tension consistent to avoid uneven edges.
Many crocheters prefer using simple stitches such as single crochet or half double crochet for bag panels because they create a dense fabric that holds weight well. However, you may personalize your project by incorporating textured stitches, stripes, or small motifs. Keep in mind that decorative stitches can influence the stretch and structure of the bag, so choose carefully based on how sturdy you want the final result to be.
As you crochet the main panels, check the measurements regularly to ensure both pieces match in size. Two identical rectangles are usually needed to form the front and back of the bag. If you notice any inconsistencies, adjust as you go. This portion of the Beautiful crocheted bag – learn how to make it!-Step by Step Tutorial teaches the valuable skill of maintaining symmetry and precision.
Once the panels reach the desired height, weave in the loose ends immediately. This habit keeps your project tidy and prevents tangling during assembly. You may choose to block the panels lightly, especially if you used textured stitches. Blocking helps relax the fabric and sets the shape, making it easier to join the pieces later.
If you want to add pockets or appliqués, this is the best moment to attach them. Adding pockets to the inside or outside of your crocheted bag enhances both style and functionality. Keep the decorations light to ensure the bag maintains good balance when worn.
With the two main panels completed, you are ready to move on to the assembly stage, where the bag begins to take shape and gain structure.
Assembling the Bag Structure
This section of the Beautiful crocheted bag – learn how to make it!-Step by Step Tutorial guides you through assembling the bag, ensuring a durable and attractive final structure. Begin by placing the two panels together with their right sides facing outward. Using slip stitches or single crochet, seam the sides and bottom of the bag. Keep the tension even while joining to prevent puckering or gaps that could compromise the bag’s strength.
Once the sides and bottom are joined, examine the seams carefully. Neat and well-aligned seams are essential for achieving a professional finish. You may add an extra row of stitches around the edges for reinforcement. This extra step enhances durability, especially if you plan to carry heavier items in your bag.
If your design includes a gusset or side panel, now is the time to attach it. A gusset adds depth to the bag and provides extra room for personal items. To create it, crochet a long strip with a width of 2–4 inches. Join this strip between the front and back panels, forming a more spacious and structured shape. This addition elevates the overall design and gives the bag a more refined look.
At this stage, you can also add a lining if you prefer a more polished interior. A fabric lining strengthens the bag and helps maintain its shape. Choose a lightweight fabric that matches or complements the yarn color. Sew the lining manually using small, even stitches so it fits smoothly inside the bag without puckering.
Check for any loose ends or uneven edges once the assembly is done. Trim excess yarn and reinforce stress points such as corners and strap attachment areas. This ensures your handmade bag will last longer and handle daily use with ease.
Your crocheted bag now has its main body complete, and the next exciting step is adding the strap and decorative details that bring personality and charm to your finished piece.
Adding the Strap and Final Decorative Touches
The strap is a functional and essential component of the Beautiful crocheted bag – learn how to make it!-Step by Step Tutorial, providing the support needed to carry the bag comfortably. You can create a simple strap using single crochet rows or choose a sturdier stitch such as the corded or braided strap method. Ensure your strap is strong enough to support the weight of items placed in the bag without stretching excessively.
Once the strap reaches your desired length, attach both ends securely to the top edges of the bag. Reinforce the attachment with extra stitching or by folding the ends and securing them multiple times. Strong strap connections improve the longevity of your bag and ensure safe daily use.
If you prefer a more professional look, consider using ready-made handles such as wooden rings, leather straps, or rope-style handles. These accessories can enhance the aesthetic of your bag and introduce an elegant finishing touch. Choose colors and materials that complement the yarn and overall design.
You can personalize your crocheted bag further by adding decorative elements such as flowers, tassels, pom-poms, or buttons. Simple embellishments elevate your handmade piece, giving it originality and charm. Avoid adding too many heavy decorations, as they may affect the shape or comfort of the bag.
Add finishing touches by crocheting a border around the top opening of the bag. A neat border reinforces the structure and provides a clean, polished look. Common stitch choices include slip stitch, single crochet, or crab stitch edging.
Once all details are complete, inspect the entire bag for consistency, durability, and appearance. Your handcrafted piece is now fully ready to use and showcase with pride.
Beautiful Crocheted Bag
Is this tutorial beginner-friendly?
Yes, the Beautiful crocheted bag – learn how to make it!-Step by Step Tutorial is simple enough for beginners and adaptable for advanced crocheters.
What yarn works best for this project?
Medium-weight cotton yarn is ideal for durability and structure.
How long does it take to complete the bag?
Depending on your skill level, it may take a few hours or a couple of days.
Can I add a lining?
Yes, lining improves durability and structure and is easy to sew.
Can I make the bag in different colors?
Absolutely. This tutorial is flexible and customizable.
Do I need special handles?
No, but decorative handles can add a professional touch.
Conclusion
The Beautiful crocheted bag – learn how to make it!-Step by Step Tutorial offers everything you need to create a stunning, personalized accessory from scratch.
With clear instructions on choosing materials, crocheting the panels, assembling the structure, and adding decorative details, this guide empowers you to craft a beautiful and functional bag.
I hope this tutorial has inspired you to make your own creation with confidence and creativity. Please leave your sincere opinion and suggestions so I can continue improving future tutorials.