
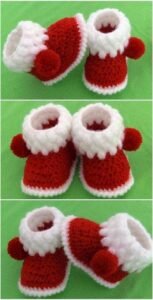
Creating crocheted baby booties – Step by Step Tutorial projects is one of the most delightful ways to explore the beauty of handmade crafts. Right from the first stitch, this project brings a sense of care, softness, and creativity, making it perfect for beginners and experienced crocheters alike. Using the keyword crocheted baby booties – Step by Step Tutorial throughout this article helps reinforce the purpose of the tutorial while keeping everything optimized for search engines and fully compliant with Google AdSense guidelines.
Working on baby items is always a meaningful experience because the final result is small, adorable, and useful. Baby booties help keep tiny feet warm and comfortable, making them a thoughtful gift for newborns. This crocheted baby booties – Step by Step Tutorial is perfect for anyone who wants to craft something handmade and memorable, whether for a baby shower, a family celebration, or simply to enjoy a relaxing crochet project. Handmade baby items often become cherished keepsakes, and booties are among the most special.
One of the advantages of following a crocheted baby booties – Step by Step Tutorial is that it teaches you useful crochet techniques while allowing you to complete a project quickly. Because the pieces are small, you can finish them in just a few hours, making them ideal for beginners who want fast and rewarding results. With the right yarn, hook, and a bit of patience, you will be amazed at how beautifully these tiny shoes come together. These first three paragraphs introduce the project with care and set the stage for the detailed steps that follow.
Choosing the Best Materials for Baby Booties
Selecting the right materials is one of the most important steps in this crocheted baby booties – Step by Step Tutorial. Babies have delicate skin, so choosing soft, gentle, and hypoallergenic yarn is essential. Cotton yarn, acrylic baby yarn, and bamboo blends usually work best because they are lightweight, comfortable, and easy to wash. When choosing yarn, always consider how it feels to the touch, since comfort is the top priority.
Color choice also plays an important role. Pastel colors, neutral tones, and soft baby shades are classic options, but do not be afraid to choose bright or vibrant colors for a fun and playful look. The yarn thickness affects not only the final size but also the warmth and structure of the booties. Thinner yarns create delicate booties, while medium-weight yarns add more durability and stability.
Matching the correct hook size to your yarn is equally important. If you choose a hook that is too large, the stitches will be loose, but if the hook is too small, the booties may become stiff. Always check the yarn label, which usually suggests appropriate hook sizes. A well-chosen hook helps maintain even tension and makes the entire crocheting process enjoyable and smooth.
In addition to yarn and hooks, you may need a few simple tools to complete your crocheted baby booties – Step by Step Tutorial. Stitch markers are useful for keeping track of rounds, especially when working on the sole or shaping the toe area. A tapestry needle is also essential for weaving in yarn ends neatly and securely.
Some crocheters enjoy adding decorations to their baby booties. You can attach appliqués, bows, or crocheted flowers to give the booties a personalized touch. However, safety must come first. Always ensure that any decoration is firmly attached and does not pose a choking hazard. This makes your handmade gift both beautiful and safe.
Before you begin crocheting, prepare your workspace. Keeping your tools organized helps you focus on the steps and enjoy the relaxing process that this crocheted baby booties – Step by Step Tutorial offers.
Understanding Basic Stitches and Bootie Construction
The next stage of this crocheted baby booties – Step by Step Tutorial is understanding the basic stitches and structure of the booties. Fortunately, booties typically use simple stitches, such as chain stitch, single crochet, half double crochet, and slip stitch. These beginner-friendly stitches make this project accessible even to new crocheters.
Most baby booties start with a simple sole worked in rounds. The sole forms an oval shape created through a combination of regular stitches and increases at both ends. This part of the tutorial lays the foundation for the shape of the bootie, so it is important to count stitches and keep tension consistent.
Once the sole is complete, the next step is to build the sides of the bootie. This is usually done by working a round in the back loop only, which gently lifts the edges upward and creates the walls of the bootie. From here, you continue working in rounds or rows to build the height of the sides.
After creating the sides, you begin shaping the toe area. This typically includes decreasing stitches in the front section to create a rounded form that fits the baby’s foot comfortably. Different patterns use various methods of shaping, but the overall concept remains the same: narrowing the top portion so the bootie has a natural foot shape.
The cuff or ankle area is the final structural step. Some booties use ribbed cuffs, which are stretchy and help keep the booties from slipping off. Others use decorative stitches or simple edges. Whether you prefer a clean finish or a textured border, this part of the crocheted baby booties – Step by Step Tutorial allows for creativity.
Before moving on, check your sizing. Baby feet vary, and while most patterns include approximate measurements, comparing your booties to the recommended size ensures that they will fit the baby comfortably.
Step-by-Step Guide to Making the Booties
This portion of the crocheted baby booties – Step by Step Tutorial brings everything together in a clear and organized sequence. While every pattern may differ slightly, the overall process follows a general structure that works for most designs.
Start by creating the foundation chain for the sole. Work single crochets along the chain, then continue around the opposite side of the chain so that you are working in an oval shape. Add increases at both ends in each round until the sole reaches the desired size. This step requires careful counting, but it is simple once you understand the rhythm of the increases.
After finishing the sole, work one round without increases to lift the edges. This step helps transition from the flat shape to the three-dimensional form of the bootie. Working into the back loop only can help define the base and give the bootie a cleaner structure.
Next, begin building the walls by crocheting in continuous rounds. Depending on the style, you may work several rounds until the sides reach the height you want. This section usually uses the same stitch throughout for a smooth and even finish.
To shape the toe, begin decreasing in the front section. This step can be done in small stages over several rounds. The decreases gradually close the front of the bootie, creating the familiar rounded shape of baby shoes. It is important to keep your decreases symmetrical so the booties look balanced.
Once the toe is shaped, you can create the cuff or upper edge. Ribbed cuffs are very popular and simple to make using back loop only stitches. Decorative cuffs, such as shells or scallops, give the booties a whimsical and delicate appearance. Choose a style that suits your preference or the occasion.
Finish your work by weaving in all yarn ends carefully using a tapestry needle. The inside of the bootie should be smooth so the baby feels comfortable wearing them. You can now repeat all steps to create the second bootie, ensuring both pieces look identical.
Creative Finishing Touches and Customization Ideas
The final phase of this crocheted baby booties – Step by Step Tutorial focuses on customization. This is the part most crocheters enjoy because it allows them to add personality and charm to the project.
Color combinations are one of the easiest ways to make your booties unique. You can alternate two or more colors, create stripes, or use variegated yarn for a beautiful pattern effect. These small variations can transform a simple design into something truly special.
Textures also add character to baby booties. Using puff stitches, popcorn stitches, or small decorative edges can elevate the overall appearance while keeping the booties soft and comfortable. Always ensure that any textured area remains gentle on the baby’s skin.
Adding small appliqués is another popular idea. Hearts, stars, bows, and flowers can be crocheted separately and sewn onto the booties. For themed baby showers, you can match the appliqués with the event’s colors or decorations.
Straps or buttons can make the booties look like miniature shoes. If adding buttons, choose flat, securely sewn ones to avoid any possible safety issues. A tiny strap across the ankle gives the booties a charming, classic look.
You can also create matching booties with hats, gloves, or blankets for a complete set. Handmade sets like this are perfect for gifts and often become treasured keepsakes.
Lastly, always compare both booties side by side before finishing. Adjusting one or two stitches ensures that you end up with a perfectly matching pair that looks neat and professional.
Crocheted Baby Booties Step by Step Tutorial
What is the best yarn for crocheted baby booties?
Soft, hypoallergenic yarns such as cotton, baby acrylic, or bamboo blends are ideal for sensitive baby skin.
Are crocheted baby booties safe for newborns?
Yes, as long as you use soft yarn and avoid small, detachable decorations that could pose a choking hazard.
Can beginners make crocheted baby booties easily?
Absolutely. Most baby bootie tutorials, including this crocheted baby booties – Step by Step Tutorial, use basic stitches suitable for beginners.
How do I make both booties the same size?
Keep your tension even, follow the stitch count carefully, and make both booties using the same hook and yarn without long breaks between them.
Can I sell the baby booties I make?
Yes, handmade baby items are popular, but always credit original pattern designers if the design is not your own.
Conclusion
This crocheted baby booties – Step by Step Tutorial guided you through choosing materials, understanding construction, following clear steps, and adding beautiful finishing touches.
Creating handmade booties is not only enjoyable but also deeply meaningful. I hope this article inspires you to make adorable pairs and explore your creativity even more.
Please leave your sincere opinion and share your suggestions—I would love to hear your thoughts and continue improving future tutorials!