
If you have ever wanted to create a fun and colorful crochet project, this Amigurumi Donuts- Step by Step Tutorial will be perfect for you. Amigurumi is the Japanese art of crocheting small stuffed toys, and donuts make one of the most adorable and beginner-friendly projects you can try. In this tutorial, we will explore how to make these sweet little decorations that can be used as toys, keychains, or even home décor items.
Crocheting Amigurumi Donuts- Step by Step Tutorial is not only enjoyable but also a great way to practice basic crochet techniques. You will learn how to form shapes, change colors, and stuff your creations properly to make them look realistic. Plus, this project is small and quick, making it ideal for using leftover yarn from other projects.
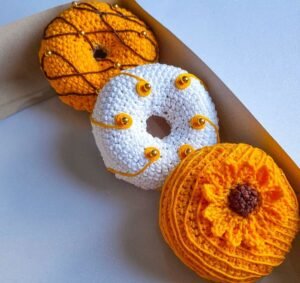
Another reason to love this Amigurumi Donuts- Step by Step Tutorial is its versatility. You can customize the donuts with different yarn colors, toppings, and decorations. Whether you prefer chocolate glaze, colorful sprinkles, or pastel shades, the possibilities are endless. Now, let’s dive into the materials and steps to bring these cute crochet donuts to life.
Materials Needed for Amigurumi Donuts
Before starting the Amigurumi Donuts- Step by Step Tutorial, you need to gather a few basic materials. Having everything prepared will make the process smooth and enjoyable.
First, you will need some worsted-weight yarn in different colors. For example, you can use a light brown color for the donut base and pink, white, or chocolate brown for the icing. Using colorful yarn for the sprinkles adds a fun finishing touch.
Next, you will need a crochet hook suitable for the yarn weight. Most Amigurumi projects use smaller hooks like 2.5mm or 3mm so that the stitches are tight, preventing the stuffing from showing through.
Polyester fiberfill is essential for stuffing your donuts and giving them a soft and plush look. A yarn needle will be useful for sewing pieces together and weaving in the ends neatly.
If you want your donuts to be keychains or bag charms, you can also prepare some small key rings or lobster clasps. This makes them both decorative and practical.
Finally, a pair of small scissors will be needed for cutting yarn. Make sure you have good lighting and a comfortable working space before beginning the Amigurumi Donuts- Step by Step Tutorial so you can enjoy the process without interruptions.
Having all materials ready ensures a smooth workflow and helps keep you focused on the creative part rather than searching for supplies mid-project.
Step-by-Step Instructions for Amigurumi Donuts
Now that you have everything ready, let’s begin the Amigurumi Donuts- Step by Step Tutorial. Start by making a magic ring with your donut base color. The magic ring technique is commonly used in Amigurumi because it creates a tight, closed center for round shapes.
Work six single crochet stitches into the magic ring. Pull the ring tight and join with a slip stitch to form the first round. This will be the center hole of your donut.
For the next few rounds, you will increase stitches evenly to form a flat circle. Usually, this means adding two single crochet stitches in one stitch at regular intervals. This widening process continues until the circle reaches the desired donut size.
Once you have the flat base, you will switch to the icing color. Crochet two or three rounds in this color to create the look of frosting. You can add small chain loops along the edge to give the icing a wavy, realistic effect.
After finishing the icing, switch back to the base color for the bottom of the donut. Continue crocheting several rounds and then start decreasing stitches evenly to shape the donut ring.
Before completely closing the donut, stuff it firmly with polyester fiberfill. Make sure it is evenly filled to maintain a round shape. Finish by closing the opening with slip stitches and weaving in all loose ends. Your basic Amigurumi Donuts- Step by Step Tutorial donut is now complete!
Decorating and Customizing Amigurumi Donuts
One of the most enjoyable parts of the Amigurumi Donuts- Step by Step Tutorial is decorating your donut. This is where you can get really creative and make each piece unique.
To add sprinkles, use small pieces of colorful yarn or embroidery floss. Thread a yarn needle and sew little straight stitches randomly across the icing area. These mimic the look of candy sprinkles and add a cheerful touch.
You can also experiment with beads or sequins for a more textured decoration. Just make sure they are securely attached, especially if the donut will be used by children.
Another fun option is to use different stitch patterns for the icing. For example, adding scalloped edges or picot stitches can give your donut a more playful and decorative appearance.
If you want to turn your donut into a keychain, simply sew a small key ring or lobster clasp onto the top before finishing the final stitches. This makes it a perfect accessory for bags, keys, or gifts.
Finally, try making a whole set of donuts in various colors and flavors. They look adorable when displayed together and can even be used as pretend play food for children’s play kitchens. The customization possibilities are endless with the Amigurumi Donuts- Step by Step Tutorial.
Tips for Success and Practical Uses
To get the best results from this Amigurumi Donuts- Step by Step Tutorial, there are some helpful tips to keep in mind.
First, always maintain consistent tension while crocheting. Tight, even stitches are important in Amigurumi projects to prevent stuffing from poking through and to create a neat appearance.
Second, use stitch markers to keep track of your rounds. Amigurumi pieces are usually worked in continuous spirals rather than joined rounds, so markers help you avoid losing count.
Third, do not overstuff your donut. Adding too much filling can stretch the stitches and distort the shape. Aim for a firm yet smooth finish.
Fourth, choose soft but durable yarn, especially if the donuts will be handled frequently or used as keychains. Cotton yarn is often recommended for its strength and smooth texture.
Fifth, take breaks when needed. Crocheting small stitches for long periods can be tiring on the hands, so resting will help maintain accuracy and comfort.
Lastly, experiment with different sizes. Using thicker yarn and larger hooks will create big, plush donuts, while finer yarn will make miniatures perfect for jewelry or decorations. This flexibility is part of what makes the Amigurumi Donuts- Step by Step Tutorial so enjoyable.
FAQ About Amigurumi Donuts
1. Is this project suitable for beginners?
Yes, this Amigurumi Donuts- Step by Step Tutorial uses basic stitches like single crochet, making it perfect for beginners.
2. How long does it take to make one donut?
On average, one donut takes about one to two hours to complete, depending on experience level.
3. What type of yarn works best for Amigurumi donuts?
Cotton yarn is recommended because it gives a neat finish and holds its shape well.
4. Can I wash Amigurumi donuts?
Yes, if made with washable yarn and stuffed with polyester fiberfill, they can be gently hand-washed and air-dried.
5. Can I sell the donuts I make from this tutorial?
Yes, handmade items based on this Amigurumi Donuts- Step by Step Tutorial can be sold, but always check for copyright on specific patterns.
6. How can I make the donuts look more realistic?
Use color changes for icing, add sprinkles, and experiment with shaping techniques for a lifelike appearance.
Conclusion
This Amigurumi Donuts- Step by Step Tutorial has shown you how to create adorable crochet donuts from start to finish. We covered the materials, basic stitches, shaping techniques, and decoration ideas to make each donut unique and fun.
By following this guide, you can now make your own collection of colorful crochet donuts for decoration, gifts, or personal accessories.
We would love to hear your honest opinions and suggestions about this tutorial. Share your thoughts and let us know what other crochet projects you’d like to learn in the future!