
Learning Crochet mini pumpkin – Step by Step Tutorial is a fun and creative way to bring a cozy touch of fall into your home. Crocheting mini pumpkins is not only a delightful seasonal craft but also a great project for beginners who want to practice shaping, sewing, and stuffing in crochet. These small decorative pumpkins can be used for home décor, gifts, or even as part of festive table settings. With a little yarn, a hook, and some basic stitches, you can create something beautiful that reflects your personal style.
When starting a crochet mini pumpkin, beginners often worry about whether the project is too complex. The good news is that this tutorial breaks everything into simple, clear steps. Each stitch and shaping detail will help you build confidence while learning how to manage increases, decreases, and finishing touches. Not only will you improve your crochet skills, but you’ll also have a cute finished product to admire.
This step by step tutorial will cover the materials you need, the process of crocheting the body of the pumpkin, how to stuff and shape it properly, and how to add a stem for the perfect finishing touch. By following along, you’ll be able to make several mini pumpkins of different sizes and colors. Whether you’re creating them for fall decorations, Halloween crafts, or Thanksgiving centerpieces, crocheting mini pumpkins is a joyful project that blends creativity with tradition.
Materials Needed for Crochet Mini Pumpkin
To begin your Crochet mini pumpkin – Step by Step Tutorial, you’ll need a few basic supplies. Gathering everything before you start will make your crochet process smoother and more enjoyable. The right materials not only ensure that your pumpkin turns out adorable but also help beginners avoid unnecessary frustration.
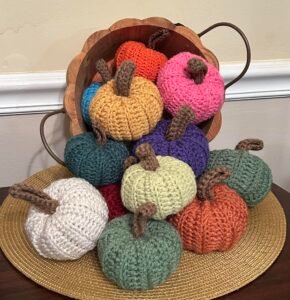
Start with yarn in your favorite fall colors. Orange is the classic choice, but don’t be afraid to try white, green, mustard, or even variegated yarns for a more unique pumpkin. A medium-weight yarn works best for structure and shaping, but lighter or chunkier yarn can also be used depending on the look you want.
Next, choose a crochet hook that matches your yarn. Most worsted-weight yarns work well with a 4mm to 5.5mm hook. The right hook size will help your stitches stay tight enough to hold stuffing without leaving gaps. Beginners should avoid oversized hooks when making small projects, as it can make the pumpkin look loose.
You will also need fiberfill stuffing, which is essential for giving the pumpkin its round, plump shape. A small yarn needle will be used for sewing the top and bottom closed as well as attaching the stem. For the stem, you can use brown yarn, green yarn, or even a small piece of cinnamon stick to give it a rustic look.
Stitch markers are useful if you are working in rounds, as they will help you keep track of where each row begins. Scissors are also necessary for cutting yarn neatly. By preparing these items ahead of time, you’ll be ready to fully focus on the crocheting process.
Finally, keep in mind that while these are the basic tools, you can always personalize your pumpkin. Add embellishments like felt leaves, embroidery, or beads to make your mini pumpkin stand out as a one-of-a-kind creation.
Step by Step Tutorial: Making the Pumpkin Body
Now let’s begin the Crochet mini pumpkin – Step by Step Tutorial by making the main body of the pumpkin. This part is essential, as it creates the foundation for the shape and design. Don’t worry if you’re new to crochet; the steps are straightforward and repetitive, which makes them easy to follow.
Start by creating a slip knot and chaining a foundation row. For mini pumpkins, you don’t need a long chain. Around 20 to 25 stitches is enough for a medium-sized pumpkin. After the chain, you’ll begin working in rows, using single crochet stitches to form a rectangle. The rectangle will eventually be stitched together to form a cylinder.
The height of your rectangle determines how tall your pumpkin will be. Continue crocheting rows until you reach the desired height, usually around 10 to 12 rows for a mini pumpkin. Consistency in stitches is key here, so keep your tension even to create a neat fabric. Beginners often improve their stitch uniformity during this step.
Once you have your rectangle, fold it so the two shorter sides meet. Using a yarn needle and matching yarn, sew along the edge to create a tube or cylinder. This tube will become the pumpkin body. At this stage, the shape may not look like a pumpkin yet, but don’t worry—the magic happens once we gather the ends.
With one open end, weave your yarn around the top edge and pull tightly to cinch it closed. Secure the yarn and knot it firmly. Then, stuff the pumpkin body with fiberfill until it feels full and plump. Avoid overstuffing, as it can stretch stitches and distort the shape. Once stuffed, weave yarn around the other open end and pull to close it as well.
Now your crocheted tube has transformed into a round ball-like shape. The base pumpkin is ready, but it still needs shaping and detail to give it that classic pumpkin look.
Shaping and Adding the Pumpkin Stem
The next step in this Crochet mini pumpkin – Step by Step Tutorial is shaping the pumpkin to give it the signature ridges and finishing it with a stem. Without shaping, your pumpkin may look like just a ball, so this step adds realism and charm.
Take a long piece of yarn, thread it onto your needle, and pass it through the center of the pumpkin from top to bottom. Pull the yarn tightly and repeat this process several times around the pumpkin, dividing it into equal sections. This creates the ridges that make it look like a real pumpkin. You can choose to make four, six, or even eight sections, depending on your style preference.
Once you’ve shaped the pumpkin, it’s time to make the stem. Using brown or green yarn, crochet a small rectangle or tube that you can sew onto the top. For a simpler option, just roll a small piece of yarn into a short stem shape and stitch it securely on top.
Some crafters like to use natural materials like twigs or cinnamon sticks as stems. This not only adds authenticity but also introduces a rustic charm. If you prefer this method, simply glue or stitch the item into the center of your pumpkin.
Adding leaves is another creative option. You can crochet small green leaves and attach them next to the stem to enhance the design. This little detail makes your mini pumpkin more decorative and festive.
Once the stem is attached, secure all loose yarn ends by weaving them into the body. Trim off any excess yarn neatly. Your mini pumpkin is now fully shaped and looks ready to display or gift.
The beauty of this step is that no two pumpkins look the same. Each handmade piece carries its own personality and uniqueness, making it a special project for seasonal crafting.
Creative Uses and Decoration Ideas
The final part of this Crochet mini pumpkin – Step by Step Tutorial explores creative ways to use your handmade pumpkins. These tiny crafts are more versatile than you might think, and they can brighten up many different spaces.
One popular use is seasonal home décor. Place your mini pumpkins on shelves, mantels, or dining tables to instantly add a cozy autumn vibe. Mixing pumpkins of various sizes and colors creates a beautiful arrangement that feels festive and warm.
Another idea is to use them as centerpieces for gatherings or holidays like Halloween and Thanksgiving. Instead of buying plastic decorations, these handmade pumpkins offer a charming, eco-friendly alternative. Guests will appreciate the effort and creativity you put into making them.
Mini pumpkins can also be turned into keychains, ornaments, or gifts. By attaching a small loop or hook, you can transform your crochet pumpkin into a practical accessory. They make thoughtful handmade presents for friends, teachers, or family members who enjoy seasonal decorations.
For kids’ rooms, mini pumpkins are safe and fun decorative items. You can even make them in playful colors like pink, blue, or purple to suit a child’s preferences. They add a cheerful and whimsical touch that children love.
Lastly, consider using your crochet pumpkins as part of a craft fair display or small business. Handmade items like these are popular at markets, especially during the fall. If you enjoy making them, you could turn your hobby into a small income stream.
FAQ About Crochet Mini Pumpkins
1. Is crocheting a mini pumpkin beginner-friendly?
Yes, this project is perfect for beginners because it uses basic stitches like single crochet and simple sewing techniques.
2. How long does it take to make one mini pumpkin?
On average, a mini pumpkin can be completed in 1–2 hours, depending on your crochet speed and experience level.
3. Can I make a pumpkin without stuffing?
Stuffing is recommended for shape and volume, but you can experiment with flat versions for appliqués or wall hangings.
4. What yarn works best for crochet pumpkins?
Medium-weight yarn is ideal, but you can use bulky yarn for larger pumpkins or thinner yarn for tiny decorations.
5. Can I wash crocheted pumpkins?
Yes, but handwashing is best to maintain their shape and prevent the stuffing from clumping.
6. How do I make my pumpkin look more realistic?
Shaping with yarn sections and adding stems and leaves enhances the natural pumpkin appearance.
Conclusion
In this article, we explored Crochet mini pumpkin – Step by Step Tutorial, covering everything from gathering materials to shaping and decorating your finished piece.
This project is simple enough for beginners but versatile enough for advanced crafters to customize. Crocheting mini pumpkins not only builds skills but also provides charming decorations for your home and gifts for loved ones.
Now that you’ve learned the steps, it’s time to grab your yarn and hook to start making your own unique pumpkins. I’d love to hear your honest opinion about this tutorial—share your thoughts and suggestions so we can continue improving and inspiring each other in the crochet community.