
If you are looking for a fun and relaxing project to add some charm to your crochet collection, this Easy to make crochet penguin- Step by Step Tutorial is perfect for you. Crocheting a penguin is not only enjoyable but also a great way to practice and improve your skills. Whether you want to make a cute decoration for your home, a handmade gift for someone special, or simply enjoy the process of crafting, this tutorial will guide you through every step.
The Easy to make crochet penguin- Step by Step Tutorial is designed with beginners in mind but also offers creative opportunities for experienced crocheters to personalize their projects. Penguins are adorable animals with their characteristic black and white bodies, little wings, and cheerful faces, making them a favorite choice for amigurumi enthusiasts around the world.
By following this Easy to make crochet penguin- Step by Step Tutorial, you will learn not only the basic crochet stitches needed but also how to shape and assemble the different parts of the penguin. In the end, you will have a delightful handmade toy or decorative piece that brings warmth and joy to your space.
Materials Needed for the Crochet Penguin
Before you begin the Easy to make crochet penguin- Step by Step Tutorial, it is important to gather all the necessary materials. Having everything ready will make the process smoother and more enjoyable from start to finish.
The most important item is the yarn. For a traditional penguin look, you will need black, white, and orange yarn. However, you can experiment with fun colors like blue or pink if you want a playful and unique penguin. Soft acrylic or cotton yarn works best for amigurumi projects because it creates a neat finish and is comfortable to work with.
You will also need a suitable crochet hook size for your chosen yarn. Most amigurumi patterns recommend a slightly smaller hook than usual to create tight stitches that prevent the stuffing from showing through. A 2.5 mm or 3 mm hook is often a good choice for this type of project.
Other essential materials include polyester fiberfill for stuffing your penguin so it becomes soft and huggable, a yarn needle for sewing the pieces together, and a pair of scissors for cutting the yarn ends neatly.
Optional items such as safety eyes can make your penguin look even cuter. If you prefer, you can embroider the eyes with black yarn for a completely handmade finish. A stitch marker can also be helpful for keeping track of your rounds, especially if you are new to working in continuous spirals.
With all these materials gathered, you are ready to start creating your adorable penguin following the Easy to make crochet penguin- Step by Step Tutorial instructions.
Step by Step Instructions for the Crochet Penguin
The Easy to make crochet penguin- Step by Step Tutorial begins with crocheting the main body. Start by making a magic ring with black yarn and work single crochet stitches in continuous rounds. This will create the rounded shape typical of amigurumi toys. By increasing stitches evenly, the body will gradually expand to the desired width before you start decreasing to close the shape.
After the body is complete, you will crochet the white belly patch. This is usually an oval piece that is later sewn onto the front of the penguin’s body. It adds contrast and gives the penguin its characteristic look. Using white yarn, crochet in rows or rounds depending on the pattern style you prefer.
Next, make the wings using black yarn. These are small oval or teardrop-shaped pieces that are attached to the sides of the body. They give the penguin its adorable flipper-like appearance and are very simple to make with just a few stitches.
The beak and feet are made using orange yarn. These small details bring your penguin to life and add a pop of color. The beak is typically a tiny triangle shape, while the feet are slightly larger and flat to help the penguin stand.
Once all the pieces are ready, it is time to assemble your penguin. Sew the belly patch, wings, beak, and feet onto the body using a yarn needle. If you are using safety eyes, attach them before stuffing and closing the body. If you are embroidering the eyes, you can do it at the end for a handmade touch.
Finally, stuff the body with polyester fiberfill to give it a soft and firm shape, then close the opening securely. Your cute crochet penguin is now complete and ready to be admired.
Adding Personal Touches to Your Crochet Penguin
One of the joys of following the Easy to make crochet penguin- Step by Step Tutorial is the freedom to customize your project. You can make each penguin unique by experimenting with colors, sizes, and accessories.
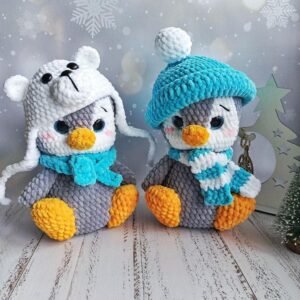
For example, you can crochet a tiny scarf in bright colors to wrap around your penguin’s neck. This simple accessory instantly makes it look cozy and festive, especially for winter decorations.
Another idea is to change the expression of your penguin by adjusting the position of the eyes or adding little embroidered eyebrows. Small details like these give your penguin personality and charm.
If you want to make a family of penguins, you can create different sizes by using thicker or thinner yarn and adjusting the number of stitches. A parent penguin with baby penguins makes a delightful set for display or as a handmade gift.
Adding small accessories like a tiny hat or bow can also make your penguin suitable for different occasions. A red hat turns it into a Christmas penguin, while a flower crown makes it perfect for springtime decorations.
Some crocheters even like to add a little pouch inside the penguin to use it as a secret pocket for small items. With creativity, the possibilities are endless, making each penguin truly special.
Creative Ways to Use Your Crochet Penguin
After completing the Easy to make crochet penguin- Step by Step Tutorial, you might wonder how to use your finished creation. There are many fun and practical ideas to consider.
One popular option is to use the penguin as a decorative piece. Place it on a shelf, table, or mantel to add a handmade touch to your home décor, especially during the winter season.
Crochet penguins also make wonderful gifts for birthdays, holidays, or baby showers. A handmade present shows thoughtfulness and care, and a cute penguin is sure to bring a smile to anyone’s face.
If you add a keyring to the top of the penguin’s head, it can become a unique keychain or bag charm. Smaller penguins are perfect for this purpose, and they are quick to make in different colors.
For children, a soft and safe crochet penguin can be a lovely toy or bedtime companion. Since it is handmade, you can ensure it contains no harmful materials and is safe for little ones.
Some people like to use small crochet penguins as holiday ornaments. Add a hanging loop, and they can decorate your Christmas tree or be part of a festive garland.
Finally, you can sell handmade penguins at craft fairs or online shops. Many people appreciate unique, handmade items, and cute crochet animals are always in demand.
FAQ about Easy to make crochet penguin- Step by Step Tutorial
1. Is this tutorial suitable for beginners?
Yes, the Easy to make crochet penguin- Step by Step Tutorial uses basic stitches and simple techniques perfect for beginners.
2. How long does it take to make a crochet penguin?
Depending on your skill level, it usually takes between 3 to 5 hours to complete one penguin.
3. What size should the finished penguin be?
The size depends on your yarn and hook choice, but most patterns create penguins about 10–15 cm tall.
4. Can I wash my crochet penguin?
Yes, gently hand wash it with mild soap and let it air dry to maintain its shape and colors.
5. Do I need safety eyes for this project?
No, you can embroider the eyes with yarn if you prefer a fully handmade and child-safe option.
6. Can I sell penguins made from this tutorial?
Yes, handmade items are perfect for selling at craft fairs or as personalized gifts.
Conclusion
This Easy to make crochet penguin- Step by Step Tutorial has guided you through everything from materials to detailed instructions, creative customization ideas, and practical uses for your finished penguin.
It is a fun and rewarding project for both beginners and experienced crocheters.
We would love to hear your honest opinions and suggestions about this tutorial. Your feedback helps us create even better crochet guides for everyone to enjoy.