
An apple cup holder-Step by Step Tutorial is the perfect project for anyone who enjoys mixing creativity with practicality. This handmade item not only adds a touch of charm to your daily routine but also provides functionality by keeping your cups protected and your hands comfortable. The apple-inspired design makes it fun, cheerful, and ideal for gifting or personal use. With just a few basic crochet techniques, you can transform yarn into a stylish accessory that looks great and works wonderfully.
The appeal of making an apple cup holder is that it combines utility with aesthetics. Cups often become too hot or too cold to hold comfortably, and a cozy solves this issue while also adding a decorative touch. By designing it with an apple theme, you create a playful item that stands out in your kitchen or office. Handmade cup holders are also environmentally friendly because they can be reused, unlike disposable sleeves, making them a sustainable option.
This Step by Step Tutorial is designed for crafters of all skill levels. Beginners will appreciate how straightforward it is, while more advanced crocheters can experiment with different stitches, textures, and embellishments. Whether you’re making it for yourself, as a thoughtful handmade gift, or even as part of a craft fair collection, an apple cup holder is a project that blends fun, creativity, and functionality.
Choosing Materials for Your Apple Cup Holder
Before starting the apple cup holder-Step by Step Tutorial, it’s important to select the right materials. The choice of yarn will determine the overall durability and look of your finished cup holder. Cotton yarn is a favorite for this type of project because it absorbs heat well and provides a neat finish. Cotton also holds its shape better than many synthetic fibers, ensuring your cup holder remains sturdy.
The crochet hook size should match the yarn you choose. For medium-weight yarn, a 4mm or 5mm hook is often recommended. This size creates a fabric that is thick enough to insulate the cup while remaining flexible enough to slip on and off easily. Always check the yarn label for guidance on hook size.
You’ll also need some additional tools to make your project smooth and professional. Scissors are essential for cutting yarn cleanly, and a yarn needle will help weave in the ends neatly once you’ve finished crocheting. Stitch markers are optional but very helpful, especially for beginners, to keep track of rounds and avoid mistakes.
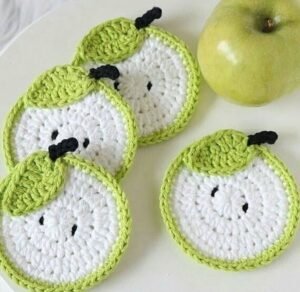
When selecting yarn colors, keep in mind the apple theme. Bright red, green, or even yellow yarn works beautifully to create the look of different types of apples. For added detail, you can use brown yarn for a stem and green for a leaf. These small touches turn a simple cup holder into a creative piece that resembles a real apple.
Another important consideration is the size of the cup. Take measurements before starting to ensure your apple cup holder will fit snugly. A loose holder may slip, while one that is too tight can be difficult to put on. Always test the fit as you go to avoid disappointment at the end.
By preparing your materials thoughtfully, you’ll be setting the foundation for a successful project. The right yarn, hook, and accessories will make your apple cup holder both functional and visually appealing.
Step by Step Tutorial: Making the Apple Cup Holder
To begin your apple cup holder-Step by Step Tutorial, start by creating a foundation chain that fits snugly around the base of your cup. Join the chain into a circle with a slip stitch, ensuring it is not twisted. This will serve as the base round of your project.
Next, work single crochet stitches into the ring to build the bottom of the holder. Continue crocheting in the round, gradually increasing stitches as needed until the base matches the size of your cup’s bottom. A good fit at this stage ensures that the holder will sit securely on the cup.
Once the base is complete, stop increasing stitches and work evenly in the round to build the sides of the cup holder. This section will determine the height of your apple design. For a standard cup, crocheting several rounds until you reach just below the rim should be enough. Adjust according to the cup size you’re using.
To create the apple look, switch to red, green, or yellow yarn as you continue working up the sides. Adding a contrasting row in brown at the top makes it resemble the apple’s stem. If you’d like to add more detail, crochet a small green leaf separately and sew it onto the side near the top of the holder.
Finish off by working a final round in single crochet or by using decorative stitches such as scallops or picots for a playful edge. This will give your apple cup holder a neat, polished finish. Remember to weave in all yarn ends securely with a needle to prevent unraveling.
At this point, slip your finished holder onto your cup to test the fit. It should slide on comfortably and stay in place. Congratulations—you’ve completed your handmade apple cup holder, both practical and stylish!
Tips and Tricks for Beginners
If you’re new to crochet, making an apple cup holder-Step by Step Tutorial might feel intimidating, but there are plenty of ways to simplify the process. One useful tip is to practice basic stitches before starting the project. Single crochet and half double crochet are the most commonly used stitches, and mastering them will make the process much smoother.
Always measure your cup before you begin. Cups can vary in size, and the chain you start with should match the circumference of the base. Taking a few minutes to measure will save time later and ensure your cup holder fits perfectly.
Using stitch markers is especially helpful when working in the round. They mark the start of each round, making it easier to keep track of your stitches. Beginners often lose their place without markers, which can result in uneven or lopsided holders.
Don’t worry if your stitches don’t look perfect the first time. Crochet improves with practice, and even small imperfections give your piece character. The important part is consistency—try to keep your tension even so that the fabric looks neat.
Experiment with colors and designs as you gain confidence. While the apple theme is classic, you can add stripes, polka dots, or even embroider initials onto your holder for personalization. Creativity is what makes handmade projects special.
Lastly, remember to enjoy the process. Crocheting is not just about the finished item but also about relaxation and creativity. Each project you complete brings you closer to mastering this craft.
Styling and Using Your Apple Cup Holder
Once you’ve completed your apple cup holder-Step by Step Tutorial, the fun doesn’t stop there. This handmade item is not only practical but also versatile in how you can use and style it. The bright apple design adds charm to your kitchen, dining area, or even your work desk.
One of the best uses of your apple cup holder is as a reusable alternative to disposable coffee sleeves. Instead of wasting paper sleeves each time you buy a hot drink, you can bring your handmade holder with you. It’s eco-friendly and stylish at the same time.
These cup holders also make excellent gifts. Whether for teachers, coworkers, or friends, a handmade apple-themed holder shows thoughtfulness and creativity. Pair it with a mug or a packet of coffee or tea, and you have a complete, heartfelt present.
Styling options are endless. You can create sets of cup holders in different apple colors—red, green, and yellow—to represent a variety of apples. This makes for a fun and colorful collection that everyone will admire.
The holder can also serve other purposes beyond cups. It can be used as a decorative cover for jars, small containers, or even as a cozy for plant pots. Its versatility makes it more than just a single-use item.
Finally, don’t forget that your apple cup holder reflects your personal style. Whether you keep it simple or decorate it with extras like leaves, buttons, or embroidery, it’s a small project that showcases big creativity.
Frequently Asked Questions (FAQ)
1. How long does it take to make an apple cup holder?
It usually takes 2–3 hours for beginners and even less for experienced crocheters. The project is quick and satisfying.
2. What yarn works best for a cup holder?
Cotton yarn is ideal because it’s sturdy, heat-resistant, and easy to clean. Acrylic yarn can be used but may not insulate as well.
3. Can I make this project if I’m a beginner?
Yes, this is a beginner-friendly project. It mainly uses basic stitches and is small enough to complete in one sitting.
4. How do I clean my crochet cup holder?
Most cotton yarns are machine washable. Simply remove it from the cup and wash according to the care instructions on the yarn label.
5. Can I adjust the size for different cups?
Absolutely. Just measure the cup before starting and adjust the chain length and number of rounds to fit.
6. What makes the apple cup holder special compared to a regular cozy?
The apple design adds creativity and charm, making it more than just a practical item. It becomes a decorative accessory as well.
Conclusion
Creating an apple cup holder-Step by Step Tutorial is a rewarding project that blends creativity with functionality. From selecting the right materials to following each step carefully, this guide has shown you how to make a practical and stylish accessory that keeps your cups insulated while looking charming.
With its apple-inspired design, it’s perfect for everyday use, gifting, or even eco-friendly alternatives to disposable sleeves.
Now it’s your turn to give it a try! I’d love to hear your honest opinions and suggestions. Have you made a crochet cup holder before? What colors or styles would you choose for your apple design? Share your experiences and ideas, and let’s keep inspiring each other with handmade creativity.