
If you are searching for a heartfelt and creative project to make during the holiday season, this Crochet Angel Ornament – Step by Step Tutorial is the perfect choice. Handmade crochet ornaments bring a warm, personal touch to your home, especially around Christmas. Angels symbolize peace, love, and protection, making them a meaningful addition to your holiday decorations. Whether you’re new to crochet or an experienced crafter, you’ll love creating this charming angel to adorn your tree or to give as a thoughtful handmade gift.
The Crochet Angel Ornament is a small yet elegant project that can be completed in just a few hours. Using only a few materials and basic crochet stitches, you can make something truly special that reflects the magic of the season. The delicate wings, graceful skirt, and fine details of this ornament add a timeless and sentimental feel to your Christmas decor. It’s a craft that celebrates tradition while also allowing you to express your creativity.
In this Step by Step Tutorial, you’ll learn how to create the angel’s body, wings, and finishing touches. Each step is easy to follow and suitable for beginners, while still offering enough creativity for advanced crocheters to personalize their designs. By the end of this guide, you’ll have a lovely ornament that captures the spirit of the holidays and showcases your crafting skills. So grab your yarn, hook, and let’s begin this beautiful project together!
Materials Needed for the Crochet Angel Ornament
Before starting this Crochet Angel Ornament – Step by Step Tutorial, it’s important to gather all the necessary materials. Having everything prepared will help you follow the steps smoothly and enjoy the process from start to finish.
You’ll need lightweight cotton yarn or fine thread, which is ideal for creating delicate and detailed crochet work. White or cream are classic choices for angels, but you can also experiment with soft pastel shades or even gold and silver for a festive touch.
A small crochet hook (around 1.5 mm to 2.5 mm) works best for this kind of intricate ornament. The smaller hook helps you achieve neat stitches and better definition in the angel’s design.
You’ll also need a yarn needle for weaving in ends and attaching parts of the ornament, as well as scissors to trim excess yarn. If you’d like your angel to hold its shape perfectly, have some fabric stiffener or starch spray ready to use once the crochet work is finished.
A small amount of stuffing or cotton will be needed for the angel’s head, and a loop of ribbon or string can be attached to the top so you can hang it on your tree or anywhere in your home.
Finally, if you want to add extra sparkle, you can decorate your Crochet Angel Ornament with tiny beads, metallic thread, or sequins. These embellishments make your angel even more eye-catching and festive.
Step by Step Instructions for Making the Crochet Angel Ornament
Now let’s begin the creative process of this Crochet Angel Ornament – Step by Step Tutorial. Follow these steps carefully to achieve a beautiful and well-balanced design that looks elegant and professional.
Start by making a magic ring for the angel’s head. Crochet six single crochets into the ring and pull it tight. This will form a neat circle. Then, crochet a few more rounds, increasing slightly to shape the head, and lightly stuff it before closing it.
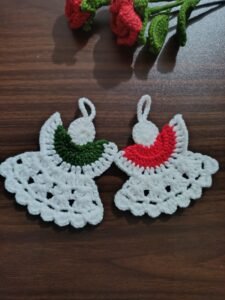
Next, you’ll create the angel’s body. Chain several stitches from the base of the head and work in rounds to form a cone shape. This cone will represent the angel’s flowing skirt. Increase the number of stitches evenly in each round to make the skirt widen gradually.
Once the skirt is the desired size, add decorative edges such as picot stitches or shell stitches to give it an elegant look. These details make the angel’s gown appear delicate and full of texture.
Now it’s time to crochet the wings. Chain a few stitches and work small loops using double crochets and chains to form feather-like shapes. You can create two symmetrical wings and attach them to the back of the angel’s body with a yarn needle.
If you wish, crochet a small halo using metallic thread or gold yarn. You can make it with a simple chain and join it in a circle, then sew or glue it gently on top of the angel’s head.
Finally, use a small piece of ribbon or yarn to create a hanging loop at the top. Once everything is attached, spray the entire piece lightly with fabric stiffener and let it dry completely. This will help your angel maintain its shape and elegance.
Tips and Tricks for Perfecting Your Crochet Angel Ornament
Every detail counts when creating this Crochet Angel Ornament – Step by Step Tutorial. Even small changes can make your angel unique and beautiful. Here are some helpful tips to ensure the best results.
First, choose consistent tension throughout your crochet work. Uneven stitches can make the ornament look misshapen. Take your time and keep your hands relaxed while crocheting.
Use fine-quality yarn for a smoother and more delicate finish. Mercerized cotton is an excellent choice because it holds its shape and has a soft sheen that enhances the ornament’s appearance.
If you want your angel to look more festive, try incorporating metallic or glitter yarn into the wings or halo. A touch of sparkle can make your handmade piece stand out beautifully on the Christmas tree.
Always block and stiffen your angel before displaying it. This step ensures that the wings and skirt keep their shape over time. Use a flat surface and pin the wings gently while they dry to maintain symmetry.
To make multiple ornaments, set up an efficient production routine—create several heads and bodies first, then add wings and halos. This method saves time and ensures consistency if you’re making several for gifts or decorations.
Lastly, consider personalizing each Crochet Angel Ornament. You can add small initials on the bottom of the skirt, different colored halos, or even tiny embroidered faces to give each angel its own personality.
Creative Ways to Use Your Crochet Angel Ornament
After completing your Crochet Angel Ornament – Step by Step Tutorial, you’ll find countless ways to use your handmade angels beyond just hanging them on your tree. Their beauty and symbolism make them versatile for many occasions.
One of the most popular uses is as Christmas tree ornaments. They bring warmth and elegance to your decorations, symbolizing peace and love during the festive season.
You can also use them as gift toppers. Attach one to a wrapped present for a personal touch that will make your gift unforgettable. It’s a creative way to combine functionality and decoration.
Another great idea is to use your angels as table or mantelpiece decorations. Place them inside glass jars, on garlands, or around candles to create a serene and cozy holiday ambiance.
If you enjoy making handmade gifts, create sets of angel ornaments to share with friends and family. They make wonderful presents for teachers, neighbors, or anyone who appreciates handmade crafts.
You can even adapt this Crochet Angel Ornament design for other celebrations or memorial events. For example, use pastel colors for baby showers, or create white and gold versions as wedding keepsakes.
Lastly, these ornaments can also serve as charity gifts. Handmade angels are often donated to hospitals or community centers to bring comfort and hope to others during the holiday season.
About Crochet Angel Ornament – Step by Step Tutorial
1. Do I need to know advanced crochet techniques to make this angel?
No, this project is beginner-friendly. Basic stitches such as single crochet, double crochet, and chain stitches are all you need.
2. What is the best yarn for making a crochet angel ornament?
Fine cotton yarn works best because it holds detail well and gives a delicate, polished finish.
3. Can I make this angel ornament larger?
Yes, simply use thicker yarn and a larger hook. This will increase the size while keeping the proportions the same.
4. How do I stiffen the angel so it holds its shape?
You can use fabric stiffener, diluted white glue, or starch spray. Apply it evenly and let it dry flat.
5. Can I wash the crochet angel ornament?
It’s better to spot-clean it with a damp cloth since washing might affect the shape or stiffness.
6. Can I use colored yarn instead of white?
Absolutely! Soft pastels or metallic tones look stunning. Feel free to match your angel’s colors with your holiday theme.
7. How long does it take to make one crochet angel?
On average, it takes one to two hours, depending on your skill level and how much detail you add.
8. Can children make this crochet angel ornament?
Yes, with adult supervision. It’s a great project to teach them patience and creativity.
Conclusion
By following this Crochet Angel Ornament – Step by Step Tutorial, you’ve learned how to create a timeless and elegant decoration that brings warmth and meaning to your home. From shaping the angel’s head and wings to adding delicate finishing touches, each step allows you to express love and creativity.
Handmade crochet ornaments like this one remind us that the beauty of the holidays lies in thoughtful, personal creations. They are not just decorations—they carry memories, emotions, and the joy of crafting something special with your own hands.
We hope this tutorial inspires you to make your own angels and share them with loved ones. If you enjoyed this guide, please leave your honest opinion and suggestions below. Your feedback helps us continue creating inspiring and creative crochet tutorials for everyone to enjoy. 🕊️