
If you love unique and handmade projects, then learning crochet hanging cauldron – would be cute for your car! – Step by Step Tutorial will be a delightful experience. This creative crochet idea is not only adorable but also practical, as it can serve as a fun decoration for your car, home, or even as a small gift bag. The beauty of crochet projects is that they combine creativity, relaxation, and functionality all in one activity. A crochet hanging cauldron is particularly appealing because it adds a touch of charm wherever you decide to hang it.
Many crafters enjoy small, quick projects that don’t take weeks to complete, and this is exactly where the crochet hanging cauldron – would be cute for your car! – Step by Step Tutorial comes in. It is small enough to be finished in an afternoon yet detailed enough to bring you a sense of accomplishment. This tutorial is designed for both beginners and experienced crocheters, offering clear steps so that anyone can follow along. With just a few supplies and some basic stitches, you can bring this cute mini cauldron to life.
What makes this project truly special is its versatility. A crochet hanging cauldron can be filled with little items like candies, charms, or even dried flowers to add fragrance inside your car. It’s an excellent way to personalize your space, and it makes a perfect handmade gift for friends and family. Throughout this Step by Step Tutorial, you will learn how to select the right yarn, how to crochet the shape of the cauldron, and how to assemble it into a hanging piece that you’ll be proud to display.
Materials Needed for a Crochet Hanging Cauldron
To start this crochet hanging cauldron – would be cute for your car! – Step by Step Tutorial, it’s essential to gather the right materials. Choosing the right yarn is one of the most important steps. A medium-weight cotton yarn is often recommended because it holds shape well and is durable, especially if you intend to hang the cauldron in your car. Cotton yarn also comes in a wide range of colors, so you can customize the project to your personal style.
Along with yarn, you will need a crochet hook that matches the yarn size. Most patterns recommend a 3.5mm to 4mm hook for smaller projects like this. Having the correct hook size ensures that your stitches are tight enough to give structure but not too tight to make the project difficult. Tight stitches are crucial for creating the round shape of the cauldron and preventing it from looking loose or floppy.
You will also need a pair of scissors and a yarn needle for finishing off the ends neatly. Stitch markers can also be helpful, especially if you are working in continuous rounds. They allow you to keep track of your rows and avoid mistakes, which is very important for beginners following this Step by Step Tutorial.
Stuffing is another optional material. If you want your cauldron to have a more solid look, a little bit of fiberfill stuffing can be placed inside. However, if you plan to use the cauldron as a small hanging pouch, you may want to leave it hollow to store trinkets or small items. Adding a keychain ring or a sturdy cord will complete your hanging piece, making it easy to attach anywhere.
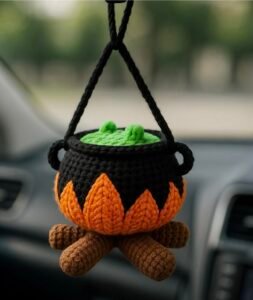
Choosing colors is another fun part of the project. Traditional cauldrons are black, but you can experiment with vibrant shades like purple, green, or orange if you want a whimsical look. The creative freedom of crochet allows you to make the project truly yours. Whether you’re going for a magical vibe or a playful style, yarn colors make all the difference.
Finally, having patience and a positive mindset is also part of your toolkit. While crochet is not difficult, it does require some practice and attention. Approach this crochet hanging cauldron – would be cute for your car! – Step by Step Tutorial with excitement, and you will be surprised by how quickly you improve your skills while creating something adorable.
Step by Step Tutorial: Crocheting the Base and Body
The first step in making your crochet hanging cauldron – would be cute for your car! – Step by Step Tutorial is to crochet the base. Start by making a magic ring and working single crochets into it. This technique creates a tight circle, which is perfect for building the bottom of the cauldron. The number of stitches will depend on the size you want, but usually starting with six single crochets is common for smaller projects.
Once the base circle is established, you will gradually increase in each round to expand the circle. This process is done by working two single crochets in certain stitches while continuing one in others. The increases should be evenly spaced so the circle remains flat and symmetrical. This is where stitch markers become very useful to avoid losing count.
After reaching the desired base size, the next step is to build up the sides of the cauldron. This is done by crocheting around without increasing, which forces the work to curve upward. The stitches form a small bowl-like shape, and as you continue, the height of the cauldron grows. Keeping your stitches tight and even is the secret to having a clean finish.
The body of the cauldron can be adjusted in size depending on your preference. Some crafters like a deeper cauldron to hold more items, while others prefer a shallow one for a decorative touch. The beauty of this Step by Step Tutorial is that you can customize it easily without needing advanced crochet skills.
Once the main body is done, you can add details such as a rim. The rim is usually slightly wider, giving the cauldron its classic round opening. This is often done by alternating between single crochets and half-double crochets to create a structured edge. The rim not only enhances the appearance but also strengthens the opening of the pouch.
At this stage, you will begin to see your project come to life. The shape of the cauldron is recognizable, and this motivates many crocheters to keep going. With each round, you get closer to finishing your crochet hanging cauldron – would be cute for your car! – Step by Step Tutorial, and the excitement builds.
Adding Handles and the Hanging Loop
The next part of the crochet hanging cauldron – would be cute for your car! – Step by Step Tutorial involves creating the handles and the hanging loop. Handles are optional but add a nice decorative touch. They can be made with small chains attached to opposite sides of the rim and secured with slip stitches. This detail makes the cauldron look even more realistic and charming.
For the hanging loop, you will need a longer chain that can be attached securely to the rim or handles. The chain should be strong enough to support the weight of the cauldron, especially if you plan to fill it with small items. Once the chain is the desired length, it is fastened back to the rim with slip stitches.
If you prefer, you can use a leather cord, ribbon, or metal ring instead of crocheting the loop. This is where creativity comes in. Choosing a different material for the hanging loop adds contrast and makes your piece stand out even more. This also gives durability if the cauldron will be used daily in your car.
Adding beads or small decorative elements to the chain is another fun option. You can thread them onto the yarn before making the chain so they become part of the loop. This personal touch can make your cauldron unique and tailored to your style.
The handles and loop not only serve practical purposes but also contribute to the aesthetic. They transform the crochet project into a fully functional hanging decoration. Without them, the cauldron would just be a bowl, but with them, it becomes a hanging treasure.
Once these elements are completed, your crochet piece is almost done. It is always rewarding to see a project take shape, especially when you can imagine it hanging in your car or home. The final steps focus on finishing touches to polish the overall look.
Final Touches and Customization
The last stage of the crochet hanging cauldron – would be cute for your car! – Step by Step Tutorial is adding finishing touches. This includes weaving in all yarn ends with a tapestry needle to make the project neat and durable. Leaving loose ends can make the project unravel, so this step is very important.
Many crocheters love to personalize their projects with embellishments. For example, you can add tiny stars, moons, or even crochet a little lid to go with your cauldron. Decorative stitching in contrasting colors around the rim is another way to add character to your project.
If you plan to use your cauldron as an air freshener holder, you can insert a small fabric pouch with scented beads or dried flowers. This adds functionality while keeping the decoration attractive. It’s a great way to blend utility and design in one item.
Customizing the color is another exciting part. While black is traditional, you might try metallic yarn for a shiny effect or even pastel shades for a playful look. Yarn with sparkles can also create a magical appearance that fits perfectly with the cauldron theme.
If you are making these as gifts, think about the personality of the person receiving it. A bright pink cauldron might be fun for a child, while a sleek black one with gold thread could appeal to an adult. The customization possibilities are endless and allow you to express creativity freely.
After all the finishing touches are complete, your crochet hanging cauldron is ready to use. Hang it in your car mirror, by your desk, or in a cozy corner of your home. No matter where you place it, this handmade piece will add warmth and charm to the space.
FAQ About Crochet Hanging Cauldron
1. Is this project suitable for beginners?
Yes, this crochet hanging cauldron – would be cute for your car! – Step by Step Tutorial is beginner-friendly. It only uses basic stitches like single crochet, slip stitch, and chain.
2. How long does it take to finish one cauldron?
On average, it can take between 2 to 4 hours depending on your skill level and the size you want.
3. Can I wash the crochet cauldron?
Yes, if made with cotton yarn, it can be hand-washed gently. Avoid washing if you use metallic or delicate yarns.
4. What can I put inside the hanging cauldron?
You can use it to hold candies, dried flowers, charms, or even small air fresheners for your car.
5. Do I need special tools for this project?
No special tools are required, just basic crochet supplies such as yarn, a hook, scissors, and a tapestry needle.
6. Can I sell the cauldrons I make?
Yes, you can sell handmade items as long as the design is your own or based on a free tutorial. They make great handmade market products.
Conclusion
Creating a crochet hanging cauldron – would be cute for your car! – Step by Step Tutorial is a fun and rewarding project for crochet lovers. It combines creativity, practicality, and personalization into one small yet impactful craft. From gathering materials to customizing colors and finishing touches, each step allows you to put your personal stamp on the design.
This tutorial has guided you through every stage, from crocheting the base to adding handles and making the hanging loop. Whether you are making it for yourself or as a gift, this project is sure to bring joy and charm to any space.
Now that you know how to make your own crochet hanging cauldron, why not try it today? Once you finish, share your experience and leave a sincere opinion or suggestion. Your feedback can inspire others and help improve creative projects for the future.