
If you love making small crochet accessories, this Crochet Little Gloves Keychain – Step by Step Tutorial will inspire your next handmade project. Creating tiny crochet gloves that can be turned into adorable keychains is both fun and practical. It’s a perfect way to use leftover yarn and create something cute, colorful, and personalized. Whether you are new to crochet or have experience, this project is quick, easy, and deeply satisfying to complete.
These mini gloves are not just charming; they also make wonderful handmade gifts for friends and family. You can attach them to your car keys, backpack, or purse, or even use them as decorative accents for seasonal displays. The best part about this Crochet Little Gloves Keychain – Step by Step Tutorial is that it doesn’t take much time — you can finish one pair in less than an hour. Once you master the pattern, you’ll find yourself making several in different colors and styles.
Crochet projects like this one are ideal for beginners because they combine basic stitches with a touch of creativity. You’ll practice the fundamental crochet techniques — such as chains, single crochets, and shaping — while learning how to work in the round to create a three-dimensional miniature glove. By following this tutorial, you’ll end up with a beautiful little keychain that looks intricate but is surprisingly simple to make. It’s an enjoyable and relaxing process that results in a handmade keepsake you’ll be proud to carry everywhere.
Materials Needed for Crochet Little Gloves Keychain
Before starting your Crochet Little Gloves Keychain – Step by Step Tutorial, gather all the materials you’ll need. Since this is a small project, you don’t require much, and you can often use leftover yarn from previous crochet projects. The main items include yarn, a crochet hook, a keychain ring, scissors, and a yarn needle for finishing.
When it comes to yarn, cotton or acrylic yarn works best. Cotton provides a sturdy texture that holds its shape well, while acrylic gives a softer, flexible feel. Choose any color you like — pastel shades make your gloves look delicate and cute, while bright colors create a fun, vibrant look. You can even mix two tones for a playful design.
For the hook size, a smaller hook (around 2.5mm to 3.5mm) is recommended to ensure your stitches are tight and the gloves maintain their mini shape. Since you’re creating a small accessory, tighter stitches prevent gaps and help your piece look neat and compact.
You’ll also need a small amount of fiberfill or yarn scraps if you wish to slightly stuff the gloves, giving them a fuller appearance. This step is optional but adds a nice touch to the finished piece. Lastly, have your keychain ring ready so you can easily attach the glove once it’s completed.
Keeping all materials organized before you begin will make the crocheting process smoother. You can store everything in a small basket or pouch to ensure nothing gets lost. Being prepared is an important step in this Crochet Little Gloves Keychain – Step by Step Tutorial because it helps you stay focused and enjoy each part of the crafting process.
Once you’ve gathered your materials, find a comfortable and well-lit space to start crocheting. A cozy corner, some background music, and good lighting can make the experience even more enjoyable. Remember — crochet is as much about relaxation as it is about creativity.
Step by Step: Making the Crochet Little Gloves Keychain
Now, let’s begin the fun part of this Crochet Little Gloves Keychain – Step by Step Tutorial. The project starts by crocheting a small cuff, which forms the wrist part of the glove. Begin with a slip knot and chain around 8 to 10 stitches, depending on the size you want. Join the chain ends together to form a loop, then work single crochets around it to create the cuff’s first few rows.
Once your cuff has a few rows of height, it’s time to shape the body of the glove. Continue crocheting in the round while slightly increasing stitches in the next rows to make it a bit wider. This will form the palm area of the glove. Keep your stitches tight and even to maintain a neat appearance.
After the palm section, you’ll create the thumb. To do this, crochet a small separate piece that will later be attached to the main glove, or simply skip a few stitches in one round to leave an opening for the thumb, which you can later fill in. The thumb is usually made with three to four rounds of single crochet.
Once the thumb is completed, close the opening and continue working on the glove’s top part. Decrease the stitches gradually to shape the fingers’ end. Since this is a mini glove, the fingers are represented by a rounded top rather than individual finger sections.
When you’re satisfied with the shape, fasten off and weave in all yarn ends neatly. You can lightly stuff the glove at this point if you prefer it to look puffy and three-dimensional. Using a bit of fiberfill makes it stand out beautifully as a keychain.
Finally, attach the keychain ring. Insert a small metal ring through one stitch at the top of the glove or use a short yarn chain as a loop to connect the glove to the keychain ring. Your Crochet Little Gloves Keychain is now complete, ready to hang from your keys, bag, or anywhere you’d like.
Creative Ideas and Variations
One of the best parts of following this Crochet Little Gloves Keychain – Step by Step Tutorial is the freedom to get creative. There’s no limit to how you can personalize your design. You can make gloves in different colors, add stripes, or even use a glitter yarn for a festive touch. Each small detail makes your creation unique and expressive.
For a more realistic look, you can crochet tiny cuffs in a contrasting color to mimic real winter gloves. For example, make the cuff in white and the glove body in red or blue — it gives a lovely, cozy appearance. You can also sew small buttons or beads onto the gloves for decoration.
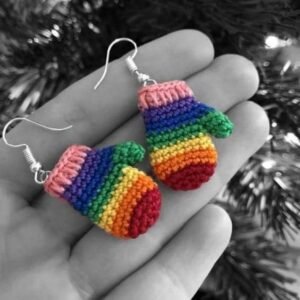
If you’re making these keychains as gifts, consider creating sets in different color combinations. You can even make “his and hers” versions or a rainbow set to celebrate special occasions. Handmade gifts like these show thoughtfulness and care, making them more meaningful than store-bought items.
Another fun idea is to add embroidered details on the gloves. Using a needle and some embroidery thread, stitch small hearts, initials, or stars onto the surface. It’s a simple way to give your keychain an artistic and personal flair.
If you prefer minimalist designs, keep your gloves in a single color and let the texture speak for itself. The small size and neat stitches already create an appealing, handcrafted charm that doesn’t require extra embellishment.
Remember, every little glove you make tells a story — your choice of color, yarn, and stitches all reflect your creativity. That’s the beauty of handmade crafts; each piece is one of a kind, made with heart and passion.
Tips for Beginners and Maintenance Advice
This Crochet Little Gloves Keychain – Step by Step Tutorial is ideal for beginners, but even simple projects can be improved with a few tips. First, always check your tension. Because the gloves are small, even minor tension differences can affect the shape. Practice keeping your yarn tension consistent for the best results.
Second, work in good lighting. Since you’ll be working with small stitches, seeing your loops clearly will help you avoid mistakes and keep your stitches even.
Third, count your stitches carefully. Missing or adding a stitch may distort the glove’s shape, especially since this project relies on small, precise rounds. A stitch marker can help you keep track of the beginning of each round.
When it comes to caring for your crochet keychain, remember that handmade items need gentle treatment. If it gets dirty, hand wash it carefully with mild soap and let it air dry. Avoid placing it in the washing machine to prevent stretching or unraveling.
If your glove loses shape over time, you can lightly steam it or shape it back with your fingers. The good thing about crochet is that it’s flexible and can often be reshaped easily.
Finally, always store your crochet accessories in a clean, dry place. Keeping your keychains safe ensures they last for years and maintain their handmade charm.
About Crochet Little Gloves Keychain
1. Is this project suitable for beginners?
Yes! The Crochet Little Gloves Keychain – Step by Step Tutorial is designed for beginners. It uses simple stitches and clear steps that help you learn while creating something cute.
2. How much yarn do I need for one glove keychain?
You only need a small amount — usually less than 10 grams of yarn. This makes it perfect for using up leftover yarn from other projects.
3. Can I use different types of yarn?
Absolutely! Cotton, acrylic, or blended yarns all work well. Just make sure the yarn weight matches your crochet hook size for the best results.
4. How long does it take to make one keychain?
On average, it takes 30–45 minutes to complete one glove keychain, depending on your speed and experience.
5. Can I wash the crochet glove keychain?
Yes, but gently. Hand wash with mild soap and air dry to keep the shape and texture intact.
6. Can I sell the finished crochet glove keychains?
Definitely! Handmade crochet items are popular in craft markets and online shops. Just make sure to credit your work as handmade and unique.
Conclusion
In this Crochet Little Gloves Keychain – Step by Step Tutorial, you learned how to create a cute, handmade accessory that’s both decorative and functional. You’ve discovered how to crochet the cuff, shape the glove, add a thumb, and finish it beautifully as a keychain.
This project combines creativity, relaxation, and practical crafting — perfect for beginners or anyone who loves small crochet projects. With just a bit of yarn and time, you can make lovely handmade pieces that brighten your day or delight someone special.
Now it’s your turn! Grab your yarn, pick your favorite colors, and start making your own Crochet Little Gloves Keychain today. When you finish, share your results and let us know your honest opinion and suggestions for future tutorials. Your feedback inspires more creative projects and helps others discover the joy of crochet!