
Learning how to make Crochet mushroom earrings- Step by Step Tutorial is a fun and creative way to combine crochet techniques with trendy accessories. These adorable earrings are perfect for those who love handmade jewelry and want to add a touch of nature-inspired charm to their style. With simple materials and basic crochet skills, you can create unique earrings that are lightweight, colorful, and personalized.
This Crochet mushroom earrings- Step by Step Tutorial is designed for beginners and experienced crocheters alike. Even if you have never made jewelry before, the instructions are straightforward, and the project is small enough to complete in one afternoon. By the end, you will have a beautiful pair of mushroom earrings ready to wear or gift to someone special.
The best part about this Crochet mushroom earrings- Step by Step Tutorial is how customizable it is. You can choose different yarn colors, adjust the size of the mushrooms, or even add decorative beads to create a variety of styles. These earrings are also eco-friendly since you can use leftover yarn from other projects, making them both budget-friendly and sustainable.
Materials Needed for Crochet Mushroom Earrings
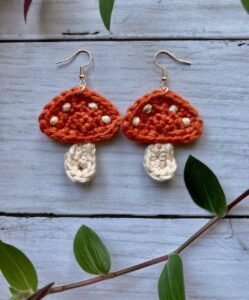
Before starting the Crochet mushroom earrings- Step by Step Tutorial, gather all the necessary materials to make the process smooth and enjoyable. First, you will need lightweight yarn, such as cotton or embroidery thread, in at least two colors: one for the mushroom cap and one for the stem. The classic look uses red for the cap with white spots, but you can experiment with any color combination you like.
A small crochet hook, usually between 1.5mm and 2mm, works best for this project. Smaller hooks create tighter stitches, which help the earrings hold their shape while keeping them lightweight and delicate enough to wear comfortably.
You will also need earring hooks or findings, which are widely available at craft stores or online. These hooks allow you to attach the crocheted mushrooms so they can be worn as earrings. A pair of jewelry pliers is helpful for securing the hooks to the crochet pieces.
A tapestry needle is essential for weaving in loose ends and sewing any small details, such as the mushroom spots. Scissors are needed for trimming excess yarn neatly and giving the earrings a professional finish.
For optional decoration, small beads or sequins can be sewn onto the mushroom cap to add sparkle and texture. These extras are entirely up to your personal style preference but can make your earrings stand out even more.
Finally, having a stitch marker on hand can help you keep track of your rounds if you are new to crocheting small pieces. This ensures that your mushroom earrings come out symmetrical and well-shaped.
Crocheting the Mushroom Cap
The first major step in the Crochet mushroom earrings- Step by Step Tutorial is creating the mushroom cap. Start by making a magic ring with your chosen cap color, typically red for a traditional mushroom look. Into this ring, crochet six single crochet stitches to form the base circle. Pull the ring tight to close the center neatly.
Continue crocheting in the round, increasing evenly in each round to form a flat circle. For example, you might add one stitch to every other stitch in the second round, then every third stitch in the next round, and so on. This will gradually widen the cap while keeping it symmetrical.
Once the cap reaches the desired size for your earrings, stop increasing and work a round or two without increases. This gives the mushroom cap a slight dome shape, mimicking a real mushroom’s natural curve. Make sure your stitches stay tight so the cap holds its form well.
If you want the classic mushroom spots, use white yarn to sew small dots onto the cap after finishing the crochet part. You can embroider simple French knots or small circles, placing them randomly for a natural appearance.
When the mushroom cap is complete, fasten off the yarn and weave in any loose ends with the tapestry needle. This ensures the piece looks neat and professional, ready for the next step.
Repeat the same process to create a second mushroom cap for the matching earring. Try to keep both caps the same size and shape for a balanced final look.
Crocheting the Mushroom Stem and Assembly
The next part of the Crochet mushroom earrings- Step by Step Tutorial focuses on the stem and assembling the pieces into wearable earrings. Begin the stem using your second yarn color, typically white or beige. Make a chain of two to three stitches, then work single crochets in the round to form a small tube.
Continue crocheting in a spiral without increasing to keep the stem narrow and straight. The length can be adjusted depending on how large or small you want the earrings to be. Short stems create a cute, compact look, while longer stems add more drama to the design.
Once the stem reaches the desired length, attach it to the flat side of the mushroom cap using the tapestry needle. Sew it securely so the stem stays in place even with regular wear.
To prepare the earrings for wearing, attach a jump ring through the top of the mushroom cap using jewelry pliers. This small metal ring will connect the crochet piece to the earring hook easily and securely.
Open the earring hook with the pliers, slide it through the jump ring, and close it tightly. Repeat the entire process for the second mushroom to complete the pair of earrings.
At this stage, the mushrooms should be fully assembled, with caps, stems, and hooks all securely attached, ready for the finishing touches.
Finishing Touches and Styling Tips
The last stage of the Crochet mushroom earrings- Step by Step Tutorial involves adding final details and styling options. If you want your earrings to sparkle, sew tiny beads or sequins onto the mushroom cap before attaching the earring hooks. This gives the design extra texture and catches the light beautifully.
Make sure all yarn ends are securely woven in and trimmed neatly. This prevents unraveling and gives the earrings a polished, professional look. Loose threads can make handmade jewelry look unfinished, so take time with this step.
Consider stiffening the earrings slightly if you want them to hold their shape firmly. A light fabric stiffener or diluted glue can be brushed onto the crochet pieces and left to dry completely. This step is optional but can be helpful if you want the earrings to stay perfectly shaped.
You can also experiment with different sizes and colors. Tiny mushrooms look delicate and subtle, while larger ones make a bold statement. Try pastel shades for a cute spring look or metallic yarn for an elegant twist.
If you enjoy making jewelry, this tutorial can be adapted to other designs, such as crochet flowers, stars, or hearts, using the same basic techniques. The possibilities are endless once you master small-scale crochet projects.
Handmade earrings like these also make thoughtful gifts. Package them in a small box or attach them to a decorative card for a personal, handmade touch that friends and family will appreciate.
FAQ about Crochet Mushroom Earrings
1. Are crochet mushroom earrings heavy to wear?
No, they are very lightweight because they are made with yarn and minimal metal hardware.
2. Can beginners make these earrings?
Yes, this Crochet mushroom earrings- Step by Step Tutorial is simple enough for beginners, using only basic stitches like single crochet.
3. How long does it take to make a pair?
Most people can finish a pair in one to two hours, depending on skill level and desired details.
4. What yarn works best for small crochet projects like earrings?
Lightweight cotton yarn or embroidery thread works best because it keeps the earrings delicate and comfortable to wear.
5. Can I sell earrings made from this tutorial?
Yes, handmade earrings are popular at craft fairs and online shops. Just make sure your pieces are well-made and neatly finished.
6. How do I clean crochet earrings?
Gently hand wash with mild soap and water, then air dry completely before wearing again.
Conclusion
In this Crochet mushroom earrings- Step by Step Tutorial, you learned how to gather materials, crochet the mushroom cap and stem, assemble the pieces, and add final decorative touches.
This project is beginner-friendly, customizable, and perfect for creating unique, handmade accessories.
Now it’s your turn to try making your own crochet mushroom earrings. Share your honest feedback, suggestions, and experiences so others can learn and enjoy this fun project too.