
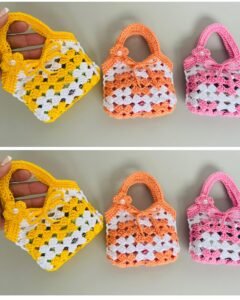
If you are looking for a practical and eco-friendly crochet project, this Crochet soap holder bag – Step by Step Tutorial is a perfect choice. Not only is it a functional accessory, but it’s also a sustainable alternative to plastic soap containers. Handmade with love, a crochet soap holder bag helps keep your soap dry, easy to handle, and adds a charming touch to your bathroom decor. This tutorial will walk you through every stage of creating your own soap holder bag, from selecting materials to adding the finishing touches, making it suitable for both beginners and experienced crocheters.
Creating a crochet soap holder bag is more than just a craft—it’s a creative way to reduce waste and practice mindful living. By using reusable handmade accessories, you contribute to a cleaner environment while enjoying the relaxing process of crocheting. These bags are small, quick to make, and perfect for gifting. You can even create them in sets with different colors or patterns to match your personal style or bathroom theme.
In this Crochet soap holder bag – Step by Step Tutorial, you’ll learn how to choose the best yarn and hook size, create a simple yet durable stitch pattern, and assemble your bag with a drawstring or hanging loop. Each step is detailed so you can follow along easily and achieve a professional-looking finish. Once completed, you’ll have a handmade soap holder bag that’s both practical and beautiful—a small item that makes a big difference in daily life.
Materials and Tools Needed for Your Crochet Soap Holder Bag
Before you begin your Crochet soap holder bag – Step by Step Tutorial, it’s essential to gather all the necessary materials. Preparing everything ahead of time ensures that your crochet session flows smoothly and helps you focus on the creative process.
For this project, the main material you’ll need is yarn. Cotton yarn is the best choice because it’s absorbent, soft, and easy to wash. It also dries quickly and holds its shape well, which makes it perfect for bathroom use. Avoid synthetic yarns since they don’t absorb water efficiently. You can use a single color or combine two shades for a more decorative look.
Next, you’ll need a crochet hook that matches your yarn weight. Most soap holder bags use a 3.5 mm or 4 mm hook, but always check the yarn label for the recommended size. Using the correct hook helps maintain the right tension and ensures your stitches are even.
Other supplies include a yarn needle for weaving in loose ends, scissors for trimming, and a small piece of ribbon or yarn for the drawstring. If you want your bag to have a hanging loop, you can also prepare a small metal or wooden ring to attach it easily in the shower.
Once you have everything ready, make sure you have a comfortable and well-lit workspace. A relaxed environment helps you enjoy each part of this Crochet soap holder bag – Step by Step Tutorial, turning it into a calming and creative activity.
Step-by-Step Instructions for Making a Crochet Soap Holder Bag
Now let’s move on to the exciting part of this Crochet soap holder bag – Step by Step Tutorial. The pattern is simple and repetitive, making it great for beginners or anyone looking for a quick, satisfying project.
To start, create a foundation chain of around 18 to 22 stitches, depending on the size of your soap bar. This chain will form the base of your bag. Make sure it’s slightly wider than your soap, as the stitches will tighten up later.
Work single crochet stitches along the chain, then continue working in rounds around both sides of the foundation to form an oval shape. This technique creates a bottom for your soap bag, giving it structure and space to hold the soap comfortably.
Once the base is complete, begin working double crochet stitches in each round to form the body of the bag. You can alternate with chain stitches between each double crochet to create a mesh pattern that allows the soap to lather easily and dry faster.
Continue crocheting rounds until the bag is tall enough to fit your soap. Make sure to test the size by placing your soap inside before finishing the top. For the final few rounds, switch to single crochet stitches to give the opening a more secure and neat edge.
Finally, create a small drawstring by crocheting a long chain—about 40 to 50 stitches—and weaving it through the top edge. You can tie a knot or add small beads to the ends for decoration. If you prefer, add a hanging loop to hang your bag after use.
Customizing and Decorating Your Crochet Soap Holder Bag
One of the most enjoyable parts of this Crochet soap holder bag – Step by Step Tutorial is personalizing your design. You can add your own touch to make each bag unique and suited to your style or to match your bathroom decor.
Start with color combinations. You can create striped patterns by alternating two or more yarn colors every few rows. This gives your soap holder a vibrant and fun look. If you prefer something more elegant, choose neutral or pastel tones.
You can also add textures by experimenting with different stitch patterns. Try using puff stitches or shell stitches for a decorative surface that adds visual interest while still being functional. Mixing textures not only enhances the look but also gives your bag a pleasant feel.
Adding a decorative border at the top edge of the bag is another great idea. You can make a simple scalloped edge or picot border to make it stand out. These small details can elevate your crochet soap holder bag from simple to stylish.
If you want to make it extra special as a gift, consider attaching a small crochet flower, heart, or leaf applique. These embellishments can be sewn on easily and turn your soap holder into a thoughtful handmade present.
Lastly, for practical purposes, you can add a lining or small pocket inside if you want to include items like mini soaps or exfoliating pads. Although optional, this addition gives your crochet bag a more finished and professional look.
Benefits and Uses of a Crochet Soap Holder Bag
A crochet soap holder bag isn’t just cute—it’s highly functional and eco-friendly. Let’s explore why this small project can make such a big impact in your daily routine.
Firstly, it helps reduce plastic waste. Many commercial soap containers are made of plastic, but by using a reusable crochet bag, you make a more sustainable choice. It’s a simple yet effective step toward an eco-conscious lifestyle.
Secondly, it acts as a gentle exfoliator. The texture of cotton yarn naturally scrubs your skin, removing dead cells and improving circulation while you shower. It’s like having a soft, reusable loofah that also holds your soap!
Another advantage is that it helps extend the life of your soap. Because the bag allows airflow and drainage, your soap dries quickly and doesn’t melt away after use. This means you can enjoy your favorite bars for longer.
Crochet soap holder bags are also perfect for travel. They keep your soap clean and contained, preventing mess inside your bag. You can even make smaller versions for short trips or larger ones for home use.
Finally, they make excellent gifts. Handmade items always carry sentimental value, and a beautifully crocheted soap holder bag shows thoughtfulness and care. Pair it with a handmade soap bar for a lovely spa-style present.
By making and using your own crochet soap holder bag, you bring together creativity, functionality, and sustainability—a perfect combination for any crafter who values both beauty and practicality.
Crochet Soap Holder Bag – Step by Step Tutorial
1. Is the Crochet soap holder bag suitable for beginners?
Yes, this project is great for beginners because it uses basic stitches like single and double crochet. It’s easy to follow and can be completed in just a few hours.
2. What kind of yarn is best for a crochet soap holder bag?
Cotton yarn is ideal because it’s absorbent, durable, and soft. Avoid synthetic fibers like acrylic, which don’t dry well and can become slippery.
3. Can I wash my crochet soap holder bag?
Absolutely! You can hand wash it with mild soap and air dry it. Cotton yarn dries quickly and holds its shape well even after multiple washes.
4. How can I prevent my bag from stretching too much?
To keep its shape, avoid using overly loose stitches. You can also make the bag slightly smaller than your soap so it stretches naturally with use.
5. Can I use my crochet soap holder for exfoliation?
Yes! The texture of the crochet stitches gently exfoliates your skin while helping the soap lather beautifully. It’s great for both shower and bath use.
6. Can I make the bag in different sizes?
Definitely. You can adjust the foundation chain and number of rounds to fit larger or smaller soap bars. Customizing the size is easy and adds versatility to your project.
Conclusion
Making a Crochet soap holder bag is a wonderful way to combine creativity, sustainability, and practicality. Through this Step by Step Tutorial, you learned how to choose materials, crochet the base and body, add decorative touches, and finish your bag beautifully. Each step helps you create a functional accessory that’s also a meaningful expression of your craft.
These small crochet soap bags are not just useful—they’re also a reflection of mindful living and care for the environment. Whether you make them for yourself, as gifts, or even to sell, they bring a touch of handmade charm to everyday life.
Now that you’ve finished this tutorial, why not try making one today? Share your honest opinion and suggestions about this guide in the comments. Your feedback helps inspire more creative and eco-friendly crochet projects for everyone to enjoy!