
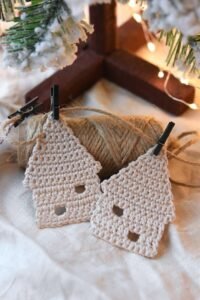
Crocheted house for Christmas tree-Step by Step Tutorial is a charming holiday craft that adds warmth, color, and a personalized touch to your Christmas décor. This adorable miniature house can be hung on your Christmas tree, displayed on a holiday wreath, or even used as a small festive gift. Creating a crocheted house brings together artistic expression and seasonal joy, making it a perfect activity for those who love handmade ornaments. Throughout this guide, we will explore how to make your own crocheted house using basic stitches, creative details, and an easy process that is suitable for beginners and experienced crafters alike.
One of the beautiful things about following the Crocheted house for Christmas tree-Step by Step Tutorial is the opportunity to customize your design. You can choose the colors that best match your holiday style, whether that means going traditional with red and green or opting for something more whimsical like pastels or snowy white tones. By adding decorative touches like tiny windows, embroidered doors, or miniature wreaths, your handmade ornament becomes a unique and memorable part of your festive celebration. The finished crocheted house can symbolize warmth, family, and holiday togetherness.
Additionally, creating a Crocheted house for Christmas tree-Step by Step Tutorial can be a relaxing and meaningful activity. Crafting with yarn has proven calming benefits, allowing time to unwind during a busy season. It is also a wonderful project to share with friends or family members, particularly children who enjoy seeing their creative contributions on the Christmas tree. Whether you are making one ornament or several to gift to loved ones, this project carries sentimental value. Now, let’s gather our materials and begin shaping your cozy holiday house.
Materials and Preparations
To start this Crocheted house for Christmas tree-Step by Step Tutorial, you will need yarn in at least two colors: one for the house body and another for the roof. Cotton or acrylic yarns in medium weight work wonderfully, as they are easy to work with and hold shape well. You will also need a crochet hook suitable for your yarn weight, typically between 3.0 mm and 4.0 mm. Small scraps of yarn in contrasting colors are helpful for details like windows and doors. Additionally, a yarn needle and scissors are essential tools for finishing details and weaving in ends.
Before you begin crocheting, decide on the size of your ornament. If you prefer a small, subtle decoration, use a thinner yarn and smaller hook. For a more noticeable ornament, use thicker yarn and a larger hook. The flexibility of this project allows you to adapt the dimensions easily. You can also vary your design to create a collection of houses in different shapes and styles to hang throughout your tree.
Make sure you have a quiet and comfortable crafting space. Sitting at a well-lit table or cozy corner with good lighting helps ensure your stitches are even. Having your yarn and tools within easy reach makes the process smoother and more enjoyable. Crafting is not just about the outcome but also the experience, so allow yourself time to relax and enjoy the creative journey.
It is helpful to review basic crochet stitches before beginning. The primary stitches used in this Crocheted house for Christmas tree-Step by Step Tutorial are chain stitch, single crochet, and slip stitch. If you are familiar with these stitches, the process will feel natural. If not, don’t worry—these stitches are simple and easy to learn quickly.
Once you have your materials and space ready, think about how you want the final house to look. Consider the color arrangement: will the roof contrast with the walls? Will the windows be outlined? Planning ahead makes the assembly smoother and allows for consistency in your design. Now, with everything organized, you’re ready to start crocheting your house.
Crocheting the Base of the House
Begin this Crocheted house for Christmas tree-Step by Step Tutorial by creating the main body of the house. Start by making a foundation chain that determines the width of your house. Keep in mind that you want the shape to be rectangular and sturdy. After forming the chain, work rows of single crochet back and forth until the rectangle reaches the height you desire.
As you continue crocheting, pay attention to your tension. Even stitches help create a structured and neat appearance. If your stitches loosen or tighten unexpectedly, simply adjust your grip on the yarn and continue working. Practice helps your work become more consistent over time.
Once your rectangle is complete, you will fold it to form the house’s shape. This is where creativity comes into play. You can fold the piece vertically to create a tall narrow house or horizontally for a shorter, wider appearance. Experiment until you find a shape that suits your design style.
Before stitching the sides, you may want to add window or door embellishments directly onto the rectangle. Using contrasting yarn and a yarn needle, you can embroider small rectangles or squares to represent windows. A slightly larger embroidered shape can serve as a charming front door. These simple touches add personality to your ornament.
Next, fold the house piece and use slip stitches to join the side edges together. Slip stitching creates a clean seam and helps the house maintain its shape. Make sure the edges align evenly to avoid visible gaps or twisting. Finish by weaving in all yarn tails with your needle to secure the structure.
Now, your house body is complete, and you are ready to create the roof that will sit atop the structure. This step adds dimension and completes the distinctive look of the house ornament.
Making and Attaching the Roof
The next stage of the Crocheted house for Christmas tree-Step by Step Tutorial focuses on crafting the roof. To create the roof, start by making another rectangle using your chosen roof color. This rectangle should be slightly wider than the top of your house body so that it overhangs naturally like a real roof.
Work your rectangle using rows of single crochet. You may create texture by alternating stitches or incorporating small decorative patterns. Even simple variations in stitch repetition can create a more dynamic and attractive surface. Once the roof piece is complete, fold it at the center to create a peaked roof shape.
Position the folded roof on top of the house body and use slip stitches or sewing techniques to attach it. Make sure the peak of the roof aligns evenly above the center seam of the house. For a neat finish, stitch carefully along the edges so that the roof does not pull or pucker.
To add charm, consider embellishing the roof. You might embroider snow accents to create a wintry effect or use small beads to represent Christmas lights. These little details bring your ornament to life and reflect your personal holiday style.
If you want your ornament to hang on the tree, attach a small yarn loop to the top of the roof. This loop should be strong enough to hold the weight of the ornament but not so large that it becomes distracting. Simply cut a short piece of yarn, fold it, and sew it securely onto the roof peak.
Once the roof is attached and the hanger loop is in place, your crocheted house is nearly complete. The finishing touches will bring out the festive charm and help your ornament shine on the Christmas tree.
Adding Final Decorative Details
The final stage of the Crocheted house for Christmas tree-Step by Step Tutorial is where your creativity can truly flourish. Begin by examining your house ornament from all sides. Look for any loose yarn ends and secure them with your yarn needle. Ensuring a clean finish enhances the overall look.
If you enjoy embroidery, add more decorative stitching to the walls or roof. Tiny stars, snowflakes, or hearts can make your ornament feel even more personal and festive. Using metallic or sparkling yarn for embroidery can add an elegant holiday glow.
Another idea is to add a miniature wreath or bow to the front of the house. Create a small circle using green yarn, then stitch it to the center above the door. Add a tiny bow using red thread or yarn for a classic Christmas appearance.
For added dimension, you may stuff the house lightly with fiberfill before closing any final seams. This makes the ornament slightly puffy, giving it a softer and more plush appearance. Be careful not to overfill, as too much stuffing can distort the shape.
If you plan to gift this ornament, consider writing a small personalized tag to attach to the hanging loop. A short message such as “Handmade with love” adds heartfelt meaning. This ornament can become a cherished keepsake for loved ones year after year.
Now your crocheted house ornament is complete and ready to be placed on the Christmas tree, shared in holiday décor, or gifted to someone special.
FAQ
1. Do I need advanced crochet skills for this project?
No, basic stitches such as single crochet and slip stitch are enough. Beginners can comfortably follow this tutorial.
2. Can I use leftover yarn?
Yes, this project is excellent for using up scrap yarn, especially small pieces needed for details.
3. How long does it take to make one house ornament?
Most people can complete one ornament in one to two hours, depending on experience.
4. Can I wash the ornament?
Handwashing is best. Use mild soap and let the piece air dry to preserve shape.
5. How can I make the ornament larger or smaller?
Adjust the foundation chain or use different yarn thickness and hook sizes.
6. Can I create multiple houses to match a theme?
Absolutely. Vary colors and decorations to create a beautiful ornament collection.
Conclusion
This Crocheted house for Christmas tree-Step by Step Tutorial has guided you through creating a warm, charming, and festive holiday ornament.
You learned how to prepare materials, crochet the house body, shape the roof, and add beautiful personal touches that make your ornament unique.
Handmade decorations bring personality and heartfelt joy to your holiday celebrations. If you enjoyed this tutorial, please leave your sincere opinion and share suggestions for future ideas. Your feedback is always welcome and appreciated.