
Starting this Crocheted sea turtle-Step by Step Tutorial is a wonderful way to explore creativity while making a charming handmade piece. A crocheted sea turtle is a delightful craft project that appeals to beginners and experienced crafters because of its simple structure, adorable appearance, and relaxing stitching process. When you begin working on this project, you quickly realize that creating a tiny sea turtle from yarn is both fun and rewarding. Throughout this tutorial, the keyword Crocheted sea turtle-Step by Step Tutorial will guide you in understanding each stage clearly and effectively.
One of the most enjoyable aspects of the Crocheted sea turtle-Step by Step Tutorial is how accessible it is for people of all skill levels. Even if you have only practiced basic stitches, you can successfully follow this guide and end up with a lovely little sea turtle. The project is small, quick to complete, and perfect for practicing tension, shaping, and joining pieces. Many people love making these small turtles as gifts, keychains, ornaments, or decorative items because they are irresistibly cute and highly customizable.
This tutorial also offers a great opportunity to explore color combinations and creative expression. The steps in this Crocheted sea turtle-Step by Step Tutorial allow you to create the turtle’s shell, head, flippers, and body with simple techniques. With patience and attention to detail, you will produce a sea turtle that reflects your personal style. As you read through this complete guide, you’ll develop a solid understanding of materials, techniques, assembly, and decoration—everything needed to create a charming crocheted sea turtle from start to finish.
Materials and Preparation for the Project
To begin the Crocheted sea turtle-Step by Step Tutorial, you first need to gather the right materials. Soft cotton yarn is a great choice because it provides a smooth finish and allows the stitches to stand out beautifully. You can choose two or more colors, such as a darker shade for the shell and lighter tones for the flippers and head. These combinations help bring your turtle to life in a visually appealing way.
A crochet hook suitable for amigurumi is essential. Hooks from 2.0 mm to 3.5 mm work perfectly depending on your yarn weight. The smaller the hook, the tighter and more defined your stitches will be. Tight stitches are especially important for amigurumi projects like this one, as they help maintain shape and prevent stuffing from peeking through.
You will also need polyester fiberfill to stuff your sea turtle. This material keeps the toy lightweight, soft, and durable. Make sure to use small amounts at a time to achieve smooth shaping throughout the body. The fiberfill also helps your turtle maintain its structure without looking too stiff.
A yarn needle is necessary for sewing the pieces together. Amigurumi requires careful assembly, and a good needle helps you attach the head, shell, and flippers neatly. Proper stitching ensures that your sea turtle is secure, durable, and maintains its shape through use or display.
Stitch markers are optional but helpful. They help you keep track of your rounds, especially since amigurumi is usually worked in continuous spirals. Using markers prevents errors and makes the crafting process much smoother.
Small safety eyes or embroidered eyes will bring personality to your crocheted sea turtle. Safety eyes create a shiny and expressive look, while embroidered eyes are perfect for a softer, handmade appearance. Either option works beautifully depending on your style preference.
Step-by-Step Instructions to Crochet the Sea Turtle
Now that your materials are prepared, you can begin the practical part of the Crocheted sea turtle-Step by Step Tutorial. Start by crocheting the turtle’s body and head. These pieces are often made as a single continuous shape to simplify assembly and create a smooth finish. Using basic stitches such as single crochet, increases, and decreases, you will build a rounded form that resembles a turtle’s body.
Once the body is complete, focus on shaping the shell. The shell is usually crocheted separately in a circle, gradually increasing stitches to form the classic turtle shell shape. You can incorporate color changes or decorative stitches to give your shell more texture and character. Many people enjoy using two tones to mimic natural turtle shells.
After crocheting the main shell piece, you can create an optional top layer for texture. This layer may include raised stitches, shell-like patterns, or decorative ridges. Adding this detail elevates the finished appearance and makes the sea turtle look more realistic and lively.
Next, crochet the flippers. You will need four flippers—two larger front ones and two smaller back ones. These are typically made using simple rounds or rows. Their size and shape contribute to the turtle’s overall charm. Make sure they match in size for symmetry.
The tail is a small but essential detail. It is usually made with just a few stitches and sewn onto the back of the body. Even though it is a small part, it helps complete the turtle’s silhouette in a delightful way.
Finally, assemble the pieces. Attach the shell to the body first, ensuring it is centered. Then sew the flippers and tail in place with care. The eyes should be added last so you can position them perfectly. Your crocheted sea turtle will now look complete and full of personality.
Tips for Perfecting Your Crocheted Sea Turtle
This section of the Crocheted sea turtle-Step by Step Tutorial focuses on improving your results. One important tip is to keep your tension consistent throughout the project. Amigurumi requires tight stitches, and even tension helps your turtle maintain a smooth and even shape. If your tension is too loose, stuffing may show through.
Another useful tip is to stuff your turtle gradually. Adding small amounts of fiberfill at a time helps maintain a uniform shape and prevents lumps. Pay special attention to the head and body, as these areas require careful sculpting for the best results.
When sewing the parts together, take your time. A neat assembly process makes a huge difference in the final appearance. Use small, invisible stitches so the joins appear seamless. This level of detail gives your sea turtle a professional look.
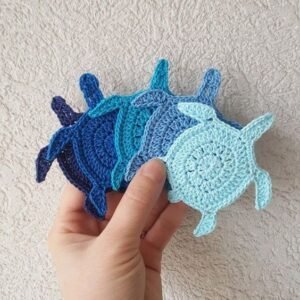
Experiment with color combinations to personalize your turtle. Oceans shades like blue and turquoise are popular, but bright colors can also create adorable designs. Using contrasting tones for the shell and flippers enhances visual appeal.
If you want your turtle to be extra soft, choose a plush or velvet yarn. This creates a different texture and gives the turtle a more cuddly feel. However, keep in mind that plush yarn may hide stitch definition compared to cotton.
You can also add embellishments such as embroidered spots or shell patterns. These small touches enhance the character of your sea turtle and make your creation truly unique.
Creative Ways to Use and Display Your Sea Turtle
This part of the Crocheted sea turtle-Step by Step Tutorial explores how to enjoy your finished creation. One idea is to use it as a decorative item. Place your turtle on a shelf, desk, or nursery space to bring a touch of charm and softness to your decor.
Another great idea is to turn your sea turtle into a keychain. Simply attach a keyring to the top of the shell. This makes your turtle easy to carry and display. It is lightweight, durable, and adds personality to your keys or bag.
Your crocheted sea turtle can also become a thoughtful handmade gift. Friends and family appreciate handmade items, and this adorable turtle is perfect for birthdays, baby showers, or special celebrations. Its small size makes it a convenient, meaningful present.
Creating themed sets is another fun option. You can crochet multiple turtles in different colors and sizes. Displaying them together creates a beautiful collection that showcases your creativity. Themes like ocean creatures or rainbow colors work wonderfully.
These turtles can also be used as children’s toys. Their soft, small design makes them safe for playtime. Just be sure to use embroidered eyes instead of plastic safety eyes for younger children.
Lastly, consider making sea turtles for charity. Many organizations accept handmade items for donation, and crocheted toys are always appreciated. It’s a beautiful way to share your work and bring joy to others.
About Crocheted Sea Turtles
Is this Crocheted sea turtle-Step by Step Tutorial suitable for beginners?
Yes, it uses simple stitches and clear instructions, making it very beginner-friendly.
How long does it take to crochet a sea turtle?
Most people finish it in one to two hours, depending on experience.
What yarn works best?
Cotton yarn is ideal because it provides structure and smooth stitches.
Can I make the turtle bigger?
Yes, simply use thicker yarn and a larger hook to increase the size.
Do I need safety eyes?
No, you can embroider eyes for a softer and safer option.
Is stuffing required?
Yes, stuffing helps the turtle maintain its shape and softness.
Conclusion
By following this Crocheted sea turtle-Step by Step Tutorial, you have learned how to choose materials, crochet each part of the sea turtle, assemble the pieces, and customize your creation.
With clear instructions and simple techniques, this guide makes it easy for anyone to create a beautiful sea turtle from start to finish.
I hope you enjoyed this tutorial and felt inspired by the creative possibilities. Please leave your honest opinion and share any suggestions for future tutorials.