
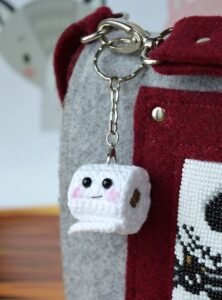
Learning how to knit a toilet paper bag pendant-step by step tutorial can be a delightful and practical craft project. Many people are looking for creative ways to store and display essential household items, and making a knitted pendant for toilet paper bags is both functional and decorative. With a handmade touch, this project adds charm to any bathroom while also being a fun introduction to knitting techniques.
When you embark on this project, you will notice how easy it is to transform basic yarn and simple stitches into something beautiful and useful. The process not only teaches you patience and skill but also allows you to create a personalized piece that can match your home décor. Unlike mass-produced storage solutions, a knitted toilet paper bag pendant feels unique, warm, and tailored to your style.
In this guide, we will explore how to knit a toilet paper bag pendant-step by step tutorial in detail, breaking the project into easy-to-follow stages. From choosing the right materials to completing the final finishing touches, this article will serve as your go-to reference. Whether you are a beginner knitter or have some experience, you will find helpful explanations, tips, and step-by-step instructions to achieve a polished result.
Choosing Materials for Your Knitted Toilet Paper Bag Pendant
When starting with how to knit a toilet paper bag pendant-step by step tutorial, the first step is selecting the right materials. Your yarn choice is one of the most important decisions you will make, as it affects both the durability and appearance of the finished piece. Cotton yarn is a popular option because it is sturdy, washable, and holds its shape well.
Knitting needles should also be carefully chosen for this project. A medium-sized needle, such as 4mm or 5mm, is often recommended for beginners, as it provides enough flexibility while still maintaining a tight stitch. The tighter the stitches, the stronger your pendant will be, ensuring it can handle the weight of toilet paper bags without sagging.
In addition to yarn and needles, you may need scissors, a yarn needle for weaving in ends, and optional decorative elements such as buttons, beads, or ribbons. Adding these details can enhance the overall appearance and allow you to match the pendant to your bathroom’s style.
Color selection plays a significant role in making the pendant stand out. Bright colors can add a playful touch, while neutral tones will blend seamlessly with modern or minimalist spaces. You can even experiment with multi-colored yarns to create unique patterns without extra effort.
Another material you should consider is a lining. While not always necessary, adding a fabric lining can make your toilet paper bag pendant more durable and prevent it from stretching over time. A simple cotton lining stitched inside works perfectly.
Lastly, ensure that you gather all your materials before you begin. Having everything prepared will make the process smoother and more enjoyable, letting you focus fully on the knitting itself.
Knitting Techniques and Basic Stitches
To begin mastering how to knit a toilet paper bag pendant-step by step tutorial, you need to understand some essential knitting techniques. The most common stitches used for this project are the knit stitch and the purl stitch. Together, they form the foundation of most knitting projects and are perfect for beginners.
Start by casting on stitches to create the base of your pendant. The number of stitches will depend on how wide you want the pendant to be. A medium size that comfortably holds a standard toilet paper roll usually requires around 30 to 40 stitches. Adjust this according to your needs.
Once your stitches are on the needle, you can knit in a simple stockinette pattern, alternating rows of knit and purl stitches. This technique creates a smooth fabric that is both sturdy and flexible, ideal for holding the shape of your bag pendant.
For those who want a more decorative design, adding ribbing or garter stitch patterns can enhance the appearance. Ribbing, made by alternating knit and purl stitches within the same row, creates a stretchy texture that adds strength to the fabric.
As you knit, make sure to keep your tension even. Uneven stitches can lead to gaps or weak spots in the fabric. Practicing on a small swatch before starting the main piece is a great way to get comfortable with your tension and stitch uniformity.
Continue knitting until you reach the desired length. Typically, the knitted panel should be long enough to wrap around the toilet paper bag and leave space for handles or loops at the top.
Assembling and Shaping the Pendant
Once you finish knitting the base fabric, the next stage of how to knit a toilet paper bag pendant-step by step tutorial is shaping and assembling your project. This process turns your flat knitted panel into a functional bag.
Begin by folding the knitted piece in half, aligning the edges carefully. Use a yarn needle and the same yarn to stitch the sides together, leaving the top open. This forms the body of your pendant where the toilet paper bag will be stored.
At this point, you can decide whether to add a lining. If you want extra durability, sew a simple fabric lining to the inside before closing the edges. This prevents stretching and keeps the bag pendant in shape over time.
Next, create a loop or handle at the top so the pendant can hang easily. You can knit a separate strap and attach it, or simply crochet a chain stitch strap for a quicker solution. Ensure that the handle is strong enough to support the weight.
For decoration, consider adding buttons, embroidered designs, or ribbons. These small touches make the pendant look more attractive and can turn it into a decorative item rather than just a storage solution.
Once everything is assembled, try inserting a toilet paper bag to test the fit. If adjustments are needed, you can easily unravel and re-knit small sections or tighten seams to achieve the perfect size.
Finishing Touches and Practical Uses
The final stage of how to knit a toilet paper bag pendant-step by step tutorial involves adding finishing details and learning how to use your new creation effectively. Finishing touches not only improve the visual appeal but also extend the pendant’s lifespan.
Start by weaving in any loose yarn ends with a yarn needle. This step ensures that your pendant looks neat and prevents unraveling over time. Trimming excess yarn carefully gives the project a polished finish.
Blocking the piece is another recommended step. By dampening and shaping the fabric, blocking helps even out stitches and gives the pendant a more professional appearance. This is especially helpful if your stitches look uneven.
You can also add embellishments such as tassels, lace borders, or embroidery. These creative details allow you to personalize the pendant and make it uniquely yours. Some crafters even add small pockets for storing other bathroom essentials.
When it comes to practical use, your knitted toilet paper bag pendant can be hung on a bathroom wall, behind the door, or near the toilet for convenience. Its compact size makes it suitable even for small bathrooms, providing functionality without clutter.
This project also makes a wonderful handmade gift. Friends and family will appreciate the thoughtfulness of a useful, handcrafted item that adds charm to their home. Personalized colors and designs can make each gift feel special.
Finally, remember that the more you practice knitting, the easier and more enjoyable it becomes. Each toilet paper bag pendant you make will improve your skills and inspire new creative projects.
FAQ
1. How long does it take to knit a toilet paper bag pendant?
For beginners, it may take around 6 to 8 hours spread over a few days. Experienced knitters might finish in 3 to 4 hours.
2. What is the best yarn for making a toilet paper bag pendant?
Cotton yarn is ideal because it is durable, washable, and holds its shape well.
3. Can I make this project without a lining?
Yes, the lining is optional. However, adding one improves durability and prevents stretching.
4. Do I need advanced knitting skills for this tutorial?
No, this project uses basic stitches like knit and purl, making it suitable for beginners.
5. How can I make the pendant more decorative?
You can add buttons, beads, embroidery, ribbons, or colorful yarns to enhance its appearance.
6. Is this pendant washable?
Yes, if you use washable yarn like cotton. Always follow the yarn’s washing instructions to maintain quality.
Conclusion
In this guide on how to knit a toilet paper bag pendant-step by step tutorial, we explored everything from choosing materials and mastering stitches to assembling and finishing your pendant. By following these instructions, you can create a functional, decorative, and personalized accessory for your bathroom.
Knitting this project is not just about crafting a useful item—it’s also about enjoying the process, practicing your skills, and adding a handmade touch to your home. Whether you make one for yourself or as a thoughtful gift, this project is rewarding and enjoyable.
I’d love to hear your opinion about this tutorial! Please leave your honest feedback and suggestions on what other knitting projects you’d like to learn in the future.