
If you are looking for a simple and fun DIY project, Make a cute dog coaster in minutes! 🐶- Step by Step Tutorial is exactly what you need. This craft project combines creativity and practicality, allowing you to create adorable coasters that will protect your tables while bringing a smile to your face. The best part? You can make them quickly, even if you are a beginner.
Making a cute dog coaster in minutes is not just about crafting something useful for your home. It is also about exploring your creative side, using simple materials, and turning them into something beautiful. Handmade projects like this one add a personal touch to your home décor and can be a thoughtful gift for friends or family members who love dogs.
In this Step by Step Tutorial, we will cover everything from the materials you need to the exact steps to create your dog coaster. We will also give you tips for customizing your project, making it unique, and ensuring it lasts a long time. With a few basic tools and some creativity, you can start making coasters today and enjoy the satisfaction of creating something with your own hands.
Materials Needed for the Dog Coaster Project
Before diving into the crafting process, let’s go over the essential materials you will need for this Make a cute dog coaster in minutes! 🐶- Step by Step Tutorial. Using the right materials makes the whole experience easier and ensures your final product looks neat and professional.
You will need some basic items like cotton fabric, felt, or yarn, depending on whether you plan to sew or crochet your coaster. The Step by Step Tutorial recommends cotton fabric because it is easy to work with, washable, and durable. Felt is also a great option since it does not fray and comes in many fun colors.
A pair of sharp scissors is essential to cut your fabric cleanly. The Make a cute dog coaster in minutes! 🐶- Step by Step Tutorial suggests having fabric glue or a sewing kit on hand if you want to stitch your coaster instead of gluing the pieces together.
To create the dog face details, you can use small pieces of fabric or felt for the ears, nose, and eyes. This Step by Step Tutorial recommends keeping a few neutral and bright colors available so you can personalize your coasters based on different dog breeds or moods.
You might also need a fabric marker or chalk to trace your pattern before cutting. According to the Make a cute dog coaster in minutes! 🐶- Step by Step Tutorial, this will help ensure accuracy and make the final product look clean and symmetrical.
Finally, make sure you have a flat, clean surface to work on. Crafting in an organized space will make the whole process faster and more enjoyable. Once you have everything ready, you can move on to the fun part: crafting your dog coaster!
Step by Step Instructions to Make a Cute Dog Coaster
Now that you have all your materials prepared, let’s go through the Make a cute dog coaster in minutes! 🐶- Step by Step Tutorial step by step. Even if you are new to crafting, these instructions are easy to follow and will guide you through the entire process.
Start by drawing or printing a simple circle or square shape for the coaster base. The Step by Step Tutorial suggests about 4–5 inches wide so it can hold most cups and mugs comfortably.
Next, cut the fabric or felt using the pattern you created. The Make a cute dog coaster in minutes! 🐶- Step by Step Tutorial recommends cutting two identical pieces so you can sew or glue them together for extra thickness.
Once the base is ready, cut out the smaller pieces for the dog’s ears, eyes, nose, and mouth. The Step by Step Tutorial gives you freedom to customize the expressions: floppy ears for a playful look, pointy ears for a curious pup, or even a tongue sticking out for a fun twist.
Now attach the dog’s facial features to the top piece of the coaster using fabric glue or stitching. The Make a cute dog coaster in minutes! 🐶- Step by Step Tutorial suggests sewing for a stronger finish, especially if you plan to wash the coaster often.
After attaching the features, place the second base piece under the decorated one and sew or glue around the edges. The Step by Step Tutorial recommends leaving a small opening if you want to add a thin layer of padding inside before sealing it completely.
Finally, finish the edges neatly so your coaster looks professional. According to the Make a cute dog coaster in minutes! 🐶- Step by Step Tutorial, a simple zigzag stitch or decorative border can add charm and durability to the final product.
Creative Ways to Customize Your Dog Coaster
One of the best things about the Make a cute dog coaster in minutes! 🐶- Step by Step Tutorial is how easy it is to personalize each coaster. With a little imagination, you can make them look like different dog breeds, match your home décor, or even create seasonal designs.
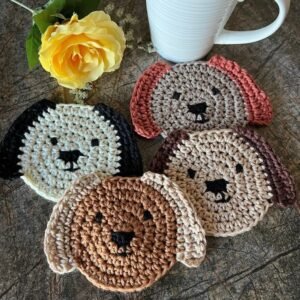
For instance, try using colors and shapes to represent specific breeds. The Step by Step Tutorial suggests brown felt with floppy ears for a Labrador, white and black patches for a Dalmatian, or gray felt with pointy ears for a Husky-inspired design.
You can also add fun details like a small fabric bow, a name tag, or even embroidered initials. The Make a cute dog coaster in minutes! 🐶- Step by Step Tutorial explains that these small touches make your coasters look unique and thoughtful, especially as gifts.
If you enjoy painting, consider using fabric paint to add extra patterns like paw prints or polka dots. The Step by Step Tutorial highlights that paint can give your coaster a colorful and creative finish.
Another idea is to make sets of coasters with different dog expressions—happy, sleepy, surprised, or playful. The Make a cute dog coaster in minutes! 🐶- Step by Step Tutorial recommends mixing and matching designs to keep things interesting.
You can even create themed coasters for holidays like Christmas, Halloween, or Valentine’s Day. The Step by Step Tutorial encourages you to experiment with festive colors and accessories like Santa hats or heart shapes.
Finally, if you plan to sell your coasters or give them as gifts, consider packaging them in sets with a cute ribbon or tag. The Make a cute dog coaster in minutes! 🐶- Step by Step Tutorial says this simple presentation can make your handmade creations look even more professional.
Caring for Your Handmade Dog Coasters
After spending time making your dog coasters, it’s important to keep them in good condition. This Make a cute dog coaster in minutes! 🐶- Step by Step Tutorial also covers some easy care tips so your coasters stay beautiful and functional for a long time.
First, always check the materials you used. The Step by Step Tutorial recommends hand-washing coasters made with felt or fabric glue to prevent damage, while sewn coasters can usually be machine-washed on a gentle cycle.
If your coasters have embroidery or decorative pieces like bows, the Make a cute dog coaster in minutes! 🐶- Step by Step Tutorial suggests placing them inside a laundry bag before washing to protect the details.
To keep the colors bright, use mild detergent and cold water. The Step by Step Tutorial warns against bleach or harsh chemicals that might weaken the fabric.
Dry your coasters flat to maintain their shape. The Make a cute dog coaster in minutes! 🐶- Step by Step Tutorial explains that air drying is best to prevent shrinking or warping.
Store your coasters stacked neatly in a drawer or basket when not in use. According to the Step by Step Tutorial, keeping them flat will prevent bending or creases.
With proper care, your handmade dog coasters will last for many years, adding charm to your table and protecting it from stains and heat.
FAQ about Make a Cute Dog Coaster in Minutes! 🐶- Step by Step Tutorial
1. Can beginners follow this tutorial easily?
Yes, the instructions in the Make a cute dog coaster in minutes! 🐶- Step by Step Tutorial are simple enough for complete beginners.
2. How long does it take to make one coaster?
Most people can finish a coaster in 20–30 minutes, depending on the level of decoration.
3. What materials work best?
Cotton fabric, felt, and medium-weight yarn are the most recommended for durability and easy handling.
4. Can I wash the coasters?
Yes, especially if they are sewn. Just follow the care tips in the Step by Step Tutorial for the best results.
5. Can I customize the coasters for gifts or sales?
Absolutely! You can personalize them with names, colors, and even holiday themes.
6. Are these coasters safe for hot cups?
Yes, they are perfect for protecting tables from heat, scratches, and stains.
Conclusion
This Make a cute dog coaster in minutes! 🐶- Step by Step Tutorial has shown you how to create practical and adorable coasters quickly and easily.
From gathering materials to customizing designs and caring for the final product, you now have all the tools you need to start crafting today.
We hope you enjoy making these coasters as much as we enjoyed sharing the tutorial. Leave your honest opinion and suggestions—we would love to hear your feedback and ideas for future projects!