
If you are passionate about handmade crafts and small, charming accessories, you will fall in love with this Mini crochet bow keychain – Step by Step Tutorial. This project is perfect for anyone who wants to create something cute, practical, and easy to carry around. Crochet lovers adore projects like this because they combine simplicity with creativity, resulting in a delightful little item that can also be a great gift. In this tutorial, you’ll learn how to make a mini crochet bow keychain from start to finish, even if you’re a beginner.
The Mini crochet bow keychain is a fantastic way to use up leftover yarn and turn it into something beautiful and functional. You can attach it to your keys, bags, or backpacks to give them a personal handmade touch. What makes this project even more appealing is how quickly it can be completed—usually in under an hour! It’s also a wonderful idea for craft fairs or thoughtful handmade gifts for friends and family. Once you make one, you’ll probably want to create several in different colors.
Throughout this Step by Step Tutorial, you’ll discover not only the exact materials and stitches you need but also practical tips for making your crochet bow look neat, symmetrical, and polished. Whether you’re an experienced crocheter or just starting out, this project offers satisfaction without being too complex. With this easy pattern, you’ll create a bow that looks elegant, professional, and adorable at the same time. Let’s dive in and start your new favorite mini crochet project!
Materials You’ll Need for the Mini Crochet Bow Keychain
To begin this Mini crochet bow keychain – Step by Step Tutorial, you will first need a few basic materials that are easy to find and affordable. Choosing the right supplies is important to ensure your bow turns out firm, balanced, and long-lasting. Let’s go over what you’ll need before starting your project.
Start with a small amount of yarn. Cotton yarn is ideal for this kind of project because it holds its shape beautifully and has a clean, defined texture. You can use bright colors for a playful look or neutral tones for a minimalist style. If you want the bow to be extra sparkly, consider using yarn with metallic threads for a shimmering effect.
Next, choose the right crochet hook size. Typically, a 3.0 mm or 3.5 mm hook works well with lightweight yarns. If your yarn is thicker, you can adjust the hook size accordingly. Always test your stitches to make sure they’re tight enough to hold the bow’s shape but not too tight that it becomes stiff.
You’ll also need scissors to trim your yarn and a yarn needle for sewing in the ends and assembling the bow. A metal keychain ring or lobster clasp will transform your bow into a functional accessory. These items are available in most craft stores or online and come in various finishes like gold, silver, or rose gold.
Additionally, you might want a bit of stuffing or felt to reinforce the bow’s center if you prefer it to look slightly puffier. While this step is optional, it gives your Mini crochet bow keychain a more structured and professional appearance. Finally, keep a small glue gun nearby if you prefer to secure parts without sewing.
Once you have all your materials ready, it’s time to start crocheting. Setting up your workspace and keeping your materials organized will make the process much more enjoyable. Remember, a clean and comfortable crafting area helps maintain focus and creativity as you work through this Step by Step Tutorial.
Step by Step: How to Crochet the Bow
Now that you have all your materials prepared, let’s start the fun part of the Mini crochet bow keychain – Step by Step Tutorial: making the bow itself. Don’t worry if you’re new to crochet—this project is designed to be beginner-friendly and easy to follow. Each step builds upon the last to create a perfectly shaped little bow.
Begin by creating a foundation chain of 20 to 25 stitches, depending on how large you want your bow to be. The longer the chain, the wider the bow. Once your chain is complete, add one extra chain stitch for turning. Then, work a single crochet in each chain stitch across. This will form the base of your bow.
For the next few rows, repeat the same single crochet stitch to build up the fabric. Usually, three to five rows are enough to form a neat rectangle. Keep your tension consistent so the edges stay straight. If you prefer a more textured look, you can alternate between half double crochet and single crochet stitches.
When your rectangle is finished, fasten off and leave a long tail for sewing. To shape the bow, fold the rectangle in half and pinch the center tightly. Wrap the yarn tail several times around the middle until it looks like a bow. You can secure it by knotting the yarn or using a dab of glue.
Once your bow is shaped, weave in any remaining yarn ends using your needle. This will ensure your work looks neat and tidy. You can also slightly adjust the loops of your bow by pulling gently to achieve the perfect balance on both sides.
Your crochet bow is now complete! But we’re not done yet—next, we’ll turn it into a stylish keychain that you can take everywhere.
Turning Your Crochet Bow into a Keychain
Now that your bow is beautifully finished, it’s time to attach it to the keychain hardware. This step transforms your simple crochet project into a practical and fashionable accessory. The process is quick and easy, and once you see the result, you’ll want to make many more!
Take your metal keychain ring or lobster clasp and position it behind the center of your bow. Using the long yarn tail or an extra piece of yarn, securely tie the bow to the ring. Wrap the yarn a few times around both the bow center and the ring to ensure it stays in place. Then, use a yarn needle to weave the ends back into the bow.
If you want extra durability, you can add a small drop of fabric glue or use a few sewing stitches to reinforce the attachment. This step ensures your Mini crochet bow keychain won’t come apart even with frequent use.
You can personalize your keychain further by adding small decorative elements such as mini beads, charms, or a small tag with your initials. These details make your creation unique and special.
Once your keychain is complete, give it a gentle shape adjustment so the bow looks symmetrical and neat. Fluff out the sides if necessary and check that the center wrap is tight enough.
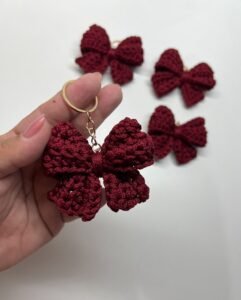
Congratulations! You now have your very own Mini crochet bow keychain, handmade and full of charm. It’s small enough to carry everywhere and stylish enough to make a statement.
Creative Ideas and Tips for Your Mini Crochet Bow Keychain
One of the best things about this Mini crochet bow keychain – Step by Step Tutorial is that you can easily customize it to suit your taste or match different occasions. The possibilities are endless when it comes to color, yarn type, and decoration.
Try using multiple colors in one bow for a striped or ombre effect. You can also crochet two smaller bows and layer them together for a double-bow design. If you like sparkle, add metallic or glitter yarn to make it stand out. These variations make every keychain unique and fun.
Another creative tip is to match your bow colors with the season. For example, use red and green for Christmas, pink and white for Valentine’s Day, or yellow and orange for summer. Seasonal designs make wonderful gifts and can even be sold at local markets or online stores.
If you’re giving the keychain as a gift, you can attach a small handmade tag or wrap it in a tiny gift box. A handmade crochet bow keychain always carries sentimental value and shows that you’ve put love and effort into creating it.
Also, don’t hesitate to experiment with yarn textures. Cotton provides a clean and classic look, while velvet yarn gives the bow a soft and plush touch. Each material offers a different style and feel.
Finally, practice makes perfect! The more bows you make, the faster and neater your stitches will become. Soon you’ll be making them effortlessly and enjoying the relaxing rhythm of crochet.
Mini Crochet Bow Keychain
1. How long does it take to make a mini crochet bow keychain?
Usually, it takes less than an hour to complete one keychain, depending on your crochet speed and experience level.
2. What type of yarn works best for this project?
Cotton yarn is highly recommended because it holds its shape well and has a smooth, elegant finish.
3. Can beginners make this crochet bow keychain?
Yes! This tutorial is beginner-friendly and uses only basic stitches like chain and single crochet.
4. How do I keep my bow from losing its shape?
Make sure to crochet tightly and use a sturdy yarn. You can also apply light starch spray for extra firmness.
5. Can I wash my crochet bow keychain?
Yes, but do so gently by hand with mild soap and let it air dry to maintain its shape and color.
Conclusion
Making a Mini crochet bow keychain is a joyful and satisfying experience that combines creativity, simplicity, and style. In this Step by Step Tutorial, you learned how to gather materials, crochet the bow, assemble the keychain, and personalize it to make it uniquely yours. It’s a project suitable for all skill levels and an excellent way to use up leftover yarn.
Now that you know how to make this adorable accessory, try creating more for your friends or to decorate your own items. Handmade crafts like this remind us how small details can bring happiness and beauty into everyday life.
If you enjoyed this tutorial, share your thoughts! Leave your honest opinion and suggestions—I’d love to know how your Mini crochet bow keychain turned out and what creative ideas you added to make it even more special.
