
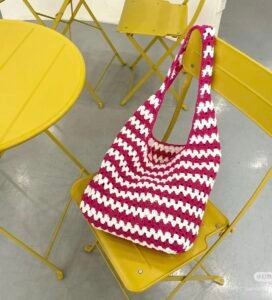
The best large-capacity crocheted travel bag-Step by Step Tutorial is a project that brings together functionality, beauty, and creativity in a single handmade piece. If you enjoy crafting items that are practical and visually appealing, a crocheted travel bag may be the perfect addition to your travel accessories. This type of bag stands out for its durability and spacious interior, making it ideal for carrying clothing, toiletries, gadgets, and personal items. Besides its usefulness, crocheting your own bag allows you to choose the yarn, colors, size, and style, turning the piece into something truly unique. Throughout this article, we will guide you through everything you need to know to make your very own travel bag from start to finish.
Creating the best large-capacity crocheted travel bag means paying attention to both structure and aesthetics. The yarn you choose, the stitch style, and the way you shape the piece all affect how strong and spacious the bag will be. In this step by step tutorial, we will explore the essential materials, basic crochet techniques, and design methods to ensure your bag is not only beautiful but also durable enough for travel. You will learn how to create a sturdy base, build up the sides, reinforce straps, and add finishing details that make the bag more comfortable and functional for everyday use or long trips.
This type of project is suitable for beginners who have basic crochet knowledge, as well as for advanced crocheters who want to challenge themselves with a more elaborate piece. By following the instructions carefully and practicing each step with dedication, you will be able to achieve a satisfactory result. With patience and creativity, your handmade bag will become a long-lasting accessory that stands out wherever you go. Now, let’s begin this journey to create the best large-capacity crocheted travel bag in a practical and enjoyable way.
Choosing the Best Materials
The first step in making the best large-capacity crocheted travel bag is selecting appropriate materials. The choice of yarn is especially important because it determines the bag’s durability and flexibility. Many people prefer cotton yarn because it is strong, easy to wash, and maintains its shape over time. Thicker cotton or cord-style yarns are popular because they provide a firm structure.
The crochet hook size also influences the final result. For travel bags, larger hooks are often used together with thick yarn to create a dense and sturdy fabric. This prevents items from slipping out and helps the bag stand upright. Always check the yarn label, as it usually suggests the ideal hook size.
Additionally, you may want to use a lining fabric to reinforce the bag. A fabric lining helps the bag maintain its shape, prevents stretching, and adds a professional look. Choose a strong cotton or canvas fabric for durability. Adding pockets inside the lining can make the bag even more functional.
For the straps, there are several options to ensure strength and comfort. You can crochet the handles, braid them, or use leather straps. Leather straps are visually appealing and very strong, but crocheted straps made with reinforced stitching can be just as durable if created properly.
Other useful materials include stitch markers, scissors, a yarn needle for finishing, and optionally, decorative accessories such as tassels, wooden beads, or metal rings. All of these items come together to build a bag that is not only functional but also stylish and unique to your taste.
Before moving on to the next step, gather all your materials and ensure that you are familiar with the basic crochet techniques, such as chain stitch, single crochet, and slip stitch. These techniques are commonly used throughout the project.
Step-by-Step Instructions for Crocheting the Base
To start creating the best large-capacity crocheted travel bag, you will first need to build a strong base. The base is the foundation of your bag, and it must be firm enough to support the weight of your belongings. Begin by making a series of chain stitches to create the desired length of your bag’s base.
After forming the chain, work single crochet stitches along the chain. When you reach the end, add a few extra stitches to round the corner. This allows you to continue stitching on the opposite side of the chain, creating a symmetrical oval shape.
Continue working in rounds without turning your work. At each end of the oval, make increases to expand the base evenly. This technique helps shape the bottom of the bag into a smooth, sturdy form. The size of your base depends on how large you want your travel bag to be.
Once you have reached your desired base width and length, stop increasing and continue crocheting evenly around. This prepares the work for building the bag’s sides upward. Make sure your base lays flat on the surface; if it begins to curve, adjust your increases accordingly.
A tightly stitched base provides extra support and structure. If necessary, you can also insert a thin piece of plastic canvas or cardboard lining to reinforce the bottom, although this step is optional depending on your preference and intended use.
When the base is fully formed, you are ready to start building the sides of the bag. This is where the bag really begins to take shape, and your project becomes recognizable. Take your time and enjoy the process.
Building the Sides and Structure
To create the sides of the best large-capacity crocheted travel bag, you will work in continuous rounds on top of the base. Begin by crocheting one round without increases. This helps transition into forming the height of the bag. Continue stitching evenly, making sure your tension is consistent throughout.
You can choose different stitches to achieve various textures and patterns for the sides. Some popular options include single crochet for a tight, simple look, or half double crochet for a slightly more flexible and airy structure. You may also alternate rows of stitches to create decorative patterns.
As you work, the bag will gradually take shape and rise upwards. It is important to stop occasionally and check the height. Think about how much space you need for personal items. Travel bags typically benefit from a taller structure, providing more storage room.
When the bag reaches the desired height, you may want to reinforce the top edge. To do this, switch to slip stitch or crab stitch for the last few rounds. This creates a firm, polished edge that prevents stretching and improves durability during use.
At this stage, you can also add optional decorative elements, such as stripes in different colors or simple stitch patterns. Personalization allows your project to reflect your personality and creativity while also enhancing its visual appeal.
Once you are satisfied with the structure and height of the bag, it is time to create the handles, which are a crucial part of a travel bag’s functionality and comfort.
Adding Handles and Finishing Touches
To complete the best large-capacity crocheted travel bag, you need to add secure and comfortable handles. You can either crochet the handles directly onto the bag or create them separately and attach them later. Make sure they are long enough to be carried on your shoulder or by hand.
If crocheting the handles, use multiple strands of yarn together or reinforce the stitches to avoid stretching. You can use single crochet or braided techniques to give the handles extra strength. Test the handles before finalizing by gently tugging to ensure they hold weight.
If you prefer leather or ready-made straps, attach them using strong metal rings or reinforced sewing. This option offers durability and a stylish finish, adding elegance to the final piece.
Next, attach the lining if you choose to use one. Sew it securely inside, making sure the seams are strong. Adding interior pockets can help keep smaller belongings more organized, such as keys, wallet, or travel-size toiletries.
Finally, add any decorative touches you like. This could include pom-poms, tassels, buttons, or embroidered details. These small elements can give your travel bag a personal and charming touch.
After completing all the finishing touches, take a moment to appreciate your work. You have created a handmade travel bag that is functional, stylish, and truly one of a kind.
FAQ – Frequently Asked Questions
1. Is this project suitable for beginners?
Yes, beginners with basic crochet knowledge can complete this project by following the steps carefully.
2. What type of yarn is best for this bag?
Cotton or cord-style yarn is recommended due to its strength and durability.
3. Can I wash my crocheted travel bag?
Yes, but always follow the care instructions for your yarn. Hand washing is often recommended.
4. How can I make the bag stronger?
Reinforce straps, use tight stitches, and add a fabric lining for structure.
5. Can I customize the size of the bag?
Absolutely. Adjust the number of base chains and height of the sides to change dimensions.
Conclusion
Creating the best large-capacity crocheted travel bag-Step by Step Tutorial is a rewarding project that combines creativity and practicality.
With attention to detail and patience, you can craft a sturdy, beautiful bag that suits your personal needs and style.
We hope this guide has been helpful and clear. Please leave your honest opinion and any suggestions you may have—we would love to hear from you!