
Pot holders made from fabric scraps are one of the most rewarding sewing projects for beginners and experienced crafters alike.
One of the greatest advantages of creating pot holders made from fabric scraps is that almost every sewing room already contains the materials needed.
This guide explains every stage of making pot holders made from fabric scraps, from selecting suitable materials to assembling, quilting, finishing, and caring for the final product. The process is beginner-friendly while offering enough creative freedom for experienced sewists to experiment with colors, layouts, and decorative stitching. By following each step carefully, you’ll be able to produce durable, attractive pot holders that brighten any kitchen and showcase your handmade craftsmanship.
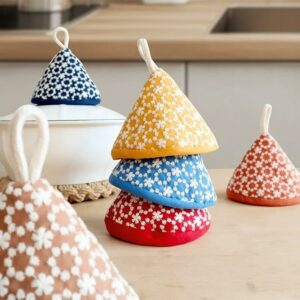
Choosing the Best Materials for Pot Holders Made from Fabric Scraps
The first step is selecting high-quality cotton fabric scraps. Cotton is heat-resistant, durable, easy to sew, and washable, making it the ideal choice for kitchen accessories. Avoid synthetic fabrics because they may melt when exposed to high temperatures.
Gather scraps in coordinating colors or create a cheerful mix of contrasting prints. Floral, geometric, plaid, polka dots, stripes, and solid colors all work beautifully together when balanced carefully.
Choose insulated batting or thermal batting specifically designed for potholders. This extra layer protects your hands from hot cookware and helps the finished project maintain its shape over time.
Prepare matching thread, quilting pins or clips, fabric scissors, a rotary cutter if available, a quilting ruler, and an iron. Pressing fabrics before sewing greatly improves the accuracy of each seam.
If you want to add a hanging loop, cut a strip measuring approximately 2 x 5 inches. Fold it lengthwise, stitch along the edge, turn it right side out, and press flat before attaching it.
Before sewing, arrange your scraps on a flat surface until you’re satisfied with the color distribution. Taking a few extra minutes during this planning stage often produces a much more attractive final design.
Step-by-Step Instructions for Sewing Pot Holders Made from Fabric Scraps
Begin by trimming your fabric scraps into manageable shapes. Squares measuring approximately 2½ x 2½ inches or rectangles of similar proportions create an attractive patchwork layout that is easy to assemble.
Place two pieces with right sides together and sew using a ¼-inch seam allowance. Continue adding additional pieces until you’ve created a patchwork panel slightly larger than your desired finished size.
Press every seam after stitching. This simple habit helps reduce bulk, keeps the block flat, and makes future sewing much easier and more accurate.
Once your patchwork top is complete, trim it into a perfect square measuring approximately 8½ x 8½ inches. This size allows for finishing while resulting in a practical potholder measuring about 8 inches square.
Create the quilt sandwich by placing the backing fabric right side down, then the thermal batting, and finally the patchwork top right side up. Carefully smooth each layer before pinning or clipping everything securely together.
Quilt the layers by sewing straight lines, diagonal lines, crosshatch patterns, or gentle curves across the surface. Quilting keeps all layers securely attached while adding texture and visual interest to the finished potholder.
Finishing and Customizing Your Pot Holders
Trim the quilted piece so all sides are perfectly even. Neat edges make binding much easier and improve the professional appearance of your finished project.
Cut binding strips approximately 2½ inches wide from coordinating cotton fabric. Join multiple strips if necessary, then press them in half lengthwise before attaching around the potholder.
If adding a hanging loop, position it at one corner before sewing on the binding. Secure it firmly between the binding layers so it can safely support the potholder when hung.
Carefully sew the binding around all four edges, mitering each corner neatly. Fold the binding over to the back and either hand stitch or machine stitch it into place.
Decorative quilting can be added before binding. Simple hearts, leaves, diamonds, stars, or geometric grids all create beautiful visual texture while improving durability.
Once completed, press the entire potholder with a warm iron. This final pressing smooths the binding, flattens the seams, and gives your handmade project a polished appearance.
Creative Ideas and Helpful Tips for Long-Lasting Results
Mix fabrics with similar color tones for a sophisticated look or choose bold contrasting prints for a cheerful country-style kitchen decoration. Both approaches create beautiful handmade accessories.
Keep all seam allowances consistent throughout the project. Accurate seams ensure that every patch fits together properly and prevent the finished potholder from becoming uneven.
Always use 100% cotton fabric, cotton thread, and heat-resistant batting. These materials perform better around hot cookware and withstand repeated washing much more effectively.
Experiment with different quilting patterns each time you sew. Straight-line quilting is excellent for beginners, while experienced sewists may enjoy free-motion quilting or decorative stitch designs.
These handmade potholders also make wonderful gifts for birthdays, housewarmings, weddings, Mother’s Day, Christmas, and many other special occasions. Pair them with matching kitchen towels or oven mitts for an even more thoughtful gift set.
Store leftover scraps by color, size, or fabric collection. Organized fabric pieces make future projects faster and encourage creative combinations without wasting valuable materials.
Frequently Asked Questions
What is the best fabric for pot holders made from fabric scraps?
The best choice is 100% cotton quilting fabric combined with thermal batting. Cotton is durable, washable, easy to sew, and performs well in kitchen environments.
Can beginners make these potholders?
Absolutely. This project teaches basic sewing, pressing, quilting, and binding techniques, making it an excellent beginner-friendly sewing project.
What size should a potholder be?
Most finished potholders measure between 7½ and 9 inches square. An 8-inch finished size is comfortable for everyday kitchen use.
Do I need thermal batting?
Yes. Thermal or insulated batting provides important heat protection. Ordinary batting alone may not offer sufficient insulation when handling hot cookware.
Can I wash handmade potholders?
Yes. Wash them with mild detergent using cold or warm water. Air drying or tumble drying on low heat helps preserve their shape and extends their lifespan.
What can I do with very small fabric scraps?
Tiny scraps can be sewn together using crumb quilting techniques or incorporated into miniature patchwork blocks, allowing you to use almost every leftover piece instead of discarding it.
Conclusion
Creating pot holders made from fabric scraps is a practical, enjoyable, and sustainable sewing project that transforms leftover materials into beautiful kitchen accessories. Throughout this guide, you learned how to choose the right fabrics, prepare your materials, sew patchwork panels, assemble the quilt sandwich, quilt the layers, apply neat binding, and personalize each potholder with decorative details. These simple techniques help produce durable, attractive pieces that are both functional and visually appealing.
Besides being an excellent way to practice sewing skills, pot holders made from fabric scraps encourage creativity while reducing fabric waste. Every combination of colors and prints creates a one-of-a-kind design, making each potholder unique. Whether you’re sewing for your own kitchen, preparing thoughtful handmade gifts, or simply looking for an enjoyable weekend project, these patchwork potholders offer endless possibilities.
I hope this tutorial has inspired you to start creating your own collection of colorful pot holders made from fabric scraps. If you found this guide helpful, I’d love to hear your honest opinion about the project. Feel free to share your experience, your favorite fabric combinations, and any suggestions you have—they may inspire other sewing enthusiasts to create beautiful handmade kitchen accessories as well.