
If you are passionate about quilting and love incorporating nature-inspired themes into your projects, then this Bird Quilt Block – Step by Step Tutorial will be perfect for you. A quilt block featuring birds not only adds charm and elegance to your quilt but also tells a story of creativity and care. In this guide, you will learn how to make a stunning bird block from start to finish, even if you are new to quilting. The process is simple, rewarding, and allows you to express your style with fabric, thread, and imagination.
The beauty of working with a Bird Quilt Block lies in its versatility. You can make just one block to use as a wall hanging or pillow, or you can create multiple blocks and piece them together to form a complete quilt. Each block can be customized with different fabrics, colors, and patterns, giving you endless creative freedom. By following this tutorial, you’ll understand not only the technical aspects but also how to use your quilting skills to bring personality to your work.
This step by step tutorial will guide you through the materials you need, cutting and piecing techniques, sewing tips, and finishing touches. Whether you prefer simple patchwork, appliqué, or even foundation paper piecing, you will discover how to adapt the bird motif to your skill level. Let’s dive in and explore how to transform fabric into a delightful quilt block full of charm and character.
Materials and Preparation for a Bird Quilt Block
The first step in any Bird Quilt Block – Step by Step Tutorial is gathering the right materials. You will need quilting cotton in different shades, especially colors that resemble bird feathers, backgrounds like sky blue or neutral tones, and accent fabrics for details such as wings and beaks. Having a well-prepared fabric palette ensures your bird design stands out beautifully.
Before cutting, always wash and press your fabrics. This step may seem small but it makes a huge difference. Pre-washing prevents shrinking and pressing ensures your fabric pieces lie flat, making them easier to cut and sew. A crisp fabric will allow your quilt block to maintain clean edges, which is especially important in detailed designs like a bird motif.
For this project, you will also need a rotary cutter, a cutting mat, and quilting rulers. These tools are essential for precision. A bird design often includes small angles and details, so accurate cutting ensures all the pieces fit together seamlessly. Investing in quality tools saves you time and helps you avoid frustration while sewing.
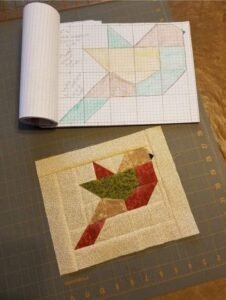
Templates or patterns are also key. Depending on the bird design you choose, you may need paper templates for appliqué or paper piecing. Templates allow you to replicate the same shape across multiple blocks, keeping your quilt consistent and neat. Always double-check your measurements before cutting, as this minimizes fabric waste.
Thread selection is another important consideration. Neutral thread works well for piecing, but you can also choose contrasting colors for decorative stitching, such as outlining the wings or highlighting the bird’s eye. The choice of thread can either blend into the design or add a pop of detail.
Finally, organize your workspace before starting. Keeping your fabric, tools, and sewing machine ready ensures you can focus fully on the creative process. Quilting is not only about stitching but also about enjoying the journey, so preparation makes the experience much more enjoyable.
Cutting and Piecing the Bird Quilt Block
Now that you have your materials, it’s time to start cutting. A Bird Quilt Block – Step by Step Tutorial emphasizes precision at this stage. Begin by cutting your background fabric into squares or rectangles that will frame the bird. These larger pieces create the base upon which your bird design will be built.
Next, cut the fabric pieces that represent the bird itself. Depending on the style, this might involve triangles for wings, small rectangles for the body, and tiny pieces for the beak and tail. If you’re using appliqué, you will trace bird shapes onto fusible web, cut them out, and press them onto your fabric.
When piecing, accuracy matters most. Sew your pieces with a consistent ¼-inch seam allowance. This is the quilting standard and ensures that when you combine blocks, they line up perfectly. Pin your pieces carefully before sewing, especially when working with small parts like the beak or wing tips.
Pressing your seams as you go is another crucial step. Press towards the darker fabric when possible to prevent shadows from showing through. For more complex bird designs, pressing open may help reduce bulk. A well-pressed block looks neat and is easier to quilt later on.
Foundation paper piecing can be an excellent technique for bird blocks. This method allows for sharp angles and intricate details. If you’re new to it, don’t worry—practice makes perfect. Paper piecing gives your bird design a professional, polished look with crisp lines and clean shapes.
Once all the pieces are joined, trim your block to the correct size. Trimming ensures your quilt will be square and that the bird is centered properly. Accurate trimming gives your quilt a uniform appearance, even when using multiple bird blocks together.
Sewing and Adding Details to the Bird Quilt Block
After piecing the main parts, the next step in the Bird Quilt Block – Step by Step Tutorial is sewing everything together and adding unique details. At this point, you should have the basic shape of your bird visible within the block. Now it’s time to bring it to life.
Appliqué is a wonderful way to enhance the design. You can appliqué smaller details such as eyes, feathers, or a wing overlay. Using fusible web helps keep these pieces in place while you stitch around them with a zigzag or blanket stitch. Appliqué gives your bird block a layered, textured effect.
Embroidery can also add personality to your quilt block. Simple stitches like French knots for eyes or backstitches for feather details give your bird character. Embroidery allows you to mix quilting with hand-stitch artistry, making your block one of a kind.
Another option is decorative quilting. Once your block is pieced, you can quilt along the seams or outline the bird’s shape. Stitching small patterns like feathers or swirls into the background fabric creates movement and dimension, making the bird stand out even more.
If you want to add color variation, consider fabric painting or fabric markers. These tools allow you to highlight certain areas, like shading on the bird’s wings or a bright accent on its beak. However, always test on scrap fabric first to ensure the paint doesn’t bleed.
Finally, step back and look at your block as a whole. Sometimes small adjustments like repositioning appliqué or adding extra stitching can make a big difference. Take your time, because this stage is where your creativity shines through and your bird becomes the star of the quilt.
Finishing Touches and Assembling Your Quilt
Once your Bird Quilt Block is complete, the final step in this tutorial is finishing and assembling. If you plan to use the block individually, you can add a border to turn it into a wall hanging, pillow cover, or table topper. Borders not only frame the design but also stabilize the edges.
When combining multiple bird blocks into a larger quilt, make sure all your blocks are trimmed to the same size. Consistency ensures smooth assembly and a professional look. Lay out your blocks before sewing to plan the design arrangement and balance the colors.
Sashing is another option when joining blocks. Adding strips of fabric between bird blocks can create space and highlight each bird individually. This technique is especially useful if your blocks vary slightly in size.
Once your quilt top is assembled, layer it with batting and backing fabric. Basting these layers together prevents shifting during quilting. Safety pins, spray adhesive, or long basting stitches all work well, depending on your preference.
Quilting the final piece can be as simple or detailed as you want. Straight-line quilting keeps the focus on the bird design, while free-motion quilting allows you to experiment with feathers, swirls, or nature-inspired motifs. Choose a style that complements your blocks.
The last step is binding your quilt. Binding encases the edges neatly, giving your quilt a polished finish. You can use a contrasting fabric to frame the quilt or a subtle color that blends in with the background. Once bound, your quilt is ready to enjoy or gift.
FAQ About Bird Quilt Block – Step by Step Tutorial
What size should a Bird Quilt Block be?
The size can vary depending on your project. Standard quilt blocks range from 8 to 12 inches, but you can adjust to fit pillows, wall hangings, or full quilts.
Is this project suitable for beginners?
Yes, a Bird Quilt Block – Step by Step Tutorial can be adapted for beginners using simple patchwork or appliqué. More advanced quilters can try paper piecing or detailed embroidery.
What fabrics work best for bird quilt blocks?
Quilting cotton is the best choice because it is easy to cut, sew, and press. Choose fabrics with solid colors or small prints to make the bird details stand out.
Do I need a sewing machine for this tutorial?
While a sewing machine makes piecing faster and more precise, you can also hand-sew a bird quilt block. Hand stitching may take longer but offers a personal, traditional touch.
Can I customize the bird design?
Absolutely. You can choose different bird species, colors, and techniques to make your block unique. Each quilt block can tell a different story through fabric choices.
How do I make sure my blocks line up correctly in a quilt?
Always use a ¼-inch seam allowance, press seams carefully, and trim blocks to a consistent size. These steps ensure smooth assembly and a neat final quilt.
Conclusion
In this Bird Quilt Block – Step by Step Tutorial, you’ve learned how to gather materials, cut and piece fabric, sew and add details, and finish your quilt with style.
This project combines technical quilting skills with creative freedom, making it a rewarding experience for quilters of all levels. Whether you create a single block or a full quilt, your bird-themed design will showcase your artistry and love for quilting.
I hope this tutorial inspires you to try making your own bird quilt block. Every stitch you take adds personality and meaning to the project. If you enjoyed this guide, please leave your sincere opinion and share suggestions for future tutorials—I’d love to hear your thoughts and ideas.