
Starting this Easy-to-make fabric napkin holder-Step by Step Tutorial is a wonderful opportunity to create a functional and beautiful accessory for your dining table. Whether you love sewing, crafting, or simply enjoy adding handmade touches to your home, this guide will walk you through each step with clarity and confidence. The idea of an easy-to-make fabric napkin holder is especially appealing because it requires minimal materials, little experience, and offers impressive results that can elevate everyday meals or special gatherings. From choosing fabrics to assembling your holder, you will find everything explained in a simple and friendly way.
Creating a fabric napkin holder by hand brings a unique sense of satisfaction. Not only does it allow you to personalize your dining table, but it also helps reduce waste by using leftover fabrics or scraps from previous projects. In this Step by Step Tutorial, you will discover that making this small yet useful item is not only enjoyable but also surprisingly quick. With the right techniques and careful stitching, your handmade napkin holder will be sturdy, attractive, and ready to impress guests or family members. This project also makes a thoughtful gift for anyone who appreciates handmade décor.
Throughout this Easy-to-make fabric napkin holder-Step by Step Tutorial, you will learn how to select the ideal materials, cut and assemble fabric pieces, and finish your project neatly for long-lasting use. The article is designed to help beginners follow without stress while still providing valuable insights for more advanced crafters. With a humanized tone, SEO-friendly structure, and clear explanations, this guide supports your crafting experience from beginning to end. Now let’s explore the essential steps to create a beautiful and practical fabric napkin holder.
Choosing the Right Materials for Your Napkin Holder
Selecting the correct materials is the first important step in the Easy-to-make fabric napkin holder-Step by Step Tutorial. Fabric choice plays a major role in the final look and durability of your napkin holder. Cotton fabric is recommended for this project because it is easy to sew, holds its shape well, and comes in a wide variety of prints and colors. You can choose solid colors, patterns, or themed designs depending on your table setting style.
In addition to the fabric, you will need a light interfacing or stabilizing layer. Interfacing adds structure to your napkin holder, helping it maintain its form and stand upright. Both iron-on and sew-in interfacing work well for this purpose. Use a medium-weight version if you prefer a firm look, or a lighter one for a softer finish.
Basic sewing supplies are essential for this project. This includes scissors, sewing pins, a ruler, thread matching your fabric, and a sewing machine. While a sewing machine makes the process much faster, this tutorial can still be completed using hand-stitching techniques, especially if you enjoy detailed or slow crafting.
A fabric marker or chalk is useful when marking cutting lines or folding guides. These marks will help you align the pieces correctly and ensure clean and professional results. Always test the marking tool on a small piece of fabric before using it to avoid permanent stains.
A good iron is also necessary for this project. Pressing your fabric at each stage—before cutting, before sewing, and after turning the fabric right-side out—helps create sharp edges and a neat finish. This small habit makes a big difference in the quality of your final napkin holder.
Finally, think about any decorative elements you might want to add. Buttons, ribbons, or embroidery can make your napkin holder unique and charming. These details are optional but can add a personal touch that highlights your creativity and style.
Cutting and Preparing the Fabric Pieces
The next stage of the Easy-to-make fabric napkin holder-Step by Step Tutorial involves cutting the fabric pieces accurately. Precision at this stage ensures that all parts align smoothly during assembly. You will usually need two identical rectangular pieces of fabric, as well as one piece of interfacing cut to the same size.
Start by ironing your fabric to remove wrinkles. Smooth fabric makes the cutting process more accurate and prevents mistakes. After preparing the fabric, lay it flat on a cutting surface and use a ruler to measure the dimensions you prefer for your napkin holder. Standard sizes work well, but you can adjust the measurements according to your needs.
Place the interfacing on the wrong side of one of the fabric pieces. If you are using iron-on interfacing, carefully fuse it following the manufacturer’s instructions. This added structure will help your napkin holder stand upright and maintain a polished look. Make sure the interfacing is fully attached before moving on.
Stack both pieces of fabric with right sides facing each other. Use sewing pins to secure the edges, making sure everything stays aligned. Pinning reduces shifting during sewing and contributes to clean, straight seams. Check one last time that both pieces are matching evenly.
Before sewing, use a fabric marker to indicate your seam allowance, usually between 0.5 and 1 centimeter. This guide ensures that your seams are straight and consistent. Carefully following seam allowances is essential for a neat and professional finish.
Finally, prepare the bottom section where the napkin holder will stand. Depending on your design, you may want to round the corners or keep them square. Both options work beautifully, so choose the style that fits your table décor best.
Sewing and Assembling the Napkin Holder
Now comes the most exciting step in the Easy-to-make fabric napkin holder-Step by Step Tutorial—sewing your pieces together. With everything pinned in place, begin stitching around the edges, leaving a small opening to turn the fabric right-side out. Sewing slowly and carefully is key to achieving clean lines and strong seams.
Once the edges are sewn, gently turn the piece right-side out through the opening you left. Use a blunt tool, such as the back of a paintbrush, to push out the corners and curves so they appear crisp and well-shaped. This step is crucial for ensuring the final appearance looks polished and symmetrical.
After turning the piece, press it with an iron to flatten and smooth the edges. Ironing also helps to close the opening naturally, making it easier to sew it shut. A neat finish is essential, especially because this part will be visible once the napkin holder is assembled.
Close the opening with a small topstitch or an invisible hand stitch. Both methods work well, but an invisible stitch creates a cleaner look. Choose the technique that suits your skill level and comfort.
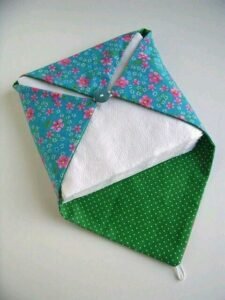
Next, fold the fabric piece into the shape of the napkin holder. Usually, this involves creating a base with two sides rising upward to hold the napkins. Pin the sides in place and adjust the folds until the shape looks balanced and symmetrical.
Sew the sides together using a topstitch to secure the structure. This final stitching step reinforces the shape of the napkin holder and ensures it stays upright during use. Once this is done, your handmade napkin holder is complete and ready to use.
Adding Personal Touches and Decorative Elements
Personalizing your project is one of the most enjoyable parts of the Easy-to-make fabric napkin holder-Step by Step Tutorial. You can add decorative touches that match your table setting, holiday themes, or home décor. Even simple details can elevate your napkin holder and give it a unique personality.
Consider adding buttons along the sides or front. Decorative buttons bring charm and a handcrafted feel to your napkin holder. Choose colors that complement your fabric for a cohesive look.
Ribbon trims can also enhance the design. A narrow ribbon sewn along the edges creates a delicate border that adds elegance. You can even create a small bow to attach to the front for a playful touch.
If you enjoy embroidery, stitching small flowers, initials, or geometric patterns can make your napkin holder truly your own. Embroidery adds texture and artistry, making the piece look custom-made and special.
Another idea is using contrasting thread for decorative topstitching. Even simple straight lines can stand out beautifully when sewn in a bright or bold color. This technique adds both color and visual interest without requiring complex skills.
Appliqués can also be added if you prefer a fun and whimsical style. Whether it’s a heart, leaf, star, or any other shape, appliqués bring character to your work and offer endless creative options.
Finally, you can personalize the size or shape of the napkin holder to suit your needs. Taller holders work well for large napkins, while smaller ones are ideal for compact spaces or buffets. Customization allows your piece to be functional and stylish at the same time.
FAQ
How long does it take to make a fabric napkin holder?
Most people can complete one in less than an hour, depending on experience and added decorations.
Do I need a sewing machine?
A sewing machine helps speed up the process, but this Easy-to-make fabric napkin holder-Step by Step Tutorial can be completed entirely by hand if preferred.
What is the best fabric for a napkin holder?
Cotton fabric is recommended because it is easy to sew and holds its shape well.
Can I wash the napkin holder?
Yes, as long as the materials used are washable. Mild washing is suggested to maintain shape and color.
Do I need interfacing?
Interfacing is highly recommended because it gives the napkin holder structure and durability.
Can beginners make this project?
Absolutely. This tutorial is designed to be beginner-friendly with clear instructions.
Conclusion
This Easy-to-make fabric napkin holder-Step by Step Tutorial has shown you how simple and enjoyable it is to create a beautiful handmade accessory for your dining table.
From choosing the right materials to adding personalized touches, each step helps you build a functional and stylish napkin holder.
With practice, you can create many variations to suit different themes or occasions. If you enjoyed this tutorial, please leave your sincere opinion and share your suggestions for future guides. Your feedback helps support the creation of helpful and inspiring content.