
Learning how to make a bottle bag- Step by Step Tutorial is a wonderful way to combine creativity and functionality in a single project. A handmade bottle bag is not only a practical accessory for carrying water, juice, or other beverages, but it also adds a personal touch that store-bought alternatives can’t offer. Whether you are an experienced crafter or a complete beginner, this tutorial will guide you through every step of the process to create a stylish and reusable bag.
The idea of crafting your own bottle bag is appealing because it gives you full control over the design, size, and materials. With the help of this how to make a bottle bag- Step by Step Tutorial, you can choose fabrics or yarns that suit your style while making something durable and eco-friendly. A bottle bag also makes a thoughtful handmade gift, especially for those who love carrying their drinks in a reusable and stylish way.
Another great advantage of making a bottle bag yourself is sustainability. By creating a reusable bag, you reduce the need for disposable plastic or paper carriers. This not only saves money but also benefits the environment. Following this how to make a bottle bag- Step by Step Tutorial ensures that you have a practical accessory ready for picnics, workouts, or everyday use. Now let’s explore how to gather materials, prepare your project, and create a beautiful bag.
Materials Needed to Make a Bottle Bag
The first step in how to make a bottle bag- Step by Step Tutorial is gathering the right materials. Depending on your chosen technique—sewing or crocheting—you’ll need different supplies, but the core idea remains the same: strong and durable material that will hold the weight of a bottle.
For sewing, you’ll need medium-weight cotton or canvas fabric, a sewing machine, thread, scissors, and measuring tape. These fabrics are sturdy enough to handle the bottle’s weight without stretching too much. Handles or straps can be made from fabric, ribbon, or even repurposed belts for a creative touch.
If you prefer crochet, gather cotton yarn, a crochet hook (usually 3.5 mm to 4.5 mm depending on the yarn weight), a tapestry needle, and scissors. Cotton yarn is recommended because it doesn’t stretch excessively and can withstand daily use. You can choose vibrant colors for a fun look or neutral shades for a minimalistic style.
It’s also a good idea to prepare optional accessories, such as buttons, zippers, or drawstrings, to close the top of your bag. These little additions can make your bag more functional and stylish. For example, a drawstring closure helps secure the bottle and gives the bag a finished appearance.
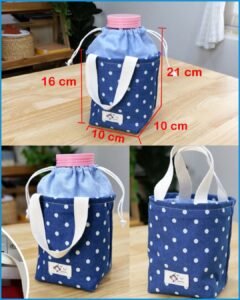
Having the right measurements is key when planning a bottle bag. Most standard bottles are about 8 to 10 inches tall and 2.5 to 3 inches in diameter, but always measure the one you intend to carry. This ensures the bag will fit perfectly and function well.
Once you have everything ready, you’ll be able to move smoothly into the next steps of cutting, sewing, or crocheting. Having your supplies organized before you start makes the process more enjoyable and efficient.
Sewing a Fabric Bottle Bag
If you choose fabric for your how to make a bottle bag- Step by Step Tutorial, sewing is a straightforward and rewarding method. With just a few cuts and stitches, you’ll create a reusable bag that looks neat and professional.
Begin by cutting a rectangular piece of fabric that is wide enough to wrap around the bottle and tall enough to cover its height, plus an extra inch for seam allowance. Fold the fabric right sides together and sew along the edge to create a tube. This will be the body of your bottle bag.
Next, cut a circular piece of fabric that matches the diameter of the tube’s opening. Pin it to the bottom and carefully sew around the edge. This forms the base of your bag, which needs to be strong enough to hold the bottle. Reinforcing the seam with a double stitch can add durability.
For the handle or strap, cut a long strip of fabric or use webbing. Attach it securely to the top sides of the bag. Depending on your preference, you can make short handles for carrying by hand or a long strap to wear the bag crossbody. Both options are practical and stylish.
If you want to add a closure, sew a casing along the top edge and thread a cord or ribbon through it to make a drawstring. This will keep your bottle safe and prevent it from slipping out. A decorative button or patch can also be sewn on for personalization.
Once finished, turn the bag right side out and test it with your bottle. If it fits comfortably and the seams feel secure, you’ve successfully created a fabric bottle bag. The process is simple, but the result is highly functional and reusable.
Crocheting a Bottle Bag
Crochet is another beautiful method explained in this how to make a bottle bag- Step by Step Tutorial. It gives the bag a handmade texture and allows for endless creative possibilities with colors and stitch patterns.
Start with a magic ring and crochet a small circle using single or double crochets. Keep increasing until the circle matches the base diameter of your bottle. This will serve as the bottom of your bag, providing a sturdy foundation.
Once the base is complete, stop increasing and begin crocheting in continuous rounds to build the sides. You can use basic stitches like double crochet for a simple look or experiment with more open stitches like mesh patterns for breathability.
As you crochet upward, keep measuring against your bottle to ensure the bag fits snugly. Continue until the bag reaches the bottle’s neck. At this point, you can add a decorative edge or a row of eyelets to insert a drawstring.
For the strap, crochet a long chain and work rows of single crochet to thicken it. Attach the strap securely to the sides of the bag. Alternatively, you can crochet the strap directly onto the bag by working slip stitches along the top edge.
The beauty of crocheting a bottle bag is the ability to customize. You can make striped patterns, add appliqués, or create matching sets for different bottle sizes. Each bag will be unique and carry the charm of handmade work.
Creative Uses and Benefits of a Bottle Bag
A major highlight of the how to make a bottle bag- Step by Step Tutorial is discovering the many uses and benefits of this project. Beyond holding a bottle, these bags can serve multiple purposes in daily life.
First, bottle bags are eco-friendly. By replacing disposable carriers, they help reduce waste and promote sustainable living. This makes them perfect for those who want to make small but impactful eco-conscious choices.
Second, bottle bags are versatile. They can be used not only for water bottles but also for carrying thermoses, travel mugs, or even rolled-up towels for the gym. Their adaptability makes them practical for various situations.
Third, handmade bottle bags are stylish. By choosing your own colors, fabrics, or stitches, you create a piece that reflects your personality. It’s a fashion accessory as much as it is a functional item.
Fourth, they make wonderful gifts. A handmade bottle bag shows effort and care, making it a thoughtful present for friends, family, or colleagues. You can even personalize them by matching colors with the recipient’s taste.
Fifth, bottle bags are cost-effective. With just a small amount of fabric or yarn, you can create something that lasts for years. Compared to buying multiple disposable carriers, this is an economical choice.
Finally, making bottle bags can be a fun family activity. Children can choose colors, help measure, or even learn beginner sewing or crochet techniques while making a practical item together.
FAQ about How to Make a Bottle Bag
1. Is it better to sew or crochet a bottle bag?
Both methods work well. Sewing gives a polished finish, while crochet adds texture and flexibility. It depends on your skills and preferences.
2. What is the best fabric for sewing a bottle bag?
Cotton and canvas are excellent choices because they are strong, washable, and easy to work with.
3. Can beginners follow this tutorial?
Yes, the how to make a bottle bag- Step by Step Tutorial is beginner-friendly. Both sewing and crochet versions use basic techniques that are easy to learn.
4. How do I make sure the bag fits my bottle?
Always measure your bottle’s height and diameter before cutting fabric or starting crochet. Adjust the size accordingly for a perfect fit.
5. Are these bags washable?
Yes, both sewn fabric bags and crochet cotton bags are washable. Hand washing is recommended for longer durability.
6. Can I add extra features to the bag?
Definitely. You can add pockets, decorative patches, or adjustable straps to make your bottle bag even more functional.
Conclusion
In this how to make a bottle bag- Step by Step Tutorial, we explored two creative ways to make your own reusable bag: sewing with fabric and crocheting with yarn. We covered the materials needed, step-by-step instructions, and the many creative uses and benefits of having a handmade bottle bag.
Making a bottle bag is not only practical but also sustainable and enjoyable. Whether you want to craft one for yourself or as a gift, this project offers endless possibilities.
Now that you’ve seen the process, we’d love to hear from you. Please leave your honest opinion and share suggestions for future tutorials—we look forward to your feedback!