
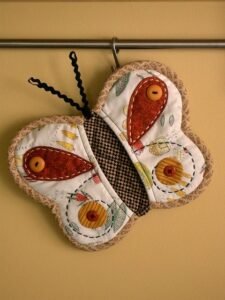
Learning How to Make Beautiful Butterfly Potholders – Step by Step Tutorial is a delightful way to combine creativity and functionality in your kitchen. Butterfly potholders are not only practical for handling hot cookware but also serve as charming decorative elements. By following this Step by Step Tutorial, even beginners can create stunning pieces that enhance both the aesthetic and utility of their cooking space.
Making beautiful butterfly potholders is a perfect project for anyone who loves crochet or crafting. These potholders can be personalized with vibrant yarn colors, fun textures, and intricate patterns, allowing your creativity to shine. The Step by Step Tutorial ensures that even those new to crochet or sewing can follow along and achieve professional-looking results.
Aside from their visual appeal, butterfly potholders are highly functional. The layered stitching and dense fabric protect your hands from heat while providing a sturdy grip on hot pans, pots, or baking trays. By following the How to Make Beautiful Butterfly Potholders – Step by Step Tutorial, you can create durable items that last for years, all while adding a touch of handmade charm to your home.
Materials and Tools Needed
Before starting the How to Make Beautiful Butterfly Potholders – Step by Step Tutorial, gather all necessary materials. High-quality cotton yarn is recommended because it is heat-resistant, easy to wash, and available in various colors. Cotton yarn also ensures your potholders are durable and functional.
You will need a crochet hook suitable for your chosen yarn, typically recommended on the yarn label. Choosing the correct hook size is essential for consistent stitches and proper tension. A smaller hook can create a tighter stitch, which is better for heat protection.
Other required tools include scissors, stitch markers to keep track of rounds, and a yarn needle for weaving in loose ends. These tools help maintain accuracy and finish your potholders neatly.
Optional materials include a small piece of cotton batting or heat-resistant fabric if you want to create thicker, more insulated potholders. This layer can be inserted between crocheted layers for extra protection.
A flat workspace with good lighting is also important. Keeping your materials organized and within reach makes the Step by Step Tutorial easier to follow and reduces errors during the process.
Familiarity with basic crochet stitches like chain, single crochet, half-double crochet, and slip stitch will make completing your butterfly potholders much easier. These foundational skills are applied throughout the How to Make Beautiful Butterfly Potholders – Step by Step Tutorial.
Starting Your Butterfly Potholders
To begin the How to Make Beautiful Butterfly Potholders – Step by Step Tutorial, start by making a foundation chain that corresponds to the width of your butterfly’s wings. This chain serves as the base of the butterfly shape and sets the tension for the remainder of your project.
Next, work the first row using single or half-double crochet stitches, creating a sturdy base. Ensure your stitches are even, as this helps maintain the symmetry of your butterfly shape.
Continue building the wings by increasing stitches strategically. This forms the natural curves and contours of butterfly wings. Using stitch markers can help track increases and maintain consistent shapes across both wings.
For the butterfly’s body, crochet a central column of stitches that connects both wings. Adjust the width depending on your desired butterfly size. A well-proportioned body ensures balance and aesthetic appeal.
Add texture to the wings by using alternate stitches, color changes, or surface crochet. This step gives your potholder a realistic and beautiful butterfly effect.
Finally, check your work for symmetry and consistency. Adjust as necessary before proceeding to finishing touches to ensure your beautiful butterfly potholders look professional and elegant.
Adding Functional and Decorative Features
In the How to Make Beautiful Butterfly Potholders – Step by Step Tutorial, functional features enhance usability. Adding a loop at the top of the butterfly allows you to hang the potholder for easy storage.
Reinforce critical areas such as the body and wing edges with an extra layer of stitches or doubled yarn to provide durability. This ensures the potholder can handle repeated use without losing shape.
Color patterns or gradients can be added to the wings for visual interest. Consider using two or more contrasting colors to highlight the wings’ natural shape.
Textured stitches such as bobbles, popcorns, or shells can add dimension and make the butterfly look more lifelike. These textures also improve grip when handling hot cookware.
You may also add decorative elements such as embroidery or small beads along the wing edges. This personalizes your beautiful butterfly potholders and adds a touch of sophistication.
Finally, check all additions for secure attachment. Loose threads or decorations can compromise the potholder’s functionality, so ensure everything is firmly in place before finishing.
Finishing and Customization
The final steps of the How to Make Beautiful Butterfly Potholders – Step by Step Tutorial involve finishing touches and customization. Begin by weaving in all yarn ends neatly with a yarn needle to prevent fraying.
If you used multiple layers or added batting, stitch the layers together carefully to maintain the overall shape and ensure heat resistance.
Shape your butterfly by gently stretching and flattening it. This ensures a polished appearance and symmetry across both wings.
Optional embellishments can be added, such as embroidered details or small buttons representing butterfly markings. These enhance aesthetics and allow for creative expression.
Consider adding a label or tag if you plan to gift the potholder. Personal touches make handmade items extra special.
Finally, test the potholder by using it on a hot pan or tray to ensure it functions as intended. Your beautiful butterfly potholders should combine both charm and practicality.
FAQ About Butterfly Potholders
Q: Is this project suitable for beginners?
A: Yes, the How to Make Beautiful Butterfly Potholders – Step by Step Tutorial is designed to be beginner-friendly while still allowing for creative variations.
Q: What type of yarn is best?
A: Cotton yarn is ideal because it is heat-resistant and durable, making it perfect for functional potholders.
Q: How long does it take to make one potholder?
A: Depending on experience, a standard butterfly potholder can take 3-5 hours to complete.
Q: Can I make the potholder larger or smaller?
A: Absolutely. Adjust the foundation chain and number of rows to achieve the desired size.
Q: Can I add multiple layers for extra protection?
A: Yes, adding an extra layer of cotton or heat-resistant batting increases insulation.
Q: How should I care for these potholders?
A: Hand wash or machine wash on a gentle cycle, reshape while damp, and air dry to maintain shape and color.
Conclusion
Creating beautiful butterfly potholders – Step by Step Tutorial is a rewarding project that combines creativity, functionality, and practicality.
By following this detailed guide, you can craft visually stunning potholders that protect your hands while adding charm to your kitchen.
From selecting materials and crocheting the base to adding decorative touches, every step contributes to a professional and enjoyable handmade item. Try this project, share your results, and leave your thoughts or suggestions to inspire others to explore the joy of crafting beautiful butterfly potholders.