
pull fabric bag -Step by Step Tutorial is a creative and practical project that allows you to make a durable, versatile, and stylish drawstring bag entirely from fabric. Whether you are a sewing beginner or someone looking to expand your craft skills, this guide offers everything you need to create a beautiful handmade accessory. By following this detailed explanation, you can produce a fabric bag that is perfect for storage, gifts, travel, or everyday organization. Using the term pull fabric bag -Step by Step Tutorial throughout the article helps keep this guide optimized for search engines and easy to understand for readers.
Creating your own pull fabric bag opens the door to endless personalization. You can choose the fabric color, texture, pattern, and even add embellishments if you wish. The technique explained in this pull fabric bag -Step by Step Tutorial is simple, yet the final results are high-quality and professional-looking. Handmade bags are eco-friendly alternatives to plastic packaging, and they also make thoughtful handmade gifts that people truly appreciate. With a bit of time and creativity, anyone can transform plain fabric into something functional and beautiful.
As you progress through this pull fabric bag -Step by Step Tutorial, you will discover that sewing does not need to be complicated. Each step has been broken down clearly, ensuring that both beginners and experienced crafters can follow along without difficulty. This project uses only basic materials and requires minimal tools, making it an accessible craft for everyone. By the end of this tutorial, you will be able to create a durable drawstring bag that can hold personal items, cosmetics, small craft supplies, and much more.
Understanding the Pull Fabric Bag Concept
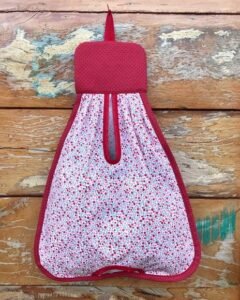
A pull fabric bag -Step by Step Tutorial starts with an understanding of how a drawstring bag works. The bag includes a channel at the top where the cord or ribbon is pulled to close the opening securely. This system is practical, simple to make, and highly functional for everyday use. With just a few sewing steps, you can create the channel, stitch the sides, and add the drawstring.
One of the great advantages of making your own pull fabric bag is the ability to size it according to your needs. You can make a small one for jewelry, a medium one for makeup, or a large one for clothing storage. Because the method remains the same, you can easily adjust the measurements.
Choosing the right fabric is essential for success. Cotton fabric works wonderfully because it is easy to handle and durable. Thicker fabrics can also be used if you need a stronger bag. The key is selecting a material that matches your desired function.
The beauty of this project is that it uses very little fabric. Even fabric scraps from previous sewing projects can be transformed into functional pull bags. This makes it a sustainable option for crafters who want to reduce waste.
The drawstring adds personality to your finished creation. You can use cotton cord, ribbon, or even a crocheted cord if you want something more decorative. The tutorial explains how to insert the drawstring easily.
Once you understand these basic concepts, the upcoming steps will feel much more intuitive. A pull fabric bag -Step by Step Tutorial offers an enjoyable experience for crafters who appreciate handmade organization tools.
Materials Needed for the Pull Fabric Bag
To follow this pull fabric bag -Step by Step Tutorial, you will need only a few simple materials that are easy to find. Start with fabric of your choice, making sure it complements the size of the bag you want to create. Cotton, linen, and canvas fabrics are the most popular options.
You will also need a drawstring, which can be made from cotton cord, ribbon, or durable yarn. Make sure the length is at least double the width of your fabric to ensure a comfortable pull mechanism. Having extra length is always helpful.
Scissors or a rotary cutter will help you achieve clean edges and straight cuts. A rotary cutter is especially useful for beginners because it makes the cutting process faster and more precise.
A sewing machine is highly recommended for this project because it ensures stronger seams and speeds up the process. However, hand sewing is also possible if you are patient and confident in your stitching skills.
Straight pins or clips will help hold the fabric in place as you sew. These small tools make the process more accurate and prevent the fabric from shifting.
Lastly, an iron is useful for pressing seams, which results in a neater and more professional look. A well-pressed bag always stands out in quality.
Step-by-Step Sewing Instructions
Begin this pull fabric bag -Step by Step Tutorial by cutting two identical rectangular pieces of fabric. The size depends entirely on your preference, but the standard size is often around 25 cm by 30 cm. This gives you a medium-sized drawstring bag suitable for many purposes.
Place the two fabric pieces with the right sides facing each other. Pin along the sides and bottom, leaving the top edge open. Accuracy during this stage ensures a cleaner final result.
Before sewing the sides completely, leave a small gap near the top edge. This opening will form the channel where the drawstring will be inserted. The gap should be about 2 cm in height.
Once the gap is marked, sew along the edges using a straight stitch. Make sure to reinforce the stitches at the beginning and end to avoid unraveling. When finished, turn the bag inside out so the right side faces outward.
Fold the top edge down approximately 1 to 2 cm to create a clean hem. Press with an iron and sew all the way around the top to secure the fold. Then fold again to form the drawstring channel and stitch around the entire top, avoiding sewing over the small gap you left earlier.
To finish, attach a safety pin to one end of your drawstring and feed it through the channel. Once both ends are through, adjust the cord and tie a knot to secure it. Your pull fabric bag is complete.
Customizing Your Fabric Bag
This pull fabric bag -Step by Step Tutorial can be easily customized depending on your taste and creativity. You can add lace, decorative stitching, or even embroidery to personalize the bag.
Consider using contrasting thread colors to add visual interest. Bright stitching on neutral fabric elevates the final look and adds charm.
If you prefer a sturdier structure, you can insert interfacing inside the fabric panels before sewing. This helps the bag stand upright and adds durability.
For a more decorative pull mechanism, you can create a fabric cord using leftover fabric. This gives the bag a cohesive appearance and adds elegance.
Adding pockets inside the pull fabric bag is another creative option. These small compartments help store tiny items and increase the bag’s functionality.
Lastly, you can experiment with different shapes, such as square or elongated designs. The same basic technique applies, so feel free to get creative.
FAQ
What is the purpose of a pull fabric bag?
A pull fabric bag is used for organizing and storing various items such as cosmetics, clothing, accessories, or craft supplies. It is practical and easy to make.
Can beginners follow this pull fabric bag -Step by Step Tutorial?
Yes, this project is perfect for beginners because it uses basic sewing techniques and minimal materials.
What type of fabric works best for the bag?
Cotton and canvas fabrics are ideal because they are durable and easy to sew. Lightweight fabric is also suitable for smaller bags.
Do I need a sewing machine?
A sewing machine is recommended for stronger seams, but you can sew the bag by hand if necessary.
Can I wash the pull fabric bag?
Yes, as long as the fabric is washable. Most cotton bags can be machine washed and air-dried.
Can I make the bag in different sizes?
Absolutely. You can customize the dimensions to suit your needs, whether for large storage or tiny gift bags.
Conclusion
This pull fabric bag -Step by Step Tutorial provides everything you need to create a functional, stylish, and long-lasting drawstring bag.
You learned how to prepare your materials, sew the structure, insert the drawstring, and even customize the final product. Handmade bags are practical, eco-friendly, and enjoyable to make, offering endless possibilities for creativity.
I hope this guide has helped you understand each step clearly. Please feel free to leave your sincere opinion and suggestions so I can continue improving future tutorials.