
The Santa Claus fabric gloves-Step by Step Tutorial is a charming project for anyone who enjoys creating festive handmade decorations. Right from the first stitches to the final details, these gloves bring the joy of Christmas crafting into your home. Whether you are an experienced crafter or someone trying sewing for the first time, this guide will help you master each stage with confidence. Using the Santa Claus fabric gloves-Step by Step Tutorial, you will quickly understand how simple it can be to transform fabric into beautiful Christmas accessories.
These handmade gloves can be used as ornaments, utensil holders, gift toppers, or even as part of your holiday table décor. With their soft textures and cheerful colors, they help spread the Christmas spirit in a heartfelt and personalized way. The beauty of the Santa Claus fabric gloves-Step by Step Tutorial is that it allows you to customize the project however you wish—different fabrics, textures, and patterns all work wonderfully. Each finished glove tells a story, especially when it is handmade.
Before diving into the instructions, it is essential to gather the right materials and understand the structure of the project. In this Santa Claus fabric gloves-Step by Step Tutorial, we focus on simplicity so that beginners feel comfortable and confident. Each section breaks down the crafting process into manageable steps so that you can enjoy every moment of creation. With clear explanations and practical suggestions, you will find this tutorial helpful whether sewing is a long-time hobby or a brand-new adventure for you.
Materials Needed for the Santa Claus Fabric Gloves
To begin this Santa Claus fabric gloves-Step by Step Tutorial, it is important to select soft, comfortable, and durable fabrics. Felt, cotton, or fleece are excellent choices because they hold their shape and are easy to sew. Choose classic Christmas colors such as red, white, or green to strengthen the festive feel. You can also add gold or silver accents for a more elegant finish.
In addition to fabrics, you will need high-quality thread in matching colors. Good thread provides clean stitches and improves the final appearance of your gloves. When following the Santa Claus fabric gloves-Step by Step Tutorial, remember that the small details make a big difference in the finished project, and consistent stitching is essential.
Carefully cutting your fabric pieces is another key part of preparation. Using sharp scissors ensures smooth edges, making the sewing process easier and cleaner. Templates or patterns are helpful for beginners who want to follow precise shapes. In this Santa Claus fabric gloves-Step by Step Tutorial, using a simple glove-shaped pattern helps create a uniform look.
You may also want to include decorative elements. Felt appliqués, ribbons, pompoms, and tiny ornaments can enhance your gloves and make them more lively. As you follow the Santa Claus fabric gloves-Step by Step Tutorial, feel free to explore creative additions that reflect your personal style and holiday preferences.
Sewing accessories are also important. A sewing needle, machine (optional), pins, and fabric glue are all useful tools that help the project run smoothly. Having everything within reach before you begin allows you to work calmly and enjoy the full crafting experience.
Finally, prepare a clean and organized workspace. A well-lit table ensures you can follow the details of this Santa Claus fabric gloves-Step by Step Tutorial without mistakes. Comfortable crafting leads to better results and a more enjoyable creative journey.
Cutting and Constructing the Glove Shape
The first step in constructing your gloves is transferring your pattern onto the fabric. In this Santa Claus fabric gloves-Step by Step Tutorial, accuracy is essential to achieve a balanced and symmetrical pair of gloves. Trace the pattern using fabric chalk or a washable marker so that all lines remain invisible after sewing.
Once your shapes are traced, cut the pieces slowly and carefully. Smooth edges make assembly easier and improve the final look of the gloves. Precision cutting is especially important when working with thicker fabrics like felt. This Santa Claus fabric gloves-Step by Step Tutorial encourages beginners to go slowly so they do not feel overwhelmed.
After cutting the fabric, pin the front and back pieces together with the right sides facing inwards. Pins help keep everything in place as you sew. This small step makes a big difference, ensuring your gloves line up perfectly when stitched. Following the Santa Claus fabric gloves-Step by Step Tutorial, this technique helps beginners avoid shifting fabric.
Next, sew around the edges of the glove, leaving the wrist area open. Use small and even stitches for the best results. If you are using a sewing machine, choose a straight or tight zigzag stitch. Hand stitching also works well if you prefer a slower and more detailed approach.
After sewing, gently turn the glove right side out. Smooth the seams with your fingers so that the shape becomes clear and defined. This part of the Santa Claus fabric gloves-Step by Step Tutorial allows you to see your glove taking form, which is always an exciting moment.
Finally, repeat the process to create the second glove. Making sure both gloves match in shape and size will give your project a polished and professional appearance.
Adding Decorative Details
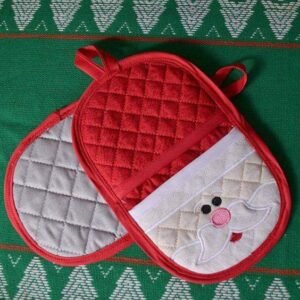
With the basic glove shape complete, it is time to add decorations. This Santa Claus fabric gloves-Step by Step Tutorial encourages creativity, allowing you to personalize each glove according to your holiday style. The most popular detail is the white cuff, which gives the glove that classic Santa Claus look.
Cut a strip of white felt or faux fur and sew or glue it around the wrist area. This simple detail adds texture and warmth to your design. In the Santa Claus fabric gloves-Step by Step Tutorial, this step contributes to making your gloves instantly recognizable as Santa-inspired holiday items.
You can also add a small pompom or fabric ball at the glove’s tip to mimic Santa’s hat style, creating a cohesive Christmas theme. Choose soft, fluffy materials that contrast nicely with the main red fabric. Small details like this enhance the charm of your finished piece.
Decorative stitching is another way to enrich your gloves. Using embroidery thread, you can stitch snowflakes, stars, or even Santa’s initials. These extra touches make your gloves truly unique. The Santa Claus fabric gloves-Step by Step Tutorial encourages crafters to explore simple embroidery shapes suitable for beginners.
Buttons, beads, or tiny appliqués can also be added for extra detail. These elements should be sewn securely, especially if the gloves will be handled frequently. As the Santa Claus fabric gloves-Step by Step Tutorial explains, durable crafting ensures long-lasting decorations.
Finally, consider adding a fabric loop to hang the gloves on your Christmas tree or wall. This feature is optional but very useful, making your gloves versatile holiday decorations.
Finishing Touches and Presentation
As you reach the final stage of this Santa Claus fabric gloves-Step by Step Tutorial, it is time to inspect your work. Carefully look over the seams, decorations, and edges to ensure everything is secure and neatly finished. Making small adjustments now improves the overall quality of your project.
Pressing the gloves lightly with an iron can help flatten seams and enhance the shape. Use a low heat setting, especially if your materials are delicate. This technique gives a clean and professional look, as suggested throughout the Santa Claus fabric gloves-Step by Step Tutorial.
If you want to use the gloves as gift holders, consider adding a lining to the inside. This strengthens the structure and allows the gloves to hold lightweight goodies like candies or small notes. This optional step enriches the project and follows the creative spirit of the Santa Claus fabric gloves-Step by Step Tutorial.
For table décor, you can create multiple gloves in matching or complementary colors. This adds harmony and charm to your holiday settings. Crafting several pairs becomes easier with practice, and this Santa Claus fabric gloves-Step by Step Tutorial helps you repeat the process with confidence.
Before storing or gifting your gloves, allow any glue or paint to dry completely. This avoids smudging or sticking. Good finishing habits ensure your gloves last for many Christmas seasons.
Finally, enjoy the satisfaction of completing such a festive project. Each glove reflects your creativity and dedication, and the Santa Claus fabric gloves-Step by Step Tutorial has guided you through every step.
FAQ
What fabrics are best for Santa Claus fabric gloves?
Soft fabrics like felt, cotton, or fleece are ideal because they hold their shape and are easy to sew, especially for beginners.
Do I need a sewing machine for this project?
No, the gloves can be sewn by hand. A machine only speeds up the process but is not required.
Can I customize the decorations?
Yes, you can add ribbons, embroidery, pompoms, or appliqués. The tutorial encourages creativity and personalization.
Are these gloves wearable?
The project focuses on decorative gloves, not wearable ones. They are meant for décor or gifting purposes.
How long does the project take to complete?
Beginners typically finish a pair in one to two hours, depending on the level of decoration.
Can children participate in this craft?
Yes, with adult supervision, especially while using scissors or needles.
Conclusion
This Santa Claus fabric gloves-Step by Step Tutorial has guided you through each stage of creating beautiful and festive decorative gloves. From choosing materials to assembling and decorating your pieces, every part of the process is simple, enjoyable, and beginner-friendly.
Handmade holiday crafts bring warmth and personality to any home, and your gloves will certainly brighten your Christmas décor.
I hope you enjoyed this tutorial and feel inspired to create even more seasonal crafts. Please leave your honest opinion and share any suggestions so we can continue crafting together.