
Creating a Teal blue turtle-shaped coin purse with zipper-Step by Step Tutorial is a wonderful way to combine creativity, practicality, and the charm of handmade crafts. This adorable coin purse is not only functional but also visually appealing, making it a great accessory or a heartfelt handmade gift. By using the main keyword naturally throughout the article, you ensure better visibility in search engines and help crafters easily find this helpful guide. This tutorial is written with clarity, friendliness, and Google AdSense–friendly structure to support your blog’s growth.
The idea of crafting a teal blue turtle-shaped coin purse captures the imagination of both beginners and experienced makers. Its fun shape makes the project enjoyable, and the addition of a zipper adds utility and convenience. Throughout this Teal blue turtle-shaped coin purse with zipper-Step by Step Tutorial, you will learn how to design the turtle body, attach the zipper, add the details, and assemble your cute coin purse. Every step is explained in simple language so that anyone can follow along confidently.
Before diving into the subtitled sections, you will first understand the process and the items you need. This project is easy to personalize, making it ideal for gifting, selling, or simply enjoying a relaxing creative session. With the right materials and a bit of patience, your teal blue turtle purse will come to life in your hands. Now let’s begin this complete Teal blue turtle-shaped coin purse with zipper-Step by Step Tutorial, designed to guide you through every stage from preparation to finishing touches.
Materials Needed for the Turtle-Shaped Coin Purse
To start making your Teal blue turtle-shaped coin purse with zipper-Step by Step Tutorial, you will first need to gather all the essential materials. Having everything prepared helps the process run smoothly and keeps you focused on the creative work. The main fabric should be a teal blue shade, as it brings the turtle theme to life beautifully and makes the purse stand out.
Choose a sturdy cotton or felt fabric, ensuring the purse maintains its shape. These materials are easy to work with and offer durability, which is important for an item used daily. Make sure the fabric has enough thickness to give the turtle body a structured appearance.
You will also need a zipper, preferably in a coordinating color. A high-quality zipper helps the purse open and close smoothly, making it practical for storing coins, keys, or small accessories. The zipper size depends on the purse dimensions, but a small to medium-length one is usually ideal.
To add depth and structure to your coin purse, you may use felt, foam, or light interfacing. These materials help reinforce the turtle shape, ensuring it stays firm and well-formed over time. You can choose the material based on availability and preference.
Basic sewing tools such as scissors, thread, needles, and pins are also essential. You may use a sewing machine for faster assembly, but hand-sewing works perfectly too. Clear tools and careful stitching will result in a neat, professional-looking finish.
Lastly, decorative items like buttons, beads, or embroidery threads can enhance the turtle’s features. These details make your Teal blue turtle-shaped coin purse with zipper-Step by Step Tutorial truly unique and full of personality.
Cutting and Preparing the Turtle Shape
The first practical step in this Teal blue turtle-shaped coin purse with zipper-Step by Step Tutorial is preparing the turtle-shaped fabric pieces. Begin by drawing or tracing the outline of a turtle onto your teal fabric. The shape should include the shell, head, and small flippers for added charm.
Once the shape is drawn, cut two identical turtle pieces: one for the front and one for the back. Make sure the outlines match perfectly to avoid alignment issues later. Precision in this stage ensures a clean and symmetrical finish.
Prepare an additional layer of interfacing or felt in the same shape as the turtle. This layer will go between the front and back fabric pieces to give your coin purse extra firmness. It helps the purse retain its adorable shape even after frequent use.
Next, cut a straight opening in the top or back area of one turtle piece where the zipper will be placed. The cut should be slightly shorter than the zipper length to allow for comfortable stitching. This is an important step in transforming a fabric turtle into a functional coin purse.
Pin the zipper in place along the opening, ensuring the zipper teeth stay centered. This step requires patience to avoid uneven stitching or tension issues. A well-positioned zipper ensures smooth functionality.
Before sewing everything together, double-check all pieces: front fabric, back fabric, interfacing, and zipper alignment. This preparation stage sets the foundation for the remaining steps and ensures your purse is well-constructed.
Sewing the Zipper and Assembling the Purse
In this part of the Teal blue turtle-shaped coin purse with zipper-Step by Step Tutorial, you will learn how to attach the zipper securely. Begin by stitching one side of the zipper to the fabric opening. Use small, neat stitches to ensure durability and to keep the zipper aligned.
Once the first side is sewn, repeat the process with the other side of the opening. Make sure the zipper moves smoothly after stitching. If it catches or feels tight, you may need to adjust the fabric slightly and restitch.
After the zipper is securely attached, place the turtle front and back pieces together with the interfacing sandwiched between them. Pin the edges carefully to maintain the shape. Accurate pinning is important for achieving a polished final look.
Sew around the entire edge, following the turtle outline. Go slowly, especially around curves such as the head and flippers. Curve stitching requires patience but results in a beautifully shaped purse.
When the stitching is complete, trim excess fabric around the edges, leaving a small seam allowance. This helps reduce bulk and creates a smoother finish. Use sharp scissors to avoid fraying.
Turn the purse right side out through the zipper opening. This moment reveals the shape of your teal turtle coin purse—an exciting step as your project starts looking complete.
Adding Details and Finishing Touches
The final part of the Teal blue turtle-shaped coin purse with zipper-Step by Step Tutorial focuses on personalizing your creation. Begin by adding eyes using buttons, fabric paint, or embroidery. These small features bring the turtle to life and give it a friendly expression.
If you want to make your purse even more detailed, you can stitch lines onto the shell to mimic a real turtle shell pattern. Use contrasting thread to make the design stand out. This step adds texture and charm.
You may also reinforce the flippers and head by adding small stitches to secure the layers. This ensures they stay in place and maintain their shape. Even simple stitch lines can make the purse look more professional.
Adding a small keyring loop or strap to the top of the turtle makes the purse more convenient. This allows you to attach it to a bag or keychain. It’s a functional detail that increases the practicality of your handmade accessory.
Check the zipper again to ensure it opens and closes easily. If needed, adjust any threads or seams that may interfere. Smooth functionality is essential for everyday use.
Once all details are complete, give your purse a final inspection. Admire your work and enjoy the satisfaction of completing a cute and useful handmade item.
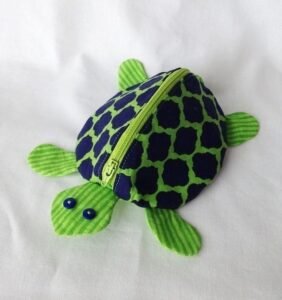
Teal Blue Turtle Coin Purse
1. Is this Teal blue turtle-shaped coin purse with zipper-Step by Step Tutorial suitable for beginners?
Yes, the steps are simple, and beginners can follow them with patience and basic sewing skills.
2. What is the best fabric for the turtle coin purse?
Cotton, felt, or any fabric with structure works well, as they help maintain the turtle’s shape.
3. Can the purse be made in other colors?
Absolutely. You can choose any color you like, but teal blue offers a charming and ocean-inspired look.
4. How long does the project take to complete?
Most people can finish it in one or two hours, depending on their skill level and sewing speed.
5. Can I add stuffing to the turtle?
Yes, a small amount of stuffing can give the turtle a plush look, but avoid overfilling to keep room inside for coins.
6. Is a sewing machine required?
No. You can sew the entire purse by hand, though a sewing machine makes the process faster.
Conclusion
This Teal blue turtle-shaped coin purse with zipper-Step by Step Tutorial guided you through every stage of making a charming, functional, and personalized accessory.
From preparing the fabric to attaching the zipper and adding adorable details, each step brings your handmade creation to life.
I hope this tutorial inspired your creativity and encouraged you to explore more sewing projects. Please leave your sincere opinion and share suggestions for future tutorials—I would love to hear from you!