
Crochet drawstring bag pattern is one of the most rewarding projects for anyone who enjoys creating practical and beautiful handmade accessories.
Crocheting a drawstring bag is an enjoyable experience because it combines simple techniques with a professional-looking result.
One of the biggest advantages of following a Crochet drawstring bag pattern is that it helps improve important crochet skills while producing something useful for everyday life. Throughout this guide, you will learn the materials needed, essential stitches, construction methods, finishing techniques, and practical tips that make the project easier. By the end of this tutorial, you will have all the knowledge necessary to confidently crochet your own beautiful drawstring bag.
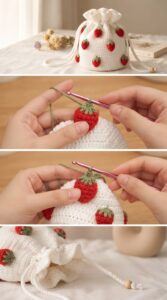
Materials and Basic Crochet Stitches for a Crochet Drawstring Bag Pattern
Before starting your Crochet drawstring bag pattern, gather all the materials you will need. Medium-weight cotton yarn is an excellent choice because it creates a sturdy yet flexible fabric. Cotton also provides durability and helps the bag maintain its shape over time.
Choose a crochet hook that matches your yarn weight. Most medium cotton yarns work well with hooks between 4 mm and 5 mm. Using the recommended hook size ensures balanced tension and a professional finish.
You will also need scissors, a yarn needle for weaving in ends, and stitch markers if you like marking the beginning of each round. These simple tools make the entire process smoother.
The most common stitches used in this project include chain stitch (ch), slip stitch (sl st), single crochet (sc), half double crochet (hdc), and double crochet (dc). These stitches create a durable fabric suitable for everyday use.
Practice maintaining consistent tension before beginning the project. Even tension helps the bag look symmetrical and ensures both sides remain balanced throughout the construction.
Once you are comfortable with these stitches, you are ready to begin crocheting the base of your drawstring bag.
Step-by-Step Instructions for the Crochet Drawstring Bag Pattern
Start by making a magic ring or chaining four stitches and joining them into a circle with a slip stitch. This forms the center of the bag’s base.
Round 1: Chain 1 and work 8 single crochet stitches into the ring. Join with a slip stitch. This creates a compact and sturdy starting point.
Round 2: Chain 1 and increase by working 2 single crochet stitches into every stitch around. You should now have 16 stitches, allowing the base to expand evenly.
Continue increasing each round by placing evenly spaced increases until the base reaches your desired diameter. A base measuring approximately 6 to 8 inches works well for an everyday drawstring bag.
Once the base is complete, stop increasing and crochet one stitch into each stitch around. This naturally causes the sides to curve upward, creating the body of the bag. You may use single crochet for a dense texture or half double crochet for a slightly softer appearance.
After reaching your preferred height, create the drawstring channel by crocheting one round using a simple pattern such as chain 1, skip 1 stitch, double crochet in the next stitch. Repeat around the entire bag. Finish with one or two rounds of regular stitches above the openings to strengthen the edge before fastening off.
Customizing Your Crochet Drawstring Bag Pattern
One of the greatest advantages of a Crochet drawstring bag pattern is its versatility. You can easily personalize the design with your favorite colors or seasonal palettes.
Try using striped yarn or changing colors every few rounds to create a unique visual effect. Soft neutral shades produce elegant bags, while bright colors give the project a cheerful personality.
Texture can also transform the appearance of the bag. Incorporate puff stitches, bobble stitches, shell stitches, or simple ribbing to add dimension without making the pattern overly complicated.
The drawstring itself offers another opportunity for creativity. Crochet an i-cord, braid several strands of yarn together, or twist multiple colors into a decorative cord that complements the bag.
Small embellishments such as tassels, pom-poms, wooden beads, or crocheted flowers can make the finished project even more attractive. These additions also make handmade gifts feel extra special.
If you plan to carry heavier items, consider sewing a fabric lining inside the bag. A lining increases durability while helping the bag maintain its shape during daily use.
Tips for a Professional Finish and Long-Lasting Crochet Drawstring Bag
Maintaining consistent stitch tension is one of the most important factors for achieving a polished appearance. Uneven stitches may cause the bag to lean or stretch unevenly.
Count your stitches regularly, especially during the base increases. Small counting mistakes can become much more noticeable as the project grows larger.
Weave in yarn ends securely using a yarn needle. Taking a few extra minutes during finishing prevents loose ends from appearing after repeated use.
Blocking the finished bag can improve stitch definition and help the fabric settle into its final shape. Follow the care recommendations appropriate for your chosen yarn.
Hand washing with mild detergent helps preserve both the yarn fibers and the overall structure of your handmade bag. Allow it to dry flat to maintain its shape.
Most importantly, enjoy the creative process. Every finished Crochet drawstring bag pattern reflects your personal style, making each bag completely unique even when following the same instructions.
Frequently Asked Questions (FAQ)
Is this Crochet drawstring bag pattern suitable for beginners?
Yes. Beginners who already know basic crochet stitches such as chain, single crochet, and slip stitch can successfully complete this project by following the steps carefully.
What is the best yarn for a crochet drawstring bag?
Cotton yarn is generally the best choice because it provides excellent durability, stitch definition, and shape retention while remaining comfortable to work with.
How long does it take to complete the bag?
Depending on your experience and the size of the bag, most crocheters finish the project within one or two days of relaxed crafting.
Can I make the bag larger?
Absolutely. Simply continue increasing the base until it reaches the desired size, then crochet additional rounds for a taller bag.
How do I make a stronger drawstring?
Using multiple strands of yarn braided together or crocheting a long chain reinforced with slip stitches creates a sturdy drawstring that glides smoothly through the openings.
Can I wash my crochet drawstring bag?
Yes. Hand washing with mild detergent is recommended for most cotton yarn projects. Always allow the bag to air dry flat to maintain its original shape.
Can I add a fabric lining?
Yes. Sewing a simple fabric lining inside the bag adds extra strength, improves durability, and prevents small items from slipping through the crochet stitches.
Which stitch works best for beginners?
Single crochet is usually the easiest stitch for beginners because it creates a dense, stable fabric that works perfectly for drawstring bags.
Conclusion
Creating a Crochet drawstring bag pattern is a fun and practical project that combines creativity with useful everyday functionality. Throughout this guide, you learned how to select the right materials, master the essential stitches, build the circular base, crochet the body of the bag, create the drawstring channel, and finish the project with professional details. You also discovered several customization ideas that allow every bag to become a unique handmade creation.
Whether you are making this project for yourself, as a thoughtful gift, or even to sell at craft markets, this timeless design offers endless possibilities for personalization. With patience, consistent stitch tension, and attention to detail, your finished bag will be both beautiful and durable.
If you enjoyed this tutorial, we’d love to hear from you. Please leave your honest opinion, share your experience with this Crochet drawstring bag pattern, and let us know your suggestions for future crochet tutorials. Your feedback helps inspire even more creative projects for the crochet community.