
Fabric hair scrunchie pattern projects are one of the easiest and most rewarding sewing creations for beginners and experienced makers alike.
One of the reasons the Fabric hair scrunchie pattern remains so popular is its versatility. Scrunchies can be made in countless sizes, colors, and textures, allowing you to customize every project according to the season or personal style.
Sewing accessories is also an excellent way to improve essential sewing skills such as accurate cutting, straight stitching, turning fabric tubes, inserting elastic, and closing seams neatly. Throughout this tutorial, you will learn how to prepare your materials, cut the fabric correctly, assemble the scrunchie step by step, personalize the finished accessory, and achieve clean professional results every time. By mastering this Fabric hair scrunchie pattern, you will also build confidence for many future sewing projects.
Materials and Fabric Preparation
Before starting your Fabric hair scrunchie pattern, gather all the necessary materials. Preparing everything in advance makes the sewing process faster and more enjoyable while helping you maintain accuracy throughout the project.
For one standard scrunchie, prepare a strip of fabric measuring approximately 22 inches long by 4 inches wide. You will also need one piece of elastic measuring 8 to 9 inches long, matching polyester thread, fabric scissors or a rotary cutter, sewing pins or clips, a safety pin or bodkin for inserting the elastic, an iron, and a sewing machine.
Cotton quilting fabric is one of the best choices for beginners because it is stable, easy to sew, and available in countless beautiful prints. However, lightweight linen, rayon blends, satin, velvet, chambray, and soft denim also produce wonderful results depending on the desired style.
Press the fabric before cutting to remove wrinkles and improve cutting accuracy. Carefully measure and cut a rectangle according to your preferred scrunchie size. Larger rectangles create fuller, fluffier scrunchies, while narrower strips produce more delicate accessories.
Fold the fabric rectangle lengthwise with the right sides facing each other. Match the long edges carefully and secure them with clips or sewing pins to prevent shifting while stitching.
Set your sewing machine to a regular straight stitch and prepare matching thread. A consistent seam allowance throughout the project helps produce a smooth and professional finish.
Step-by-Step Fabric Hair Scrunchie Pattern
Begin sewing along the long raw edge using a ¼-inch seam allowance. Leave both short ends open because the fabric tube must be turned right side out before inserting the elastic. Sew slowly and maintain a straight seam from beginning to end.
Once the long seam is complete, carefully turn the fabric tube right side out. A safety pin attached to one end makes this process much easier, especially when working with narrower fabric strips. After turning, press the tube gently with an iron to create crisp edges.
Attach a safety pin to one end of the elastic and guide it through the entire fabric tube. Hold the opposite elastic end securely to prevent it from disappearing inside the casing. Continue pulling until both elastic ends emerge from opposite sides.
Overlap the elastic ends by approximately half an inch and stitch them together securely using several rows of straight stitches or a small zigzag stitch. This reinforcement ensures the elastic remains durable during everyday use.
Fold one fabric end inside the other, enclosing all raw edges neatly. Pin the opening closed and sew around the remaining opening using a straight stitch placed close to the folded edge. Backstitch at the beginning and end for additional strength.
Give the completed Fabric hair scrunchie pattern one final press if necessary. Fluff the gathers evenly around the elastic so the fabric distributes uniformly, creating a balanced and attractive finished accessory.
Creative Ways to Customize Your Scrunchies
One of the greatest advantages of making a Fabric hair scrunchie pattern is the endless variety of customization options. Simply changing the fabric creates a completely different appearance without altering the construction method.
Floral cotton prints create soft romantic scrunchies perfect for spring and summer outfits. Tiny floral patterns, pastel colors, and lightweight fabrics produce elegant everyday accessories suitable for all ages.
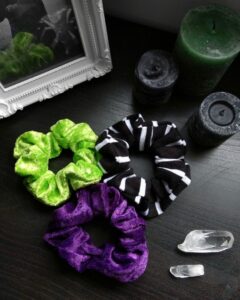
Velvet fabric creates luxurious scrunchies ideal for colder seasons and special occasions. Rich jewel tones such as emerald green, burgundy, navy blue, and plum give the finished accessory a sophisticated appearance.
Satin scrunchies have become especially popular because they are gentle on hair and help reduce friction, making them an excellent choice for protecting delicate hair while maintaining an elegant look.
You can also sew oversized scrunchies by increasing the fabric width to six or even eight inches. These dramatic accessories create fashionable statement pieces that pair beautifully with casual and formal outfits alike.
For an even more personalized Fabric hair scrunchie pattern, consider adding bows, detachable ribbons, lace trim, decorative embroidery, contrasting fabrics, or seasonal prints for holidays such as Christmas, Halloween, Valentine’s Day, or autumn celebrations.
Tips for Professional Sewing Results
Accurate cutting is the first step toward creating beautiful scrunchies. Even slight differences in width can affect how evenly the finished fabric gathers around the elastic. Always measure carefully before cutting.
Choose thread that closely matches your fabric color. Matching thread helps conceal stitches and contributes to a cleaner, more professional appearance throughout the finished project.
Press after every major sewing step rather than waiting until the end. Proper pressing improves seam accuracy, removes wrinkles, and makes the finished Fabric hair scrunchie pattern look significantly more polished.
Avoid twisting the elastic while inserting it through the casing. Keeping the elastic flat ensures comfortable wear and allows the scrunchie to stretch evenly during everyday use.
When closing the final opening, sew slowly and keep your stitching close to the folded edge. A neat closing seam becomes nearly invisible and enhances the overall quality of the finished accessory.
Finally, inspect every seam, trim loose threads, and gently distribute the gathers evenly around the elastic before using or gifting your completed scrunchie. These simple finishing touches elevate the project from homemade to beautifully handcrafted.
FAQ
Is the Fabric hair scrunchie pattern suitable for beginners?
Yes. This is one of the easiest sewing projects available and is perfect for learning basic sewing techniques such as straight stitching, turning fabric tubes, and inserting elastic.
Which fabric works best?
Cotton quilting fabric is highly recommended for beginners, while satin, velvet, linen, rayon, and lightweight denim are excellent alternatives depending on your desired style.
What size should the fabric be?
A common size is approximately 22 inches by 4 inches, although both the length and width can be adjusted to create fuller or smaller scrunchies.
How long should the elastic be?
Most standard scrunchies use 8 to 9 inches of elastic, but you can adjust this slightly depending on how tight or loose you prefer the finished accessory.
Can I wash handmade scrunchies?
Yes. Wash according to the fabric type used. Most cotton scrunchies can be machine washed on a gentle cycle and air dried for the best results.
Can I make oversized scrunchies?
Absolutely. Increasing the width of the fabric strip creates fuller, puffier scrunchies that have become especially fashionable in recent years.
Are scrunchies good handmade gifts?
Yes. Handmade scrunchies are thoughtful gifts for birthdays, holidays, bridal parties, teacher appreciation gifts, and stocking stuffers because they are practical, beautiful, and easy to personalize.
Can I sell scrunchies made from this pattern?
Yes. Handmade Fabric hair scrunchie pattern projects are popular products at craft fairs, online handmade shops, and local markets because they are affordable, customizable, and appeal to a wide variety of customers.
Conclusion
Creating your own Fabric hair scrunchie pattern is a simple yet rewarding sewing project that combines creativity with practical everyday use.
Throughout this tutorial, you learned how to prepare your materials, cut the fabric accurately, sew the scrunchie step by step, insert the elastic correctly, customize the design with different fabrics, and apply professional finishing techniques for beautiful results. Whether you choose classic cotton prints, luxurious velvet, elegant satin, or cheerful seasonal fabrics, every finished scrunchie becomes a unique handmade accessory that reflects your personal style and sewing skills.
Thank you for following this complete guide. I hope this Fabric hair scrunchie pattern inspires you to create many beautiful handmade accessories for yourself, your family, and your friends. If you make this project, please leave your honest opinion, share your experience, and send your suggestions. Your feedback is greatly appreciated and helps inspire even more creative sewing tutorials for makers everywhere.